**** DONE: 1/72 Fl.156 Storch - Captured / Aircraft in Foreign Service GB

Ad: This forum contains affiliate links to products on Amazon and eBay. More information in Terms and rules

I found another computer that will not read my drive. :( 
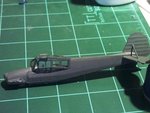
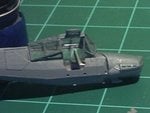
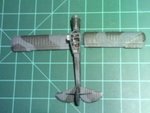
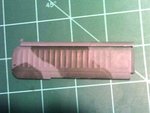
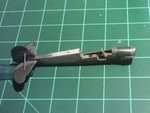
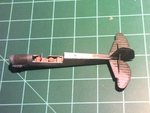
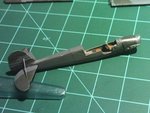
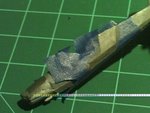
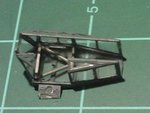
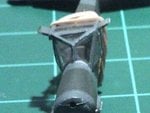
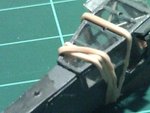
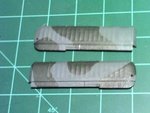
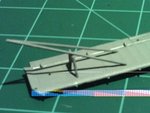
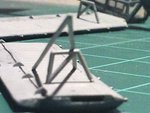
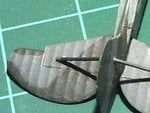
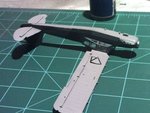
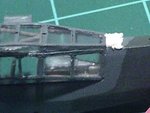
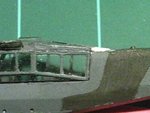
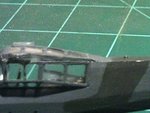
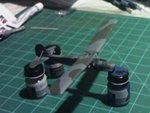
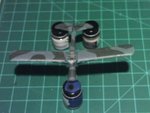
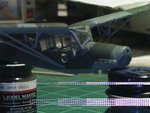
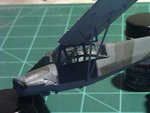
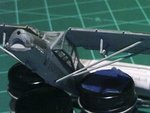
This is getting old. I am almost finished with the plane. I may have to wait until the college opens back up next week. No airbrush, Santa thinks I was a bag boy since I have not wored since 103111...lol. My fathter was messing with me again this year.

DBII
 
Were to begin?
1-6 is the first steps of painting. In photos #5 you can see the gap between the canopy and the nose. I will fill it in with white glue. You can see where I filled in a little on the top right side of the glass. In photo #6 you can see there is still a gap between the engine and the firewall. The canopy hasd not been glued down yet.

DBII
 

Attachments

  • fi4.JPG
    fi4.JPG
    31.3 KB · Views: 81
  • fi5.JPG
    fi5.JPG
    30.2 KB · Views: 77
  • fi12.JPG
    fi12.JPG
    29.4 KB · Views: 78
  • fi7.JPG
    fi7.JPG
    27.7 KB · Views: 75
  • fi6.JPG
    fi6.JPG
    32.7 KB · Views: 76
  • fi9.JPG
    fi9.JPG
    28.4 KB · Views: 79
Photos 7-14

#7 8
I added the green was not not happy with it at all. The paint was to thick and look bad.

#9 - 14
I stripped off the worse parts and repainted.

DBII
 

Attachments

  • fi18.JPG
    fi18.JPG
    28.5 KB · Views: 82
  • fi16.JPG
    fi16.JPG
    31.3 KB · Views: 84
  • fi14.JPG
    fi14.JPG
    29.9 KB · Views: 77
  • fi13.JPG
    fi13.JPG
    32 KB · Views: 71
  • fi15.JPG
    fi15.JPG
    33.7 KB · Views: 80
  • fi17.JPG
    fi17.JPG
    30.5 KB · Views: 74
  • fi19.JPG
    fi19.JPG
    32.3 KB · Views: 80
Photo #15-19

#15
I have added the bracking to the canopy. I am still not happy with the paint on the canopy but I am getting better.

#16 @ 17.
I glued down the canopy. I first tried white glue but that did not work. In photo #16 you can see where I filled the gap with white glue. In #17, the top rear of the canopy should be flush. I will try and correct it with filler.

#18 @ 19
I read through the modeling tips and used a pencile to bring out the recessed lines. Not to bad for a first attempt. It was easier than I thought.

DBII
 

Attachments

  • fi20.JPG
    fi20.JPG
    28.3 KB · Views: 78
  • fi21.JPG
    fi21.JPG
    32 KB · Views: 70
  • fi22.JPG
    fi22.JPG
    32 KB · Views: 69
  • fi24.JPG
    fi24.JPG
    29.7 KB · Views: 75
  • fi25.JPG
    fi25.JPG
    29 KB · Views: 77
Last edited:
This will get me up to date.
Photos #20-24

#20 21
I left these off of the earlier post. #21 is after I used the pencile.

#23 -24
My next problem area. The bracing does not line up. I did a little dry fitting and I may be able to bend everything into position. If not, I will have to make new holes for the bracing. What fun :)

DBII
 

Attachments

  • SUNP0059.JPG
    SUNP0059.JPG
    28.5 KB · Views: 104
  • SUNP0060.JPG
    SUNP0060.JPG
    32.9 KB · Views: 97
  • SUNP0023.JPG
    SUNP0023.JPG
    28 KB · Views: 101
  • SUNP0057.JPG
    SUNP0057.JPG
    23.6 KB · Views: 122
  • SUNP0058.JPG
    SUNP0058.JPG
    32.1 KB · Views: 127
i'm watching your build with interest as i have 2 old heller storch kits to build,that canopy assembly looks very fiddly,keep up the good work
 
I think the problem is that the canopy is not correct. The gap that I filled with white glue may have caused to struts not to line up. The wings attach to the canopy. Since the canopy is out of position the structs will also be off. My original plan was to file the canopy to make it set flush with the nose. I started sanding and was worried about getting the shape wrong. I then went with using glue as a filler. I should has gone with the first plan. The right side is almost correct but the left is bad. The longest strut was to long and I had to sand it down a little. It is a good thing that I did several test fittings or it would be worse.

Today I attached the wings and wheels. After a little touch up painting and decals it will be finished. I will post the photos soon.

DBII
 
Next set of photos.

Photos 1 -3
I used filler to make the canopy flush with the back deck.

Photos 4-8

Attaching the wings. The last two shots show how the strut does not line up with the hole. If I attached the strut, the wing would bow up. A little sand paper fixed the problem.
 

Attachments

  • SUNP0062.JPG
    SUNP0062.JPG
    29.2 KB · Views: 156
  • SUNP0063.JPG
    SUNP0063.JPG
    31.1 KB · Views: 149
  • SUNP0064.JPG
    SUNP0064.JPG
    32 KB · Views: 83
  • SUNP0065.JPG
    SUNP0065.JPG
    28.5 KB · Views: 84
  • SUNP0066.JPG
    SUNP0066.JPG
    26.5 KB · Views: 86
  • SUNP0067.JPG
    SUNP0067.JPG
    31.5 KB · Views: 94
  • SUNP0070.JPG
    SUNP0070.JPG
    29 KB · Views: 75
  • SUNP0072.JPG
    SUNP0072.JPG
    20 KB · Views: 81

Users who are viewing this thread

Back