Navigation
Install the app
How to install the app on iOS
Follow along with the video below to see how to install our site as a web app on your home screen.
Note: This feature may not be available in some browsers.
More options
You are using an out of date browser. It may not display this or other websites correctly.
You should upgrade or use an alternative browser.
You should upgrade or use an alternative browser.
**** DONE: PCM 1/32 Fw190A-1 Brown 1 Oblt.Walter Schneider 6/JG26
- Thread starter Wayne Little
- Start date
Ad: This forum contains affiliate links to products on Amazon and eBay. More information in Terms and rules
More options
Who Replied?- Thread starter
- #142
Thanks for your support guys...
Vic the slack or tensioned antenna wire is dependent on whether the pulley system was installed. Early Doras did not have the pulley system on the early style canopy so when opened the wiring went slack.
Red stencilling...will have to send you a scan of the detail Evan....after the comps on the weekend....
A4K
Brigadier General
Cheers Wayne! Good luck at the comps!
- Thread starter
- #144
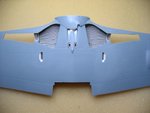
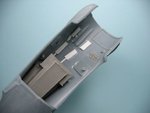
Made some progress....the other ejection chute done and added the small resin section for the rear wheel and took some pics....
More pics tomorrow the fuselage halves are now together and the cockpit is installed.
More pics tomorrow the fuselage halves are now together and the cockpit is installed.
Attachments
vikingBerserker
Lieutenant General
It looks immaculate!
A4K
Brigadier General
Great work as always Wayne!
Looking good Wayne!
- Thread starter
- #149
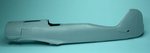
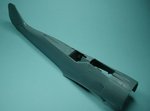
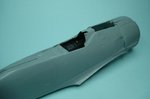
As I said fuselage is together, with one section of the upper nose glued on one side only, there was a slight twist or misalignment in this area so i decide to get one side right and reinforced before lining up the other side and fitting the other upper cowl section.
Attachments
109ROAMING
2nd Lieutenant
Stunning D-9 mate !
Airframes
Benevolens Magister
Looking good Wayne.
Vic Balshaw
Major General
You're keeping up the standards Wayne.
A4K
Brigadier General
Looking good Wayne!
- Thread starter
- #155
Thanks Guys.
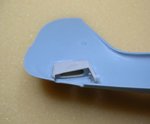
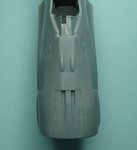
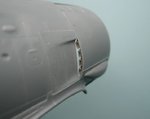
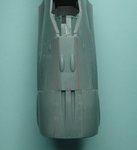
Ok, got the upper piece of the gun cover in place, the gun cover is actually one large section so the way it has been done so ran a bead of superglue along it so it means plenty of careful sanding to fill along the sides to remove the join line, which it appears that I have nailed it....
plenty of reinforcing on the inside of the cowling to ensure all the pieces are set right and have a strong bond.
Also fitted the resin exhausts into each side of the cowl.
Added some Red lines to show where the join line is/was in the last pic.
Attachments
Last edited:
Airframes
Benevolens Magister
Nice work Wayne.
A4K
Brigadier General
With Terry!
- Thread starter
- #158
Appreciate it guys.
Catch22
Major
Nice work! Now why would they have done it like that?
- Thread starter
- #160
Nice work! Now why would they have done it like that?
dunno mate, just makes it harder to do that way, but it is not a big deal...
Users who are viewing this thread
Total: 1 (members: 0, guests: 1)