GB-49 1/48 P-51D - Favourite A/C of WWII

Ad: This forum contains affiliate links to products on Amazon and eBay. More information in Terms and rules

Hey, jgreiner,
Wow, significantly undersized. Guess I will check on the other tanks and see how they stack, if they are appropriate for the bird I am building.
 
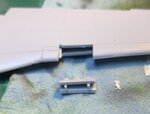
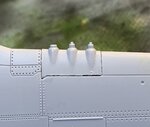
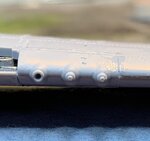
Ok, the way the fit on the gun ports came out really bothered me. I wanted to figure out just what happened (besides my impatience). So, I have several of the Airfix P-51Ds at hand. I pulled one out, took out all the wing parts and got them assembled right up to placing the gunport, but actually not placing them in place yet. I then worked on one gunport trying to improve the fit into the wing (last few pictures). Once I had it sorted out, I then turned my attention to other gunport / wing and started on those mods and documented what I did in pictures. Picture one shows the initial gun port as it came off the sprue (Pic 1).

Gunport not modified.jpg

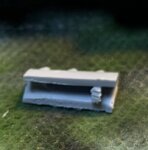
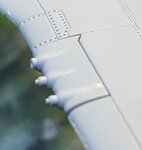
As you can see, the plastic is rather thick and the two tabs COULD be a problem. I decided to remove the tab that would be in the outmost part of the port )Pic 2).

Gunport tab removed.jpg

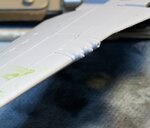
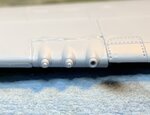
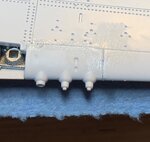
That seemed to help better the fit, But, there are still challenges (Pics 3-6).

Unmodified gun port trial fit 1.jpgUnmodified gun port trial fit 2.jpgUnmodified gun port trial fit 3.jpgUnmodified gun port trial fit 6.jpg

So, what next? I then decided to thin the plastic out on the port to make it easier to squeeze and improve the fit. That seemed to really help with the first attempt at getting a better fit. It seems almost like thinning the plastic reduced internal tension in the plastic as very little squeezing was required to get a much better fit. No pictures of the thinned pieces though, my bad.
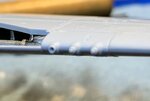
Turns out removing that tab and thinning the plastic really helps improve the fit (Pics 6-9). Now, I cannot say every kit has this issue. I can say that the two I have checked have the issue. I do hope this helps any of you guys building the Airfix kit if you find you have the same fit issues I have discovered.

Modified gunport 2nd wing improved fit 1.jpgModified gunport 2nd wing improved fit 2.jpgModified gunport 2nd wing improved fit 3.jpg

I think I will use this wing for the group build as the parts beetween the two kits are identical. I'll put the boogered up wing back in the 2nd kit and deal with all the fit issues when I drag that one back down.

Thanks for stopping by.
 
Last edited:
Ok, no recent posts as I have been puttying away. I think I am close to good on that work. Not perfect, but I am ok with it. Most birds had imperfections in the putty job during their life times so I am ok with some less that perfect coverage.

Wing primed 1.jpgWing primered 2.jpgWing primered 3.jpgWing primered 4.jpg

Out of curiosity, I pulled down the Eduard kit I am considering adding a 2nd build with. I wanted to look at how the fit of the gun ports was with the Eduard. The wing assembly is considerably more involved. So, I am not to the point of putting the gun ports in place yet. I will probably posted a new build post in the next 12-48 hours.

Thanks for stopping by.
 
Good stuff. Its amazing that kit builders still put panel lines in the wings

Yeah, Geo, I agree. The first one to mold wings with the proper puttying will sell a ton of kits as long as they are good to great kits.

Ok, more work started. Working on the cockpit now. Start painting and laying out my plans. I have ordered an Eduard PE set. Not committed to using it just yet. I want to get it in my hands and decide. I did start on the floor. Two shades of tan / brown in an attempt to get that wood effect. Not 100% happy, but I am going to let things dry and then decide.

Cockpit floor 1.jpg

Question for you all. Did the factory cover the wood with a black textured, non slip covering or paint? I seem to recall this is true, but I cannot find any pictures showing that with quick google.

Thanks for stopping by.
 

Users who are viewing this thread

Back