**** DONE: GB-57 1/48 P-51K / Mk.IV Mustang - WW2 Foreign Service

Ad: This forum contains affiliate links to products on Amazon and eBay. More information in Terms and rules

Crimea_River

Marshal
45,079
13,133
Nov 16, 2008
Calgary
Username: Crimea River
First name: Andy
Category: Judge – Non competing
Scale: 1/48
Manufacturer: Airfix
Model Type: P-51K/Mk.IV Mustang
Aftermarket addons: Decals maybe?

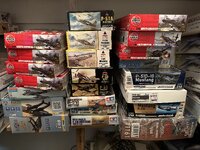
With my other GB entry needing time for the multiple filling patches to cure, I've decided to enter a second build for this GB and went out to the local shop and picked up this Airfix Mustang:

1121429-24595-97-720.jpg

The kit looks wonderful! Clean, crisp details throughout with no flash seen at all. The plastic seems a bit harder than the soft stuff Airfix used on their Spit XIV. The wings are nicely detailed with recessed panel lines and fine rivets where appropiate, which is a shame as alot of this will need to be puttied over if I want to be true to the type, which I do. There are lots of spare parts with two types of drop tanks, bombs, flattened tires, exhausts, and a British prop in addition to the American unit. I'll post shots of the parts as I move into the build.

I've not decided on a scheme yet. The kit has decals for two attractive aircraft and I'll need to ask for a little leeway on the timeframe to be considered as "WW2" if I use them. The first scheme is the one shown on the box cover, Mustang IV KM272 "Dooleybird" Flown by F/L Arthur S. "Joe" Doley of 19 Squadron RAF in late 1945. The colour scheme has been the subject of some debate, though Airfix reference input from two peopele familiar with the subject.

a05137.1.jpg

The second scheme is a P-51K of No. 3 Squadron RAAF based at Lavariano, Italy in July 1945. There are pics of other aircraft in this squadron with similar markings dated prior to war's end in Europe.


A05137.2.jpg

I'll do a little more digging on both schemes before deciding but will give this kit a start shortly.
 
Thanks guys. Steph, I'm looking ahead to the ponies GB and have a camo'd Mustang in mind for that. I have realtively few NMF kits so am leaning toward Dooleybird.

I love it when I start googling for reference pics and it just brings me back to this site. Wojtek posted the below pics in this thread 1/32 Tamiya P-51D MUSTANG :

qv-v-jpg.jpg

dooleybird-jpg.jpg
mustang-jpg.jpg


It seems clear from the first pic that there is another colour along the lower border of the anti glare panel and the lower sliding canopy frame. As to whether or not it is yellow is another question. The caption on the second pic says it's blue, which makes a bit more sense in my mind as it matches the squadron colours. Still researching.
 
Last edited:
Off we go with a quick assembly of parts that also gives you a bit of an idea of the engineering of this kit. First, the seat comes in three parts: the back rest with moulded cushion and belts, the seat bucket, and the side braces which also have the lap belts moulded onto them. This assembly is glued to the back armour and, in the below pic, rests without glue in the substantial fuselage interior mould that contains the radiator and tail wheel bay. I would admit that the side braces on the seat are a bit clunky and I'll probably thin these somewhat.

23031601.jpg


The radio comes mounted to the frame but one needs to add the battery. There are no wires to the radio terminals and battery so I'll add those.

23031602.jpg


The tail wheel bay has one of the nicely detailed walls attached. The door is part of the wall mould so there's little chance of getting the angle wrong or breaking this off. I'll need to paint this area before going further as things will get pretty congested otherwise.

23031603.jpg


The radiator exit duct and grilles come in 4 pieces and insert into the interior mould. Fit is decent but not Tamiya-precise as we can see a bit of a gap. Also note the ejector pin marks on the wall which I didn't bother filling. These will hardly be visible once the exit louvre is added.

23031604.jpg


Here's the intake side of the same part with a big seam visible and more pin marks.

23031605.jpg


However, once the oil cooler is added (loosely in the below pic), things become less obvious, though I think I'll still do something about that seam.

23031606.jpg


The cockpit sidewalls have been glued into the recesses in the fuselage sides. Detail is nice with the trim wheel and throttle box being separate parts. The ejector pin mark in front of the map case is out in the open and has no hope of being cleanly filled and so will be left as is. The one behind the map case will be completely hidden by the fuel tank.

23031607.jpg


Here's the other side. A nice touch by Airfix is to provide the oxygen hose, something too often omitted by kit manufacturers. The pin mark just aft of the rear part of the hose is beside the seat and so won't be too obvious. the one behind that is, again, obscured by the fuel tank.

23031608.jpg


Below is a sense of the surface detail. To my eye, it's nice and crisp but a bit overdone, an Airfix trademark in their newer kits in my opinion.

23031609.jpg
23031610.jpg


That's all for now.

I did a bit more reading on the colours of the canopy frame and anti-glare panel border. Though blue seems logical, it's stated that the yellow was reported by ground crews.

 
Thanks Wojtek and Don. I will watch out for that gap and for other issues I've read in reviews. There would seem to be many opportunities for fit issues but reviews point to those being minor.
 
Thanks Wojtek and Don. I will watch out for that gap and for other issues I've read in reviews. There would seem to be many opportunities for fit issues but reviews point to those being minor.
Loved the kit, I have several as Hobby Lobby had 40% off coupons so got them at about $12 ea. nice detailed kit, just the one issue, and I always blame myself till proven otherwise.
 

Attachments

  • 3414C75F-14F4-4371-866D-E5BD3BEAC098.jpeg
    3414C75F-14F4-4371-866D-E5BD3BEAC098.jpeg
    1.6 MB · Views: 14
A bit of an update here as cockpit detail painting and assembly have been completed. Let's start with the instrument panel. There's a decal provided for the instruments and it fits the bezels well. However, I found the white outer rims of the dials to be a bit too stark and so toned them down with a fine black Sharpy. Below are before and after pics, and the latter shows the added pedals and a few other details picked out in red.

23032301.jpg
23032302.jpg


I used the seat and moulded harnesses as provided. The back rest is nicely moulded but arguably a bit unrealistic and the harnesses will pass for a quick build. I did thin the braces holding the seat pan up quite a bit.

23032303.jpg


It's not very obvious below but the floor-mounted fuel gauges had the dials scratched in and a dab of PVA applied to simulate the glass. Radio wiring is still to come.

23032304.jpg


The side walls have good detail and several placard decals round out the areas nicely.

23032305.jpg
23032306.jpg


Looking down into the pit with the fuselage dry-fit together gives us the view below. Yes Don, the fit is a bit springy with all the built up parts fitted but I encountered no real interferences. I think it will all go togther with a bit of care and mild clamping. This will be the next step after I paint the rear wheel wells.

23032307.jpg


I think Airfix's colour call-outs are a bit suspect as they would have us paint the wheel wells and tail wheel strut interior green. I think I will go with bare aluminum for both the tail wheel and wells unless someone has better info. The main gear wells will also be aluminum with the rear spar and possibly the stringers in YZC.

Thanks for looking.
 
Looks to me like Airfix is really upping their game! The molded in seatbelts and the details on the bulkhead cockpit walls says a lot about their attention to details. I may jsut ahve to get one just to have, and enjoy the detail..
 

Users who are viewing this thread

Back