Navigation
Install the app
How to install the app on iOS
Follow along with the video below to see how to install our site as a web app on your home screen.
Note: This feature may not be available in some browsers.
More options
You are using an out of date browser. It may not display this or other websites correctly.
You should upgrade or use an alternative browser.
You should upgrade or use an alternative browser.
Njaco's New Sig
- Thread starter Njaco
- Start date
Ad: This forum contains affiliate links to products on Amazon and eBay. More information in Terms and rules
More options
Who Replied?- Thread starter
- #82
Njaco
The Pop-Tart Whisperer
Thorlifter
Captain
Hey, not bad Njaco. I like the idea of holiday siggies.
GrauGeist
Generalfeldmarschall zur Luftschiff Abteilung
Hey, not bad Njaco. I like the idea of holiday siggies.
They can be alot of fun! 8)
- Thread starter
- #86
Njaco
The Pop-Tart Whisperer
Grau, you gave me the idea!
- Thread starter
- #88
Njaco
The Pop-Tart Whisperer
Canadian Independance day is Monday! ")
- Thread starter
- #89
Njaco
The Pop-Tart Whisperer
Thorlifter
Captain
Of the three, I like the top one the best. I like the idea of having the 109 hide in the clouds, but the insignia's seem a bit too jumbled up.
- Thread starter
- #91
Njaco
The Pop-Tart Whisperer
Thor I was trying to get a feathered edge like your siggy but it didn't work. Back to the drawing board. I like that one as well.
Thorlifter
Captain
Ah, easy.
1. set you background color to the color of this website.
2. make the active layer the one you want to erase
3. load the basic brushes and select a soft lead mechanical brush with appropriate size.
4. select the eraser tool
5. click once and release in the top left corner.
6. hold down the shift button and click once in the top right corner, then lower right corner, then lower left corner, then top left corner.
holding down the shift will make it do a straight line between mouse clicks. You'll get the idea as you play with it a little, unless your wanting the more jagged edge look, then you can manually erase it until it look like how you want it.
Hope this helps.
Lucky13
Forum Mascot
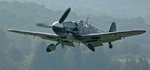
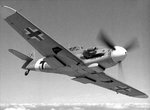
If you want some more 109's....


Lucky13
Forum Mascot
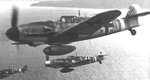
Lucky13
Forum Mascot
Something for Njaco to play with.....
- Thread starter
- #99
Njaco
The Pop-Tart Whisperer
Thanks Lucky!
That Hartmann pic in the second set is from a model boxtop. I recognize it as I have it!
That B/W one I did I like because its simple - not overpowering - and is different.
That Hartmann pic in the second set is from a model boxtop. I recognize it as I have it!
That B/W one I did I like because its simple - not overpowering - and is different.
Lucky13
Forum Mascot
Users who are viewing this thread
Total: 1 (members: 0, guests: 1)