No 56 Squadron, RAF, 'The Firebirds', 1918 - 2008.

Ad: This forum contains affiliate links to products on Amazon and eBay. More information in Terms and rules

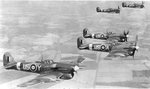
Yep, it's a basic kit, but very nice, with accurate outline etc, leaving room for some proper modelling. I might still get the half-price Airfix Tornado, and if it looks cr*p when done, then I'll replace it eventually when the Hobby Boss one is released. Or maybe even add a second Tornado! Don't know if it'll interest you, but Eduard are releasing a 1/48th Lightning, based on the Airfix kit. Hannant's say it's an F6, whilst the Eduard site has it as the F1./F1A etc. Also, Academy are releasing a Lightning F6 soon, again in 1/48th scale.
 
Thanks for the info Terry, I could be interested in another lightning or 2-3, 4, 5, though sneaking in another couple of Lightning kits could be a problem. I see that Trumpeter have just released the 1:32 F1A/F3, now that would be a challenge and a nice complement to go with my A-10 Warthog (1:32) sitting on a desk top in my hobby room. But then again I have to leave room for the F-14A Tomcat that's yet to be built.

As for the F.3 Tornado, fool that I am, I've taken the bull by the horns and picked up a couple of Airfix revamped kits, with recessed lines on upper fuselage. I figure that if I construct these with a different approach to the one I'm doing at the moment, many of the problems could be overcome or minimised though I think their will still be lots of filling and sanding. As for the half finished one I can mess around and practicing weathering.
:p
 
Sounds good Vic. As for the Trumpeter 1/32nd Lightning, personally I don't think it's worth the asking price. If it was a third of the price, it might be acceptable. One of the members here has built the F1, which turned out very nice, but it looks to be a basic kit, with some fit problems, and errors or 'weak' areas also - certainly not what you'd expect from such a high-priced kit, and not acceptable in my view. But then, as it's the only one in this scale (apart from OOP vac-forms), and if it's what someone really wants, then I suppose the price doesn't come into it.
 
How's the Phantom conversion coming along Terry? I had a go at the Meteor F3, changing the colour scheme, made a complete hash of it. I manage to find a replacement last week, so that's another kit on the stock pile. After months of fiddling and waiting for some decals, I've been able to put the finishing touches to one of my Phantoms the evening. If I get time tomorrow, I'll run off a pic and post it. Also received some "Bob's Buckles" today, mainly for a new Snipe, there to small to even photograph, but hopefully they will help improve my rigging techniques.
 
Sorry Vic, just seen your post - been away for a week. Got the Phantom re-painted, although it needs toning-down a bit. I should get it finished in a couple of weeks, soon as I get the judging for the GB done and catch up with other bits and pieces. I'll post pics when it's done.
 
The Phantom is almost done - I just need to get some more paint to match-in some areas, which I should get on Monday. Meanwhile, during a break from finishing the base for the MTO GB Beaufighter, I decided to start the first complete build for the collection, so here we go.
Hawker Tempest MkV, series II.
56 Squadron gave up its big Typhoons in April 1944 and, for nearly 3 months, flew Spitfire MkIX's on escort, and shipping reconnaisance operations. By the end of June, the Squadron had joined the first Tempest Wing at Newchurch, alongside numbers 3 and 486 Squadrons, the Wing being under the command of Wg/Cdr R.P. Beamont, D.S.O., D.F.C, but 56 still had the Spitfires. Conversion to the Tempest MkV soon followed, and by early July, 56 Sqn were operational, flying anti 'Diver' patrols to combat the V1 flying bombs launched against Southern England and London. These ops continued until late September, when the Wing moved to Grimbergen, joining 2 TAF, where it was involved in armed reconnaisance for the rest of the war in Europe, moving from base to base as the land forces advanced into Germany.
During the Luftwaffe's 'Unternehmen Bodenplatte', on January 1st 1945, 56 Squadron were based at the former Luftwaffe field at Volkel, roughly 30 kilometres north-north-east of Eindhoven, Holland. With two Wings based there, the field was packed when JG6 made their attack , but fortunately for the Squadron, eight Tempests were airborne on an armed recce to Munster, and, due to various circumtances prevailing at the time, part of the attacking force missed the airfield.
The Tempests remained until 31st March 1946, when 56 Squadron disbanded, becoming 16 Squadron, only to reform with Meteors and the 56 number the following day, when 124 squadron at Bentwaters, England, was re-numbered!
The Model
At the time of writing, no 1/48th scale kits of the Tempest were available as current stock items, but I was able to find a source for the old Esci kit, and the Eduard example, which was twice the price! As I suspected the Eduard offering was itself an upgraded Esci kit, with added PE and so on, I decided to go for the cheaper option, and see what I could do with this old kit which, when first released, was fairly typical of many kits of the period in this scale. (PIC 1)
A quick examination showed a mix of mainly raised panel lines and detail, with some recessed lines, mainly around the gun hatches on the wings. Although generally accurate in outline, the kit is very basic, and there are some spurious panel lines here and there. Also, there are sink marks all over the place, even on both faces of each of the propellor blades. In fact, it's got more sink marks than the fin of Baumbach's JU88!! (or Jan's Guinness glass....)
The cockpit is crude to say the least, and the landing gear legs and wheels are very basic representations, which will need a lot of work in order to make them look acceptable in this scale. To this end, I've added a set of 'True Details' resin wheels, as the kit items are plain, chunky, and virtually impossible to improve. As for the gear legs themselves, I think I'm going to have to scratch-build the relatively complex lever-action system, and I'll possibly replace the kit canopy with a vac formed item, although it will probably be displayed in the closed position anyway.
With so much work needed on this model, and with at least 12 models being added to the Squadron 'history', there's a small temptation to just get on with the build and make do, in order to complete the collection. But, I beleive the kit can be turned into a very nice representation of this powerful fighter, and can't see any reason to risk the possibility of spoiling the overall line-up just for the sake of an 'easy build'.
So, work has begun on cleaning up and improving various areas, before any major construction or painting is undertaken.
PIC 2 shows the raised panel lines, some of which are spurious around the cowling, an example of some of the sink marks, and the 'solid' exhaust stubs.
PIC 3. Work underway to drill-out the exhausts, and improve the appearance of the general area around the exhaust apertures.
PIC 4 Apart from a 'Mr. Blobby' pilot figure, this is all that is provided in the way of internal detail, plus a decal to go on the inaccurately shaped instrument panel. Although not much will be seen through the relatively narrow canopy, some form and shape needs to be added, to at least give some semblance of the Tempest cockpit.
PIC 5. Shows the first stage in improving the look of the cockpit. The floor has been cut away, and the 'seat' butchered, as well as the armour plate head rest being trimmed dowen and thinned.
PIC 6. Stage 2 involved building the shape of the seat from plastic card, and adding some heel boards, control rods, and a scratch-built control column, using stretched sprue, plastic rod and card. After being cleaned up, the assembly will be painted very dark grey, to simulate the black cockpit of the later Tempests, with the seat, heel boars, and some of the sidewall frame work being in dull silver. A scrtach-built seat harness will also be added.
PIC 7. A few pieces of plastic rod have been glued to each side of the cockpit, to simulate the tubular frames, and the basis of a throttle quadrant added from plastic card; thiis will be detailed later.
PIC 8. The kit's very crude instrument panel has been trimmed to a more realistic shape, and the decal cut out and glued direct to the front. The lower sections have been folded forward, as per the actual aircraft, and will match up with the cockpit framework. A compass and gunsight have yet to be made and fitted, before the panel is then painted. The gunsight on the Tempest lacked the reflector screen, the graticules being projected direct onto the windscreen, and it was mounted on a tubular bracket, away from the instrument panel, and this will also be scratch-built.
So, that's how the model is to date, and I hope to be able to show some more progress pics, in between doing the builds for the next GB, in the very near future.
 

Attachments

  • Spit XIV Build 333.jpg
    Spit XIV Build 333.jpg
    59.1 KB · Views: 107
  • 56 Sqn Build 031.jpg
    56 Sqn Build 031.jpg
    30.6 KB · Views: 100
  • 56 Sqn Build 038.jpg
    56 Sqn Build 038.jpg
    47.4 KB · Views: 114
  • 56 Sqn Build 030.jpg
    56 Sqn Build 030.jpg
    42.4 KB · Views: 86
  • 56 Sqn Build 040.jpg
    56 Sqn Build 040.jpg
    60.7 KB · Views: 93
  • 56 Sqn Build 044.jpg
    56 Sqn Build 044.jpg
    44.8 KB · Views: 85
  • 56 Sqn Build 053.jpg
    56 Sqn Build 053.jpg
    34.4 KB · Views: 89
  • 56 Sqn Build 048.jpg
    56 Sqn Build 048.jpg
    36 KB · Views: 88
nice start Terry, have you seen that modelhobbies have the Eduard EE lightning in stock it comes with decals for a 56 Sqdn aircraft, its £51 though !!!!
 
found this whilke i was looking for cockpit details for my hurricane needless to say didnt find what i was looking for but i thought you might like this
 

Attachments

  • Hawker Typhoons.jpg
    Hawker Typhoons.jpg
    24.8 KB · Views: 100
Thanks Jamie! That's one shot of their first Typhoons I haven't got! It is one of a series of Press release pics, taken on the same day on the airfield and airborne, and it'll be one of those aircraft I'll be modelling when I do the Typhoon, probably US-C.
BTW, there's a load of cockpit detail in the Hurricane stuff I'm sending you. Now that my CD writer has been replaced, I should get this off to you this week, and hope the Postal strikes don't delay it too much.
 
Nice one Jamie!!
Thanks Daniel.
Karl, sory mate, just noticed your bit on the Lightning. Yep, thought the Eduard one might be expensive, but not that much! And it's the Airfix kit!! Got the Airfix F1A, which has the 'Firebirds' aerobatic team decals, and might add the F6, or use it for a 1980's Sqn, when the Academy kit comes out.
 
The Tempest build has now advanced considerably. The cockpit has been completed and fitted, except for the gunsight and its mount, which will be added later. The fuselage has been joined, and the wings, tailplane and fin have been fitted, and some horrendous gaps filled and sanded.
I had to chuckle part way through this part of the assembly, as the fit of some parts reminded me of something you'd get out of a corn flakes packet, or a Kinder egg! This kit is a bit like the average woman in the town where I live - the right shape, but a bit of a dog!
PIC 1 Shows the cockpit assembly fitted into the port fuselage half. A compass has been added, made from a sliver of plastic tube, mounted onto a bracket made from thin plastic card. The seat harness in this case is simply strips of Tamiya masking tape, with the buckles etc painted on.
PIC 2. The cockpit after the fuselage halves were joined. I didn't go 'to town' on this area, as very little will be seen, especially through the distortion of the 'bubble' canopy in the closed position.
PIC 3. After the three-part wing was fitted, it was taped in place until set, to hold the angle for the dihedral.
PIC 4. The underside of the centre section and wing, showing the gaps. Some filing and sanding had to be done in order to allow the trailing edge of the centre section to locate, and there are 'notches' at the leading edge wing roots. Also, due to the way the lower half of each wing is deigned and fitted, there is a noticeable joint the entire length of each, just behind the leading edge. The rear of the air intake scoop should be open, with the intake ducting curving forward to the radiator and oil cooler. I had considerd cutting this, boxing it in, and making the required parts, but decided against it, as the effort isn't really worth the end result, as very little of this area will be seen on the finished model. Instead, a compromise will be made, and the radiator shutter will be made, and fitted so that it is only just drooped, to give the illusion of the open area.
PIC 5. All the gaps and sink marks filled and sanded, and the tailplanes fitted.
PIC 6. The fin and rudder slot into the top of the fuselage, seating into a slot between the tailplane tabs. The fit was good, but there was a prominent gap at the fin to fuselage joint, and also small gaps at the joints of the tailplanes. These were filled with PVA and smoothed off.
PIC 7. How the model looks so far. The next step is to give it a primer coat, to check for any imperfections in the filled joints, and also to see if any sink marks have been missed. Once that's done, the undercarriage will be scratch-built, using the unpainted model to check alignment of the realtively complex gear legs, but won't be fitted until after the model has been painted and decalled.
Thanks for your interest, and I'll post a further update soon.
 

Attachments

  • 56 Sqn Build 054.jpg
    56 Sqn Build 054.jpg
    48.2 KB · Views: 66
  • 56 Sqn Build 064.jpg
    56 Sqn Build 064.jpg
    35 KB · Views: 95
  • 56 Sqn Build 070.jpg
    56 Sqn Build 070.jpg
    54.5 KB · Views: 89
  • 56 Sqn Build 069.jpg
    56 Sqn Build 069.jpg
    42.9 KB · Views: 63
  • 56 Sqn Build 080.jpg
    56 Sqn Build 080.jpg
    31.9 KB · Views: 61
  • 56 Sqn Build 079.jpg
    56 Sqn Build 079.jpg
    35.1 KB · Views: 64
  • 56 Sqn Build 078.jpg
    56 Sqn Build 078.jpg
    31.3 KB · Views: 63

Users who are viewing this thread

Back