No 56 Squadron, RAF, 'The Firebirds', 1918 - 2008.

Ad: This forum contains affiliate links to products on Amazon and eBay. More information in Terms and rules

happy0034.gif

This is looking good Terry, you put in some hard yards there.
:hotsun: :hotsun:
 
Thanks very much, Daniel, Jan and Vic. It's a long time since I messed around with such a basic kit, but I think it'll be worth it in the end. (He said hopefully!)
 
Thanks guys!
Vic, I haven't heard anything since the automated e-mail response, acknowledging receipt of the e-mail I sent.That was a little over three weeks ago, so I'll give it another week or two, and if there's no luck, I'll be knocking on your door saying 'Yes please'!
 
As it's been a couple of weeks since I touched the Tempest, and with the Beaufighter now out of the way and plenty of time to continue with the Boston later, I decided to try to break the back of the tiresome correction work, in order to get on with the main part of the build.
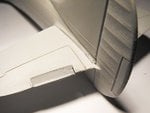
PIC 1. Shows the tailplane joint, now filled with PVA, and an insert of scrap plastic shaped to form the fillet to the rudder. The elevator trim tabs were also way oversized, and these have been trimmed and filled, and await final sanding in this pic.
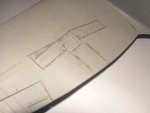
PIC 2. The somewhat deep gun access panels have been partly filled, and a new panel line scribed to correct the angle at the forward edge. Initial sanding has been carried out, and has since been completed.
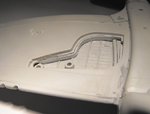
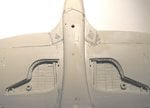
PIC 3. The wheel wells have been boxed-in with thin strips of plastic card, and await clean-up here.
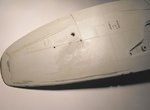
PIC 4. Landing lamp housings have been drilled in each wing, and the original, incorrect locating hole for the pitot tube filled, and a new hole drilled further outboard. Also just visible here are the slots for the shell ejection ports, partly cut out of the lower wing surface, and that leading edge joint, now filled and awaiting a final rub-down with fine grit paper.
PIC 5. The troublesome centre section joints have been filled and sanding is underway in this shot. Also visible are the holes drilled for the recognition lamp, access step and antenna.
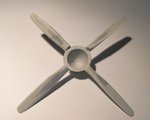
PIC 6. The prop! More than an hours work was required to fill the large sink marks, and file and sand the blades to something resembling the correct profile and pitch.
PIC 7. A gunsight and 'tubular' mounting bracket have been made and fitted, and await painting and glazing. The sight on the Tempest V did not have a reflector screen, the reticule being projected direct onto the windshield. The piece of plastic tubing used for the sight will be painted a gold/silver colour inside, then the bore filled with PVA or Kristal Kleer, to represent the projector lens. The upper decking behind the pilot's seat has been faired over, and will eventually be painted black.
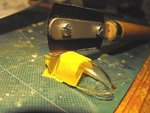
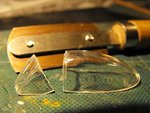
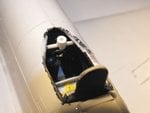
PICS 8 and 9. After trial fitting the canopy, it was evident that there was so much distortion that not even the basic cockpit detail would be seen. So, I decided to pose the canopy in the open position, which entailed sawing off the windshield. The tape is to prevent scratches in case the saw slipped!
Themodel has now been polished and washed, and the next stage is to spray the model overall in Medium Sea Gray, which will not only serve as the underside colour, but act as a primer, and identify any areas which might need further filling etc.
Then, it's time to tackle the landing gear!
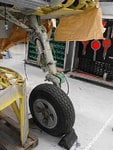
PIC 10 shows what the gear should look like.
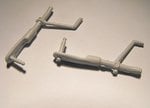
PIC 11 shows the kit parts! Some tricky scratch-building ahead methinks!!
Thanks again for your interest, and I'll post another update soon.
 

Attachments

  • 56 Sqn Build 082.jpg
    56 Sqn Build 082.jpg
    26.7 KB · Views: 80
  • 56 Sqn Build 083.jpg
    56 Sqn Build 083.jpg
    22.1 KB · Views: 81
  • 56 Sqn Build 084.jpg
    56 Sqn Build 084.jpg
    24.2 KB · Views: 81
  • 56 Sqn Build 087.jpg
    56 Sqn Build 087.jpg
    22.7 KB · Views: 76
  • 56 Sqn Build 088.jpg
    56 Sqn Build 088.jpg
    26.7 KB · Views: 79
  • 56 Sqn Build 093.jpg
    56 Sqn Build 093.jpg
    49.4 KB · Views: 117
  • Czech 031.jpg
    Czech 031.jpg
    80.1 KB · Views: 87
  • 56 Sqn Build 094.jpg
    56 Sqn Build 094.jpg
    58.5 KB · Views: 84
  • 56 Sqn Build 098.jpg
    56 Sqn Build 098.jpg
    24.7 KB · Views: 85
  • 56 Sqn Build 089.jpg
    56 Sqn Build 089.jpg
    21.4 KB · Views: 102
  • 56 Sqn Build 091.jpg
    56 Sqn Build 091.jpg
    21.2 KB · Views: 97
Thanks very much indeed guys. Karl, there were only the Esci kit (I'm using) and the Eduard kit. I think the Eduard is based on the Esci, but of course improved, and both are out of production. I got the last Esci from King Kit, but I think they might have some Eduard left, at around £19.
 
What I hope is the last major hurdle is out of the way - the landing gear legs!
As shown in previous pictures, the kit parts were, to say the least, crude, and bore no resemblance to the real thing. With a bit of work, I managed to adapt the kit parts to at least resemble the fairly complex lever-arm units. Although by no means perfect, or totally accurate, they should look reasonable when painted and in place, especially with the replacement resin wheels.
PIC 1 Shows the first stage, with the kit legs trimmed down around the axle yoke, and cut into two parts, and the ends of the lower leg and yoke drilled. Careful measurements were taken, and a piece of plastic tubing cut to the required length, into which a piece of wire (from a paper clip) was inserted. This not only helped to join the parts and add strength, but also allowed the upper part of the front oleo to be roughly represented, where it bends onto the rear leg.
PIC 2. Second stage. Here, the two parts of the leg, and the separated yoke, have been joined and fixed with Superglue and liquid cement.
PICS 3 and 4. Show two views of the completed legs. Plastic rod has been used to simulate hinges and the complex torque links, and thin plastic card has been used to make the curved joints at the top of the legs, and also to face the retraction jack, simulating the angular, cast arm of the original. Brake lines have been added from stretched sprue. When the assemblies have fully set, they will be cleaned up before painting, and set aside until required.
So, the next stage, after the primer, will be to apply the 'Sky' tail band, then mask this and spray the first coat of camouflage paint, in this case, Ocean Grey.
Thanks again for your interest, and I'll post another update soon.
 

Attachments

  • 56 Sqn Build 113.jpg
    56 Sqn Build 113.jpg
    27.1 KB · Views: 77
  • 56 Sqn Build 111.jpg
    56 Sqn Build 111.jpg
    21.8 KB · Views: 86
  • 56 Sqn Build 102.jpg
    56 Sqn Build 102.jpg
    30.6 KB · Views: 78
  • 56 Sqn Build 114.jpg
    56 Sqn Build 114.jpg
    30.3 KB · Views: 100

Users who are viewing this thread

Back