Recent Purchases (19 Viewers)

I'm liking the Mig!
 
Rob , making vacuformed models is quite similar to the injected kits. The main difference is that there aren't sprues with parts but sheets of styrene with a kit pieces. And the first step it to cut them out of these sheets. Usually it is done by sanding.A sandpaper sheet has to be fixed to a flat surface. Often, all struts, blades of propellers are made as one-side "drawpieces" , quite thin of course. So it is better to fill them with an epoxy putty before cutting out by sanding. It makes cutting easier and reduce possibility of their breaking or crushing.Also there aren't set pins for parts. For that can be used a brassy wire and styrene strips.
There are included rasin and made of "white metal" additional parts often.

A couple of examples here...

AIRLINERCAFE.COM - Walter's Guide to Building Vacuform Models
Old Model Kits :: Plastic model info and howtos » Blog Archive » How To Build Vacuform Model Kits
Walter's Guide to Building Vacuform Models
 
Last edited:
ho boy....that looks pretty complicated.
 
Nice scores guys.

@ Trebor. You're a brave man. I can barely do a regular injection model let alone vacu-form. I hope you post the build here as I'm sure I'm not the only one who would like to see how its done.
 
Quite a wee bit under RRP as well! :oops: :D Getting a 400 quid bonus and payrise this week, thought that I'd treat myself! :D
 

Attachments

  • Tamiya Lancaster TA61105.jpg
    Tamiya Lancaster TA61105.jpg
    64.5 KB · Views: 102
Good score with the Connie Rob and I'm with Wojetk, you need patience with vacform. I usually outline the shapes with a felt pen before cutting outside the marked line. For sanding I have a sheet of emery stuck to a sheet of glass and with it slightly dampened just gently rub the pieces until the felt marking had all gone, you must keep checking your work particularly on larger pieces as there is a tendency for one side/end to sand down quicker. Once done, test fit and adjust accordingly. Also wherever possible when joining to halves particularly in the fuselage add some guiding strips on the inside to help position and strengthen the join.

As for the Micro-sol, it's a good range of liquids which I use all the time.


Quite a wee bit under RRP as well! :oops: :D Getting a 400 quid bonus and payrise this week, thought that I'd treat myself! :D

A nice looking Lanc Jan, big bug*er to.
 
I can only imagine Vic! With 2 B-17's, 2 B-24's and a Lancaster.....space is becoming a bit of a, well......problem! :oops: :lol: Y for Yorker, KMoY.... 123 missions flown, some 121!
 
Bit puzzled why you've gone for a vac-form 'Connie' Rob, when there are numerous 1/72nd kits around in injection stuff - but each to their own I suppose.
Jan old chap, re our telecon - you bucky lastard !!!
 
VERY Good one Jan!
 
Aye! 20+ under RRP!! Happy with that and the lass shipped the kit yesterday.....so soon......:oops:

I also received this yesterday....

DSCF0003-140.jpg


And I snapped this one up, for just wee snifter over 10 quid!!! Oh come on....you can't blame me for that, eh?! Who wouldn't!? :oops: :lol:

EduardFw190D-9Late.jpg
 
Jan, friend of mine needs a B-24J! I'll give you his address :lol:
 
.................................................:lol:

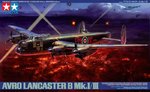
As I was saying, the lass shipped my Lancaster yesterday and today, before I even got a chance to hit the sack for some well needed zzZzzZZzzzZ....

DSCF0003-141.jpg


DSCF0004-120.jpg


DSCF0005-109.jpg


DSCF0006-91.jpg


DSCF0007-79.jpg


DSCF0008-75.jpg


DSCF0009-73.jpg


DSCF0010-60.jpg


DSCF0011-68.jpg


DSCF0012-58.jpg


DSCF0013-54.jpg


:oops: :oops: :lol:

What a kit! :shock:
 
Have to say though Herr Dr. Dipl. Engineer, Prof...etc., etc., Wojtek, that I'm disappointed with Tamiya's instrument panel, it's just a flat thingy, no structure whatsoever....the decals are excellent, but.....still... :( Still one h*ll of a kit! H-U-G-E! :shock:
 
Fantastic Jan!

Notice Braunen 4 in there too...wanna drop her in the GB in 'complete' condition? :-)
 

Users who are viewing this thread

Back