Revell 1/32 P-38 Kit #4774

Ad: This forum contains affiliate links to products on Amazon and eBay. More information in Terms and rules

prem895

Staff Sergeant
1,172
55
Oct 7, 2012
Toronto/Beijing
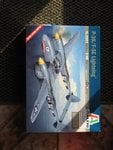
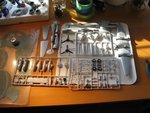
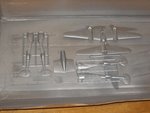
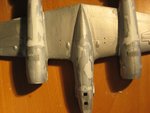
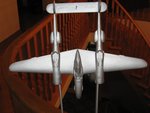
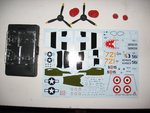
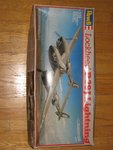
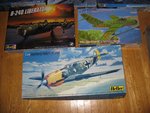
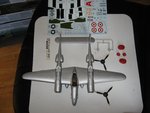
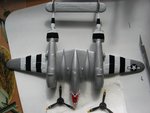
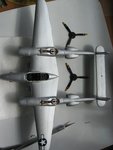
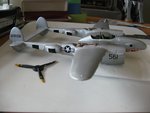
Hi everyone. This is my 1st day here and I need your help. I am about to start said kit and I would really appreciate your input with this build. I am about to finish my 1st kit after a 35 yr hiatus.The one I am finishing is the Italeri 1/48 P-38/F-5E #2681. I think it will looks ok for my 1st comeback attempt. Just need to finish decals,canopy and props. That is why I want to build this one,because I am comfortable with this plane. I did have some fit issues with the 1/48 one though.The booms needed some milliput,but all in all not a bad build. This coming from a guy building his 1st kit in 35 yrs.haha.I will post some pics of this one when it is done. (please don't laugh out loud) I need your expertize in completing this build.Tips,pros and cons,that type of thing. With your help I belive this will be a good model when completed. Btw way I traded in drinking and replaced it with my long lost hobby. It is more fun and more rewarding. Hope to make some freinds here and down the good kings hiway be asked for my help someday.Regards Jr. Builder Gary.
 

Attachments

  • 051.JPG
    051.JPG
    715.5 KB · Views: 203
  • 041.JPG
    041.JPG
    596.4 KB · Views: 184
  • 039.JPG
    039.JPG
    674.7 KB · Views: 183
  • 079.JPG
    079.JPG
    611.9 KB · Views: 189
  • 081.JPG
    081.JPG
    561.9 KB · Views: 188
Seems like you're still on the right track Gary, even after 35 years..... like any build take it easy, lots of dry fitting, get the build sequence right show us lots of progress pics and you will get plenty of good advice!

....and welcome aboard too! :D
 
Last edited:
Welcome to the board Mate. The model is a nice beginning. Looking forward to next shots of the progress. One tip for the future assemblings though. It is not too good to paint main parts of a model before sticking them together. A paint can be a kind of preservative disturbing a glue or a putty at making a good joint. Especially if we use enamels. Generally painting parts before preparing them ( filling gaps , removing stamp traces and traces of sprues, etc... ) for applying colours forces you to making a double work.
 
Thanks guys.Wurger you are absolutly right It did cause me to re-paint the main parts. Today I will attempt the decals. I am a little nevous with this process. I am afraid that after all the work I put in to doing a good job that messing up the decals would mean that all the work I have done to this point ends up in the garbage can. I think I should apply the bigger ones 1st and work my way down to the more delicate ones. What say you? This is all that is left to do. These pics are ones that I will be working on this winter. The 1/32 P-38 is up next. Help will be needed for sure
 

Attachments

  • P-38 and ones to build 001.JPG
    P-38 and ones to build 001.JPG
    585.2 KB · Views: 161
  • P-38 and ones to build 002.JPG
    P-38 and ones to build 002.JPG
    853.9 KB · Views: 157
  • P-38 and ones to build 003.JPG
    P-38 and ones to build 003.JPG
    859.4 KB · Views: 173
  • P-38 and ones to build 004.JPG
    P-38 and ones to build 004.JPG
    794.4 KB · Views: 152
Yep... these bigger decal markings should go first. However sometimes it is better to have them painted ( brushed or airbrushed ) instead of applying decals. It should be taken into consideration because not always decal markings coming with a kit fit correctly. ALso there might be a problem with sticking them to bended or just curved surfaces.
 
Last edited:
I don't have the talent yet to hand paint them. That is down the road. I will be using Revell Decal Soft. I hope it will help
 
I don't have the talent yet to hand paint them. That is down the road.

It's not a matter of being talented but of having some masking tape. Believe me.

"Revell Decal Soft" - what do you mean by this ?
 
I have to finsh paint the super chargers.The decal time. Wish me luck. Before decals.
 

Attachments

  • 001.JPG
    001.JPG
    509.9 KB · Views: 162
It softens the decals up so you can position them corectlly without breaking them. We will soon see if this works or not.
 

Attachments

  • 002.JPG
    002.JPG
    587.5 KB · Views: 154
Welcome aboard Gary. I like what you've done so far and agree with Wojtek (Wurger) that painting the anti-glare panels will likely be easier in the long run but see how it goes anyway. You never know!
 
Welcome!
Silver paint is notorious for pulling up with masking, so I usually paint the anti-glare panels and mask them.
If you have stencil decals they would go on first as they are applied at the factory along with the national markings, squadron and personal markings would sometimes cover stencils partially. You are doing fine work, as for the kit stash, I am jealous. Get your hand back in with a few of the easier kits before tackling the B-24, she's alot of putty work, and a difficult fit in places.
Happy Modeling!
 
Welcome to the mad house, and good to see another 'returnee' to the modelling habit (it ain't a hobby, it's an addictive habit - yes nurse, I'm coming!).
 
This is what I have done today with decals. F'd the ones on the prop,you know.the ones under the round ones. I know this plane is not correct,but what the hell.Not toooo bad for my 1st return. What do you think,and be honest
 

Attachments

  • 003.JPG
    003.JPG
    476.7 KB · Views: 158
  • 004.JPG
    004.JPG
    516.4 KB · Views: 161
  • 005.JPG
    005.JPG
    524.3 KB · Views: 150
Not too bad. :thumbright: However the US Star on the tail boom , seems to be upside-down.
 
Last edited:
Take a break.
If by ruined you mean you got paint where it shouldn't be, don't worry. Let it dry and use a sharp toothpick to scrape the area clean.
Future acrylic will clear up any scratches.
 

Users who are viewing this thread

Back