Revell PV-1 Ventura 1/48 scale

Ad: This forum contains affiliate links to products on Amazon and eBay. More information in Terms and rules

deckape

Staff Sergeant
769
63
Jul 26, 2011
Moraine Ohio U.S.A.
Ahoy
dont mean to keep everyone in limbo for my where beings Been tu busy gettimg my house done for winter this year i been away from the forum now everything is done i am bnack to stay. I will be doing two builds side by side I will post my goose build and start this build too. I will keep all of your peeper clicking.
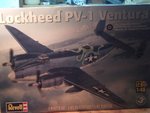
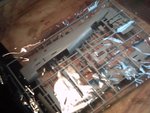
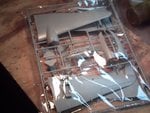
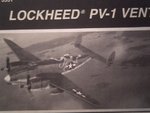
The Kit

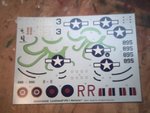
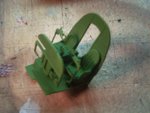
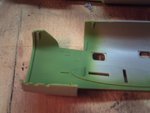
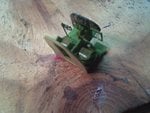
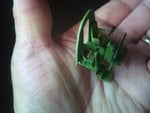
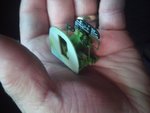
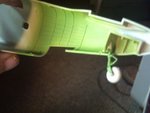
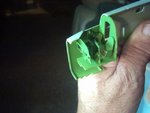
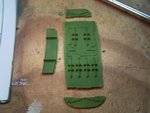
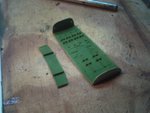
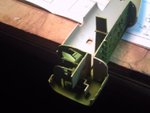
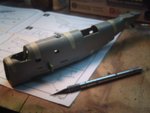
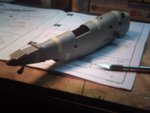
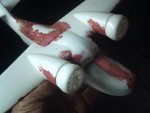
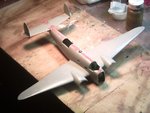
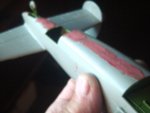
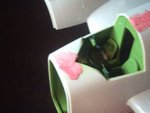
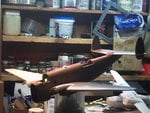
This is the new Revell Lockheed PV-1 Ventura Patrol Bomber, I have never seen this kit produced in 1/48 scale only the mini craft 1/72 scale The kit gives you two type of decals one for the U.S Navy and the other for the 149 squadron Prince Rupert British Coloumbia 1943. The kit very well detailed I am going to have a ball with this one, This kit would make a great compamion with the classic airfframes 1/48 scale Hudson bomber Here are tyhe [ictures of the kit
Boats:D:D:D:D
 

Attachments

  • PICT0013.JPG
    PICT0013.JPG
    47.1 KB · Views: 252
  • PICT0014.JPG
    PICT0014.JPG
    59.5 KB · Views: 189
  • PICT0015.JPG
    PICT0015.JPG
    56.5 KB · Views: 198
  • PICT0016.JPG
    PICT0016.JPG
    43.7 KB · Views: 214
  • PICT0017.JPG
    PICT0017.JPG
    52.3 KB · Views: 192
Looking forward to this Boats. I did not know the decals had a B.C. squadron as an option. This model will now become my quest.

Geo
 
Good to see you back Boats. I built the 1/72 kit and loved the way it looked in the navy paint scheme. I wish the quarter scale kit had been around then. I'll be watching.
 
Great to see you back Boats, and looking forward to seeing this build come together. I'm hoping that Revell will release the RAF (glass nose) version of this kit - the way it's moulded suggests that this could happen. Hope it' soon!
 
Ahoy
Thank you very much fellas for all of your replies and a hardy welcome back its good to be back here with you great fellas as always I am Honored. Construction has started beginning with the cockpit parts after they were aeembled and set aside to dry, when dry I airbrushed zinc chromate green on all interier surfaces along with all interier parts. Next I will finish up the paint work on the cockpit sub assembly.Here are few shots on the construction I will post more this evening aalso i will post a progress report on the Goose on my other build thread stay tuned my friends.

Boats:D:D:D:D
 

Attachments

  • PICT0018.JPG
    PICT0018.JPG
    44.7 KB · Views: 194
  • PICT0019.JPG
    PICT0019.JPG
    37.9 KB · Views: 182
Ahoy
Here is a update build report on the Ventura Patrol Bomber, continued after letting the chromate green dry over night I went on by finishing up the cockpit detail only there are only 11 parts to the cockpit. On the following pictures of the construction you will see the the three parts that make up the bomb bay floor. The pilot and Co-pilot6 seats were panted olive drab with the remainder on the rest of the cockpiut chromate green. A nice touch for Revell on the dial consol is painted black when dry there are a dial face decals that fit right over the dial consol. As to Terrys demands the kit can be built as a English Mark V Bomber there is a nose transparentcy that fits on the nose for the bombadier but there is no bombadiers flooringt on the kit. On the nose section there are two pieces. If you were make the English version you would have to cut out eight windows. Perhaps in the near future some after modeling compant will make parts conversion sets for this purpose. Although there are English decals for the PV-1 it can be made into the Enlish version. Once all interier parts have been cemented into position the the fuselage halfs were joined together useing ACC glue with masking tape to hold the fuselage into dry. Not very many interier parts to the Venturajust the cockpit and bomb bay is all youi get with the kit.But with after market parts coming our way it will fill the bill to this kit. In overal perspective a great kit, The fit od parts go together very well without fuss. Tomorrow tghe main sub assembly of the wings and tail feathers will be installed next then its fill and prime time. Here are the update of the Ventura Bomber/

Boats:D:D:D:D
 

Attachments

  • PICT0001.JPG
    PICT0001.JPG
    55.4 KB · Views: 177
  • PICT0002.JPG
    PICT0002.JPG
    43.5 KB · Views: 168
  • PICT0003.JPG
    PICT0003.JPG
    40.2 KB · Views: 170
  • PICT0004.JPG
    PICT0004.JPG
    39.4 KB · Views: 171
  • PICT0005.JPG
    PICT0005.JPG
    46 KB · Views: 180
  • PICT0006.JPG
    PICT0006.JPG
    48.5 KB · Views: 175
  • PICT0007.JPG
    PICT0007.JPG
    44.9 KB · Views: 167
  • PICT0008.JPG
    PICT0008.JPG
    36.4 KB · Views: 172
  • PICT0009.JPG
    PICT0009.JPG
    38.4 KB · Views: 179
  • PICT0010.JPG
    PICT0010.JPG
    36.2 KB · Views: 172
  • PICT0011.JPG
    PICT0011.JPG
    33.2 KB · Views: 164
Great stuff Boats, and interesting about the extra parts. If the kit has the correct glazed nose, then the rest I can convert quite easily. Think I'll be getting myself one of these !
 
Ahoy Terry
Thanks man for the reply it shouldn,t be any fuss in converting the ventura into a English Mark V bomber, By cutting out the eight side windows and working in the bombadiers floorboard and so on. On the kit the clear nose piece is painted white. I paid $35.00 for the kit In england it wojuld prabaly cost 6 pounds or perhaps less it wont break the pocket book a good kit the fit of parts are great. thanks Terry i will have another update.

Boats
 
Ahoy
Here is the update for the night a lot of work ahead of me on this great bird. After ther fuselage assembly has dried over night I went ahead as per instructions assembled the wings and tail unit in place. Ther wings were cemented together and set aside to dry and then i procede with the two verticval tail and horizonal tail assemlies. The fit of parts are excellent. once all these parts were glued to the fuselage assembly I applied the filler on the fuselage joining seams not much putty was used the great fit of parts resulted in useing less putty. Tomorrow I will sand down the seams and give the ship a primer coat of gray primmer paint, then procede with the build. Here are the pictures for the night.

Boats:D:D:D:D
 

Attachments

  • PICT0001.JPG
    PICT0001.JPG
    49.7 KB · Views: 161
  • PICT0002.JPG
    PICT0002.JPG
    40.5 KB · Views: 170
  • PICT0003.JPG
    PICT0003.JPG
    31.9 KB · Views: 166
  • PICT0004.JPG
    PICT0004.JPG
    39.4 KB · Views: 172
  • PICT0005.JPG
    PICT0005.JPG
    33.6 KB · Views: 165
  • PICT0006.JPG
    PICT0006.JPG
    66.6 KB · Views: 165

Users who are viewing this thread

Back