Good stuff Wojtek, colours are looking ok, Bill....
Navigation
Install the app
How to install the app on iOS
Follow along with the video below to see how to install our site as a web app on your home screen.
Note: This feature may not be available in some browsers.
More options
You are using an out of date browser. It may not display this or other websites correctly.
You should upgrade or use an alternative browser.
You should upgrade or use an alternative browser.
Russian Pe-3 Bis, Russia's first use of radar for a night fighter
- Thread starter Night Fighter Nut
- Start date
Ad: This forum contains affiliate links to products on Amazon and eBay. More information in Terms and rules
More options
Who Replied?Airframes
Benevolens Magister
Some good research and nice work there Bill, and good stuff Wojtek.
Lucky13
Forum Mascot
Excellent work and information lads!
Nice work so far!
- Thread starter
- #125
Night Fighter Nut
Master Sergeant
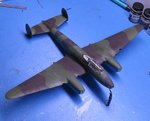
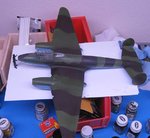
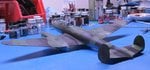
Thanks guys for the support. Well I was able to do some respraying and I think the results are better. Tell me what you guys think. BTW... The side window is not uncovered yet when I took these photos. Next time. ") Working on subtle effects with some washes and drybrush. This may take awhile as I prepare our house for my wife's return from Russia.
Working on subtle effects with some washes and drybrush. This may take awhile as I prepare our house for my wife's return from Russia.
Thank you for the help Wojtek.
Working on subtle effects with some washes and drybrush. This may take awhile as I prepare our house for my wife's return from Russia. Thank you for the help Wojtek.
Attachments
Last edited:
Airframes
Benevolens Magister
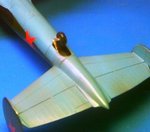
Looking good - and I see you have a little guy helping out!
that is very nice
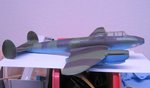
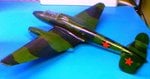
I agree with Terry. But if you used the Dark Brown colour you should have used the third camo paint that was the Dark Grey... If you decided to make two-tone camo scheme it should have been the Black one instead of the brown colour. Like in the profile below..

- Thread starter
- #129
Night Fighter Nut
Master Sergeant
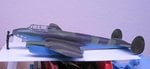
Thanks guys, Wojtek I did use black but I think I lighten it incorrectly. The light might also have some effect on it. It's an old aquarium light. I'll see what I can do to darken it more so that it is correct.
- Thread starter
- #131
Night Fighter Nut
Master Sergeant
It looks dark brown on my screen as well. I'll work on it. Thanks, I appreciate your input.

- Thread starter
- #133
Night Fighter Nut
Master Sergeant
The dark brown is more black now. It will be a little while before I can post some pictures. My camera is giving me fits.
- Thread starter
- #134
Night Fighter Nut
Master Sergeant
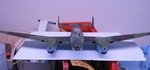
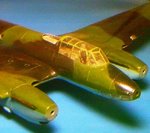
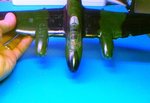
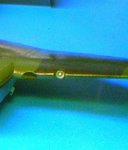
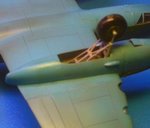
Ok, got some of the bugs worked out of the camera. Here are a few updated photos. I have added the decals...total of six for this plane, the exhaust pipes, a couple of vents on the bottom not shown and the light in the port wing. The light was made and shown in an earlier post. Hope this looks better. Currently working on the landing gear which has become a little squirrely. Working on scratch building the mechanism for closing these landing gear doors. Apparently they were hooked up to the landing gear struts so as the landing gear was pulled in, the doors were pulled closed.
Attachments


- Thread starter
- #136
Night Fighter Nut
Master Sergeant
Thanks Wojtek, its definitely been an education.
Good work so far!
- Thread starter
- #139
Night Fighter Nut
Master Sergeant
Right... well I've assembled the landing gear and have them attached. It was a little tricky but thanks to the drawings, I was able to pull it off. The plans leave something to be desired. There is a piston that pushes outward on the locking cross members. The push rod goes against this but the large end doesn't butt up to anything. It actually rests past the bottom of the "U" shaped struts and can really only be assembled right after the struts and locking cross members are in place. I'll post this later as time allows. Next will be the landing gear doors and retracting rods attached to the doors.
- Thread starter
- #140
Night Fighter Nut
Master Sergeant
Users who are viewing this thread
Total: 1 (members: 0, guests: 1)