Russian Pe-3 Bis, Russia's first use of radar for a night fighter

Ad: This forum contains affiliate links to products on Amazon and eBay. More information in Terms and rules
The finger is not as bad as it seems. Some blackness around the nail. Thanks guys for the encouragement. I can use my finger again, of course if I was to show my finger someone might think I was giving the bird. :)
 
Ok, I've been able to get more work done. Mostly worked to finish up the interior, front part, and some mod cables for the radar setup. Nothing to go by, just winging it here. Did start working on the rear gun and finding more fit issues between the glass and the platform. I'll have some pictures of this later. For now here is what I have. Thanks guys.
 

Attachments

  • Picture 568.jpg
    Picture 568.jpg
    26.1 KB · Views: 99
  • Picture 567.jpg
    Picture 567.jpg
    32.8 KB · Views: 100
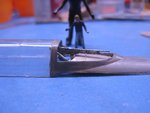
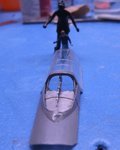
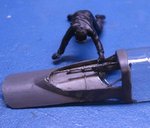
Ok, me and the boys are back at work on the plane. Oddly enough the model's directions state putting in the rear facing gun and putting the canopy over it with the window part covering the gun. Unfortunately it doesn't work that way. The rear window has to be cut out first before the gun could sit properly. Of course the other way is to have the gun sit in a lower position, like a storage position. Then the glass would be able to sit properly without being cut. Lots of choices, but which is right? Anyway, here are the latest photos with help from the desktop boys. Pictures are not quite in order but I've attached the lower glass and am test fitting the canopy. Trying to decide which will work best.
 

Attachments

  • Picture 722.jpg
    Picture 722.jpg
    28.7 KB · Views: 94
  • Picture 720.jpg
    Picture 720.jpg
    55.9 KB · Views: 95
  • Picture 721.jpg
    Picture 721.jpg
    30.6 KB · Views: 86
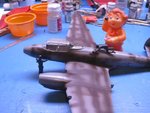
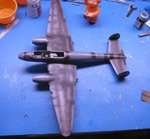
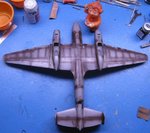
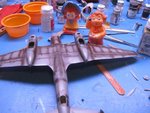
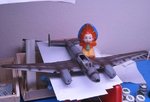
Ok, me and the lads have figured out what we will do with the gun and glass. Based off of photos I've seen and what I have available, we have decided to cut out the back part of the window to mount the gun. Of course the plastic for the glass is very thin and easily damaged, so I put tape along the area I planned to cut and sharpened up my blade. Very tedious cutting. The rest was easy. Once that was done, I did some painting to find all scratches and lumps and to pre-shade my panel lines. A couple of added Russian characters... extra points if you know who they are. :) ... came by to paint the plane and inspect it to make sure its done right. Kid stopped by to see what his dad was up to. Hope you enjoy.
 

Attachments

  • Picture 009.jpg
    Picture 009.jpg
    43.5 KB · Views: 106
  • Picture 008.jpg
    Picture 008.jpg
    25.4 KB · Views: 113
  • Picture 007.jpg
    Picture 007.jpg
    49 KB · Views: 106
  • Picture 006.jpg
    Picture 006.jpg
    45.5 KB · Views: 120
  • Picture 005.jpg
    Picture 005.jpg
    46.5 KB · Views: 109
  • Picture 004.jpg
    Picture 004.jpg
    54.2 KB · Views: 119
  • Picture 003.jpg
    Picture 003.jpg
    34.3 KB · Views: 117
  • Picture 002.jpg
    Picture 002.jpg
    36.4 KB · Views: 112
  • Picture 001.jpg
    Picture 001.jpg
    54.1 KB · Views: 110
  • Picture 010.jpg
    Picture 010.jpg
    38.3 KB · Views: 105
Currently filling in those nasty scratches around the gun position. Should be nice and smooth for our next photo shoot. Thanks guys for all the kind comments. Thanks also for being patient with me as I slog through this. This is definitely not an easy kit. I believe I will do a P-61 next with a little twist. I'll show how those spoilerons were used. :)
 
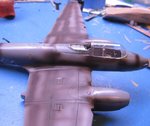
Got some more work done over the weekend. Fixed up those cut marks around the gunners position and added a couple of intake scoops. There was one other intake that I drilled out. After attaching the canopy, I masked it up and covered the gunners position with cardboard and tissue. Now the bottom is sprayed and was also able to build one of the propeller assemblies. Hope it looks ok, I'm still new with a paint brush. :)
 

Attachments

  • IMG_2933.jpg
    IMG_2933.jpg
    37.2 KB · Views: 97
  • IMG_2928.jpg
    IMG_2928.jpg
    47.4 KB · Views: 101
  • IMG_2929.jpg
    IMG_2929.jpg
    29.1 KB · Views: 94
  • IMG_2930.jpg
    IMG_2930.jpg
    29.4 KB · Views: 95
  • IMG_2931.jpg
    IMG_2931.jpg
    32.3 KB · Views: 95
  • IMG_2932.jpg
    IMG_2932.jpg
    35.3 KB · Views: 93

Users who are viewing this thread

Back