Special hobby 1/48 Fairey Barracuda MK.2

Ad: This forum contains affiliate links to products on Amazon and eBay. More information in Terms and rules

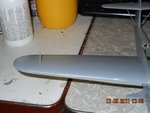
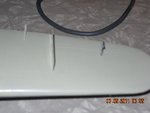
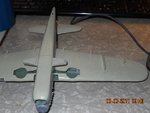
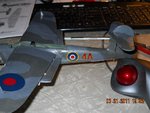
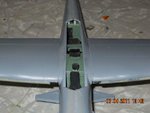
Well here is where I am at now got the sides glued together trimmed enough to where gaps aren't too bad which is good as I'm just about out of tape.

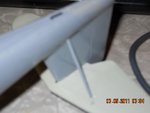
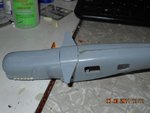
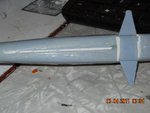
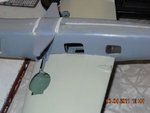
the little wing thing only goes one way and like everything else so far it had to be trimmed as well to fit flush. IF I would have left it alone it would not have set flush and would have been to big for the opening. So deepen the place where it sits on by maybe a half mm and trim one both ends a little at a time. still got a gap but nothing major.

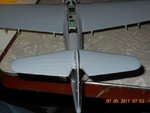
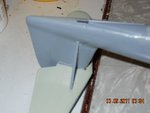
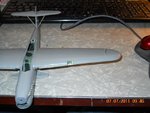
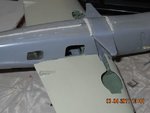
Next part fitting the wings and tail section
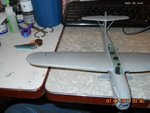
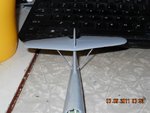
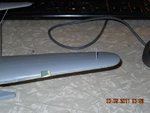
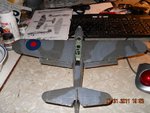
 

Attachments

  • Picture 404.jpg
    Picture 404.jpg
    93 KB · Views: 85
Putty done wings on, and about as flush as I can get them.
 

Attachments

  • Picture 408.jpg
    Picture 408.jpg
    94.9 KB · Views: 99
  • Picture 410.jpg
    Picture 410.jpg
    90.2 KB · Views: 85
  • Picture 409.jpg
    Picture 409.jpg
    92 KB · Views: 85
  • Picture 411.jpg
    Picture 411.jpg
    90 KB · Views: 109
Looking good. :) What did you use for sanding of the putty and seams on the undersides of the fusleage?
 
I tape it as close as I could, then I have been using nail polish remover regular strength. But squadron putty dries very fast so need to be quick with the remover to smooth it out, think I'm getting the hang of it.
 
Down to last little fiddy bits then paint.

There is a small oval on the sides and on the tail to show you where the struts go, but if you do it the way they show the struts will not fit, they are too short.
So I glued the bottom first then worked them into position on the tail. They will sit to the inside of the ovals on the tail part. And the ovals are very lightly scribed so you will need to look hard to see them.
And this is where it will sit till I can get more paint, I'll be able to prime it and finish the bottom but not the top as I'm going to paint it up as a Pacific fleet bird.

Unless some one can tell me the equivalent to extra dark sea grey/ dark slate grey

the hobby store I go to has Model master paint but just the Federal standard numbers not any of the different countries paints.
 

Attachments

  • Picture 413.jpg
    Picture 413.jpg
    99.3 KB · Views: 72
  • Picture 418.jpg
    Picture 418.jpg
    80 KB · Views: 77
  • Picture 415.jpg
    Picture 415.jpg
    90.8 KB · Views: 81
  • Picture 414.jpg
    Picture 414.jpg
    99.5 KB · Views: 74
  • Picture 419.jpg
    Picture 419.jpg
    81.4 KB · Views: 69
  • Picture 417.jpg
    Picture 417.jpg
    84.9 KB · Views: 87
  • Picture 412.jpg
    Picture 412.jpg
    96.6 KB · Views: 83
And this is where it will sit till I can get more paint.
 

Attachments

  • Picture 425.jpg
    Picture 425.jpg
    105 KB · Views: 68
  • Picture 421.jpg
    Picture 421.jpg
    96.6 KB · Views: 66
  • Picture 428.jpg
    Picture 428.jpg
    103.2 KB · Views: 77
  • Picture 422.jpg
    Picture 422.jpg
    100.4 KB · Views: 71
well after two very long weeks paint has been acquired and some detail brushes as well. So now I can finish this thing.
 
Well already had a disaster trying to decal it as a pacific fleet bird, one of the ric decals disintegrated on me so now I'll have to do one of the Atlantic birds.

the fulmar decals on the other hand went down without any trouble.
 
Well be careful with the decals they suck, had another one shred on me. Will post pics tomorrow I've had enough for tonight.
 
Tim, if you have a spray can of clear coat, or if you can airbrush some on, apply a layer to the whole decal sheet and let thoroughly dry before trying again. The clear coat will strengthen them and prevent what you've experienced.
 
Well here are the pics I finished decal-ling it since these were taken and they are the worst part of the kit. I used humbrol gloss varnish and I don't understand why it dried the way it did.
 

Attachments

  • Picture 438.jpg
    Picture 438.jpg
    116 KB · Views: 98
  • Picture 439.jpg
    Picture 439.jpg
    106.2 KB · Views: 88
  • Picture 441.jpg
    Picture 441.jpg
    107.8 KB · Views: 91

Users who are viewing this thread

Back