What's on The Workbench (1 Viewer)

Ad: This forum contains affiliate links to products on Amazon and eBay. More information in Terms and rules

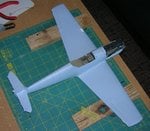
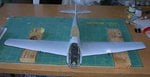
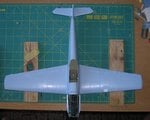
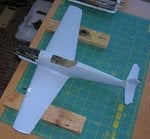
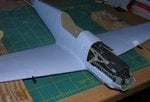
I've attached the main gear to the wings along with the gear doors. and I've also attached the JT4D engines to the wings, and this plane is almost done. I just need to airbrush the gear fairings light grey, but the chrome hasn't been fully cured, yet. I am SOOOO close to finishing this I can almost smell the jet cabin. lol

while I was waiting I've started work on my 2nd concorde. I've just gotten the basics done. assembling the landing gear, assembling the fuselage, wings to the fuselage, play doh inside the fuselage along with nose weights, and I've also attached the drooping nose in the supersonic cruise position (yes, I only like that position cos all it says is speed, there)
 
um.....ok these decals are a POS.....at first i thought it was my fault that I had messed the first piece up....but no as I progressed, I find that the TWA arrow stripes that go along the fuselage have been breaking apart for no apparent reason. now I've not had much of a problem with Minicraft decals, but this one....these decals must be defective and to top it off, the store that sold me the kit has been closed for about an hour so I'm doubly pissed.

HPIM1778.jpg

HPIM1779.jpg
 
Know the feeling Rob, happened to me a number of times in the past. Nowadays I usually coat decals particularly older ones with Microscale Liquid Decal Restorer.

:hotsun: :hotsun:
 
looks like they are. I contacted them yesterday and they said they'd contact the manufacturer and their distributor to get me a replacement decal sheet

on another note, I've made a lil more progress with the Concorde, and I've puttied all necessary seams on it. I'm not attaching the Olympus 593's or the landing gear till I finish with sanding the plane off. and I've discovered a new method of applying putty: I squeeze the putty outta the tube and break it off with the end of a spotter paintbrush then I get into those hard-to-reach areas such as the side-of-body areas where the wings join the fuselage and I just run it along the seam , and then I quickly gather up the excess and keep applying it along the seam so i use less putty..wow, I've had this putty tube for a full year, now. the first time I used it was when I worked on my first airliner. the McDonnell Douglas MD-80 in the Delta Airlines livery. hehe fun times.
 
and the decal sheet is being sent to the store! 8D it'll be a while before I pick them up cos I live 20 miles from the store lol
 
Bf 109E of Airfix 1/24 scale.
 

Attachments

  • Dscn3176.jpg
    Dscn3176.jpg
    123.1 KB · Views: 58
  • Dscn3172.jpg
    Dscn3172.jpg
    92.9 KB · Views: 49
  • Dscn3173.jpg
    Dscn3173.jpg
    108.6 KB · Views: 52
  • Dscn3175.jpg
    Dscn3175.jpg
    125.7 KB · Views: 52
  • Dscn3177.jpg
    Dscn3177.jpg
    98.9 KB · Views: 54
Nice one Wojtek, and what a coincidende! I've just been cleaning mine, ready to add more damage before putting it on a base, ready for the introduction to the BoB Group Build. It's Meyerweissflog's, after a belly landing - the one you kindly supplied a photo of not long after I joined the forum.
 
THX guys.:) In fact the Airfix kit is very old one and thare are mistakes that should be corrected if we want to have a good replic. I have decided it would be OOB model. But during assembling it appeared too basic at a few areas.As a result I have had to make a couple of details scratch-built.For instance ...seat belts...
 

Attachments

  • Dscn3261.jpg
    Dscn3261.jpg
    95.5 KB · Views: 54
  • Dscn3248.jpg
    Dscn3248.jpg
    92.1 KB · Views: 54
  • Dscn3246.jpg
    Dscn3246.jpg
    117.2 KB · Views: 56
  • Dscn3262.jpg
    Dscn3262.jpg
    90.9 KB · Views: 48
THX Gents. :D

Herry, I have bended the brass wire.I have used a thin drill (0.3mm), my tweezers , a scalpel blade, a needle of rectangular shape in its cross-section and also small pliers for that..
 
Last edited:

Users who are viewing this thread

Back