What's on The Workbench

Ad: This forum contains affiliate links to products on Amazon and eBay. More information in Terms and rules

Good advice Terry!

My No.4 Mk.1 was ex NZ Army, and built by the firm Savage. It was slightly different in colour to what you mentioned.
The woodwork was dark, but had a hint of red to it (American Beech ?), the metal parts were actually closer to a flat 'dark iron' ( ie, flat 'Gun metal' I guess) than black, the bolt and action in more or less the same colour, though a shiny aluminium where worn with use (as I remember - this is going back about 18 years or so!), and the butt plate a dark aluminium. Had a 'pig spike' (pointed) bayonet for her too, which was in same Dark Iron as the metal parts, canvas 'frog' (webbing) as you mentioned.

(Don't mean to contradict your info Terry, just added this out of interest!)
 
No probs Even. The Canadian No4 used red beech, as you rightly guessed, and this was one of the recognition points, without close examination. The bolt, rear sight and bolt release were also different, hence the difference in colours, and the metal fittings were not normally painted, apart from the magazine, which would have started life as black painted, and ended up a metal colour. The butt plate was either shiny steel, or a shiny alloy. If yours has the grooves running along the top of the forestock furniture, then it's probably a Canadian No4 Mk1 *. And I guess the rear sitght would be the simple, flip over 'peep' type, graduated at 300 yards and, IIRC, 800 yards, instead of the flip-up, adjustable graduated sight, from 300 to 1,300 yards, with the 'peep' battle sight at 300 yards. Still a lovely rifle, even though mass produced, whereas the SMLE was hand-made, with the option for 3 butt lengths, and a magazine cut-off latch, overall a better weapon, but more expensive, and time consuming to manufacture.
 
Bloody hell Terry, you know your stuff! :shock: :)

From what you described, mine was definitely a Canadian No.4 mk.1 then ...I well remember the grooves in the forestock that I'd never seen in photos of SMLE's. Also had the peep sight in the rear ( I've only seen the adjustable type on No.1 Mk.3's ).She was a beautiful colour too, that Red Beech is a lovely wood...

Lee, great idea! The pink Lee Enfield...the perfect accessory for the 'extreme' Barbie doll...(kind of 'Cindy meets G.I Joe'...) :)
 
ugh! unbefreakinleieveable! I just tried to put on the first coat of sage green metal flake on the corvette, and it ended up being a feckin disaster

first of all, it's being extremely runny, and secondly, I try to do the back, I bump my hand and the goddamn body goes on the ground outside, getting all kinds of dirt and splotches on it >_< maybe I should have done a silver coat first
 
Great stuff guys!


Ah damn Rob, its not so bad take back the body work and try again. Especially with auto's gotta get that finish dead on. Once the paint is dry you can cut it back and polish it, now that will make it look superb. good luck with it.

Cheers.
 
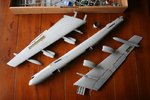
Heres a pic of the B-52 I've got going - got the engines on last night
 

Attachments

  • IMG_0078.JPG
    IMG_0078.JPG
    82.5 KB · Views: 66
Hmmm would be real interested to see your Bear sometime! Forgot there was a kit in 1/72! would look awesome side by side!
 
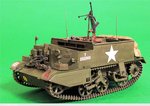
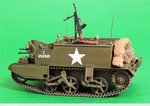
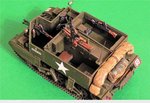
Well I did my best with the Bren carrier the weapons are ok but not very good and the so called matt coat i bought is not very matt and so I threw it in the bin as it ruined some of my painting work but its been a good starter kit for learning the basics now i will move on to a Hasagawa MKIX Spite as it was recommended as a good starter plane kit to do and so far the advice i have recieved from you guys especialy Wayne and Terry has been very helpful and bang on so I'll send off for the kit and get ready for round 2
 

Attachments

  • bren3.jpg
    bren3.jpg
    66.7 KB · Views: 61
  • bren2.jpg
    bren2.jpg
    67 KB · Views: 56
  • bren1.jpg
    bren1.jpg
    82.7 KB · Views: 61
beautiful work, everyone!

I safely resolved it. I sanded off some stuff, sprayed it with silver, then with the green metallic, let it dry overnight, and then sprayed another coat of the green metallic, and she looks great!
 

Users who are viewing this thread

Back