Navigation
Install the app
How to install the app on iOS
Follow along with the video below to see how to install our site as a web app on your home screen.
Note: This feature may not be available in some browsers.
More options
You are using an out of date browser. It may not display this or other websites correctly.
You should upgrade or use an alternative browser.
You should upgrade or use an alternative browser.
What's on The Workbench (3 Viewers)
- Thread starter Heinz
- Start date
Ad: This forum contains affiliate links to products on Amazon and eBay. More information in Terms and rules
More options
Who Replied?- Thread starter
- #1,882
Heinz
Captain
Looks fantastic 
Airframes
Benevolens Magister
Hells Teeth Lee! I've just got in from my first night out for ages, and looked at your pics. Now do you really think that I believe that this is your work, on your own first model!??!!
That is absolutely fantastic mate, and I''m not just saying that to please you. I've seen stuff in modelling mags that would have to go 150% to equal this! You've done a really first rate job, not only on the construction, but the painting and detailing too. As for the small arms, they look good enough to me, bearing in mind that what I can see of the Brens are not particulary totally accurate in their mouldings, regarding dimensions.
If you can continue in this vein, your Wellington will not only be a great tribute and memorial, but a first-rate competition winner too!
The way you have done the work, and 'listened' to and absorbed the hints and tips provided by the people here is not only a credit to you, but a lesson for others; if you ask the question, and get the answer(s), then take heed and follow the advice/suggestions - to the letter, not just the 'bullet points'!
Absolutely stunning work mate, and, for a first attempt, worthy of any and all praise heaped on it/you.
Very well done indeed!!
trackend
Chief Master Sergeant
Thanks guys
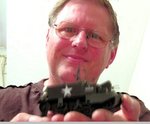
A time exposure picture hides a multitude of sins, I am very flattered at the compliments.
I know you were only joking and I dont want you to think im having a dig Terry, but it is deffinately my own work and my first model. I would no more plagerise a model than I would a photograph. I have been very slow buiding it and followed all the advice that you.Wayne and the other guys have given me. So much of any credit must go to you guys.
The instructions were clear consise and above all easy for me to follow. The guns were just too small for my eyes to do all the colouring that was given me so I had to comprimise.
I have add a picture of myself holding the model (sorry inadvance at my ugly mug) just to prove ithe model was not a picture I pinched off the net, but if I videoed myself building it I would take up all your hard drives memory
next build I'll show all my build stages.
As I say much of any credit must go to yourself, Terry ,Wayne,AK and others too numorous to mention,
Lets hope I can get to grips with the art of camo painting an aircraft on the next build.
To any guys in my position just starting out or a relitive beginner in the hobby of model making, listen to these guys If a poor eyesighted old git like me can turn out a reasonable model then anyone can.
Having done my first model my advice is dont rush, read and follow the brilliant advice of the experts we are lucky enough to have on this site
Attachments
Last edited:
Lucky13
Forum Mascot
Bl**dy h*ll Lee! THAT is one nice creation of yours! Well done indeed mate! Looking forward to your next project!
Lee, don't sell yourself short, the Bren looks very good. I second Terry's spot on comments! Well done mate.
B-17engineer
Colonel
Great job Track
trackend
Chief Master Sergeant
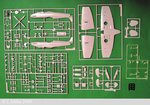
Ive come over all enthusiastic to get cracking on my next learning model after seeking advice from the expert WW2 A1 build boys on what would be a good second build to help hone my skills it was suggested I go for the Hasegawa/Revell 1/48th Spitefire MK IX
I looked on the net but found I could get it for the same price locally so I have now got my next build ready to rock and roll
I've already made a start by washing all the parts to remove any grease or releasing agent left from the moulding process I wont hog this thread, but I'll start my own Glue Boy Trys to Build a Spit MK IX thead.
I looked on the net but found I could get it for the same price locally so I have now got my next build ready to rock and roll
I've already made a start by washing all the parts to remove any grease or releasing agent left from the moulding process I wont hog this thread, but I'll start my own Glue Boy Trys to Build a Spit MK IX thead
.Attachments
Airframes
Benevolens Magister
Looks great Lee. That's the Bren carrier I was meaning of course! We are about the same sort of age, and I have the same problem painting (and handling) small parts. One of the best things I ever got is a 'Helping Hands' thingy. It's an adjustable bracket thing, with clips for holding parts, and a magnifying glass. This, together with your home-made magnifier/lamp, would really help.
The Spit should be a good kit to start aircraft modelling with, and if you need help or advice, just shout.
The Spit should be a good kit to start aircraft modelling with, and if you need help or advice, just shout.
trackend
Chief Master Sergeant
Dont worry Terry I wont need the internet for you to hear me when Im in a fix. I see that it could do with a seat harness any thoughts? I have again perused all the info from you and Wayne and the threads but I'm still not sure if a ready made off the shelf or scratch built one would be best.
Airframes
Benevolens Magister
In this scale Lee, it's just as good to make the seat harness. The Spit used the Sutton Harness up until the very late models, with only relatively minor changes. You could make this from thin paper strips, or thin metal foil, the type you get around the necks of wine bottles.
Cut these into strips approximately 1 mm wide, and form a 'Y' for the shoulder and tail straps. Use superglue to glue the pieces together. The lap strap is again two lengths of 1mm wide strips, glued to the underside of the set pan. The tail strap goes back to a cable which is anchored deep in the fuselage. if you have a look at my Spit MkXIV build, you'll see what I mean. In 1/48th scale, these will be good enough painted a buff colour, with around six pencilled 'dots' for the adjusting holes on the shoulder straps. Buckles can also be drawn in with pencil, good enough for this scale. When you feel up to the challenge, you can maybe try a more detailed technique.
If you can't get any lead foil or similar, let me know, and I'll send you some of the foil I use, which is ideal for this scale. I've got plenty of it, from my pain-killer tablets!!!
If you want more details of how to go about it, again, just shout, and I'll post some sketches etc.
Airframes
Benevolens Magister
Looking ok Rob, but you seem to have used a heck of a lot of putty.I haven't used 'Green Stuff' before, but i presume it should be soft enough to work with ok. Try using the back of a craft knife bladeor similar to spread it into the joint. This will make the sanding, and ahieving a level joint, a lot easier.
- Thread starter
- #1,897
Heinz
Captain
With the putty I tend to mask along the edges of the joins that need it. Saves some of the detail getting clogged or sanded away later. Alternatively what I do these days is apply the putty give it a minute or two then take a Q tip/cottin tip and dip it in some nail polish remover and wipe it along the putty. It takes all the excess off leaving a fairly perfect filled join. No sanding required almost in some cases.
Cheers
Cheers
Seam Repair
Alex is correct but, I myself, have noticed that using the nail polish remover in excess can short the putty and fill the seam but not level it with the surface. So now I use some to smooth, then let the putty dry for a few hours then sand it down so in the process you make the putty and plastic on the same level, therefore no seam! When the putty is still soft it can get a sort of uplift from sanding and leave those unlevel areas, in my experience rather.
Alex is correct but, I myself, have noticed that using the nail polish remover in excess can short the putty and fill the seam but not level it with the surface. So now I use some to smooth, then let the putty dry for a few hours then sand it down so in the process you make the putty and plastic on the same level, therefore no seam! When the putty is still soft it can get a sort of uplift from sanding and leave those unlevel areas, in my experience rather.