Navigation
Install the app
How to install the app on iOS
Follow along with the video below to see how to install our site as a web app on your home screen.
Note: This feature may not be available in some browsers.
More options
You are using an out of date browser. It may not display this or other websites correctly.
You should upgrade or use an alternative browser.
You should upgrade or use an alternative browser.
1/48 B17G Flying Fortress [Revell]
- Thread starter Maglar
- Start date
Ad: This forum contains affiliate links to products on Amazon and eBay. More information in Terms and rules
More options
Who Replied?
- Thread starter
- #102
Thanks Wojtek, my mom probably has some of those. 
A tiny sanding update, I think it looks a bit more even now. Still need to mask the windows and glue them from the inside, might wait till I have some canopy glue because elmers breaks like no tomorrow with any pressure.
A tiny sanding update, I think it looks a bit more even now. Still need to mask the windows and glue them from the inside, might wait till I have some canopy glue because elmers breaks like no tomorrow with any pressure.
Attachments
- Thread starter
- #104
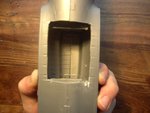
The side that wasnt cut looks good and the otherside is crap. I will probably have the straight side the bottom one because thats all that will be seen.. still need to paint these, but thats later..
Attachments
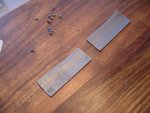
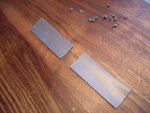
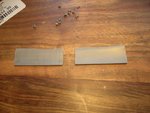
These are a good semi-material for the doors.If you want you can make them even and then sand down the inner sides.Find some pics or drawings with a view at these real one.Accordig to them you can scratch the inner structure using strips of a phone card or other plastic pieces.
- Thread starter
- #106
- Thread starter
- #108
109ROAMING
2nd Lieutenant
Coming along swell
Airframes
Benevolens Magister
Yep, coming along nicely - told you you could do it!
The bay doors are shaped to the contours of the belly, so if you want to turn them upside down, swap sides also, so that they have the right shape.
The figures are looking good, and BTW, one is a pilot, and another a crew member. For future reference, to make the job easier, remove the seams on the figures with a scalpel/craft knife blade, shaving 'backwards'; in other words, scraping the seams away. It's much easier, and more accurate, than trying to sand in confined, small areas.
Good work so far.
- Thread starter
- #112
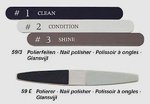
I used the sideways method alot, but I polished it with sanding. I use the edge of my metal nail filer back n forth like mentioned.
I also just recieved a tractor for my bomb cart from a forum member on another site, so now the cart will be rigged up to the tractor in my diorama.
I also just recieved a tractor for my bomb cart from a forum member on another site, so now the cart will be rigged up to the tractor in my diorama.
Airframes
Benevolens Magister
Nice one! Should look good on a hard-standing with the bomb train approaching or loading. Let me know which unit you're modelling if it's an 8th AF one, and I'll let you know what shape the dispersal areas were on the airfield concerned, so that you can make a base easily.
- Thread starter
- #114
We might have to PM Terry, I am thinking bases and tactics but also have to consider the plane type and where it served, let me check my decal sheet. My buddy also just threw in his field crew from his B24 Lib so I will have some extras on the diorama.
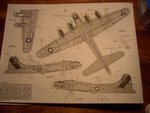
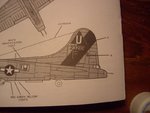
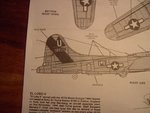
Heres some photos, I know your eyes are probably gone so bare with me on the last pic..
Heres some photos, I know your eyes are probably gone so bare with me on the last pic..
Attachments
Airframes
Benevolens Magister
OK, no probs. Same colour schemes as my old kit. The natural metal bird was based at Glatton. I'll dig out the info and send you a PM to start with. I might have some colour pics of the aircraft from that unit on their base, I'll certainly have a sketch map of the place at least.
Leave it with me and I'll PM in a day or so.
Terry.
Leave it with me and I'll PM in a day or so.
Terry.
- Thread starter
- #116
Doin' ok so far Maglar, keep at it mate!
- Thread starter
- #118
Lucky13
Forum Mascot
My buddy also just threw in his field crew from his B24 Lib so I will have some extras on the diorama.
Soooo, this buddy of yours......is he a member of this forum, hmmmm....?
Users who are viewing this thread
Total: 1 (members: 0, guests: 1)