ozhawk40
Master Sergeant
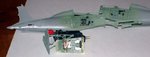
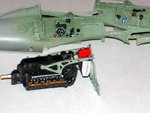
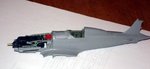
Great looking engine there Kevin.
Cheers
Peter
Cheers
Peter
Follow along with the video below to see how to install our site as a web app on your home screen.
Note: This feature may not be available in some browsers.
Ad: This forum contains affiliate links to products on Amazon and eBay. More information in Terms and rules
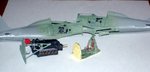
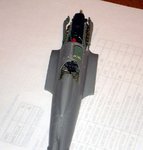
 )and had to shorten the rudder pedal about 1/16".The weathering I really thought was not bad or great till I took a photo and whew! you guys are not seeing those.This kit as said before is a fit sand fit sand cut whatever but I am still thinking she might look decent in the long run wish me luck.I have decided the CR 42 4 colours is after this by Classic Airframes I also have the float version also hmmmnn..............Thks for poking your head in in advance.Cheers Kevin
It does look like you're having fun Kevin.....you are, aren't you?
if I had gotten a thin one would of been fine,brain lapse Cheers Kevinlooks good to me Kevin