- Thread starter
- #381
Crimea_River
Marshal
In the last update, I had put the resin side panels on. Since then, I removed these as they did not fit that well and I replaced them with the kit panels which are just as good if not better. The below two pics show the painted and grunged-up lower cowl and side panels. The firewall has also been installed. The small gap where it meets the bottom cowl won't be seen so I didn't bother to fill this.


To complete this area, some oil lines will need to be added to the visible areas and some hoses added to the firewall, although much of it won't be seen.
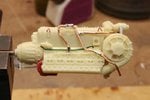
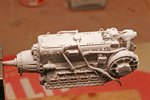
Back to the engine with detail work starting on the starboard side. The first pic shows progress up to this morning. The main leads from the magneto were added using insulated electrical wire. Note how the rocker cover stops right at the vertical line with the block.

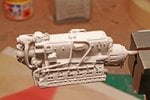
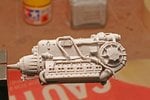
The next pic shows some of the added detail. Pictures of the DB603 show that the block casting actually extends farther back with a cast gusset plate being present and the rocker cover extending a bit further. I did this by adding a piece of spare resin, cut and filed to shape as well as a piece of cut card, seen in white. Some miscellaneous junk was added at the back to make the area look a bit more business-like, the area being just visible through the open cowl. The lead to the spark plugs was added between the main magneto lead and the end of the resin cast harness. The green line (not sure the purpose) was added and the crank case overflow was added from the breather cap and extended to a drain hole which I drilled at the back of the cowl. Hose connections are made of furnace duct tape.

That's it for today, slow but steady. Thanks for checking in. Should have more tomorrow.
To complete this area, some oil lines will need to be added to the visible areas and some hoses added to the firewall, although much of it won't be seen.
Back to the engine with detail work starting on the starboard side. The first pic shows progress up to this morning. The main leads from the magneto were added using insulated electrical wire. Note how the rocker cover stops right at the vertical line with the block.
The next pic shows some of the added detail. Pictures of the DB603 show that the block casting actually extends farther back with a cast gusset plate being present and the rocker cover extending a bit further. I did this by adding a piece of spare resin, cut and filed to shape as well as a piece of cut card, seen in white. Some miscellaneous junk was added at the back to make the area look a bit more business-like, the area being just visible through the open cowl. The lead to the spark plugs was added between the main magneto lead and the end of the resin cast harness. The green line (not sure the purpose) was added and the crank case overflow was added from the breather cap and extended to a drain hole which I drilled at the back of the cowl. Hose connections are made of furnace duct tape.
That's it for today, slow but steady. Thanks for checking in. Should have more tomorrow.

