Navigation
Install the app
How to install the app on iOS
Follow along with the video below to see how to install our site as a web app on your home screen.
Note: This feature may not be available in some browsers.
More options
You are using an out of date browser. It may not display this or other websites correctly.
You should upgrade or use an alternative browser.
You should upgrade or use an alternative browser.
1/48 Pro Modeller Heinkel He111H-22 with V-1
- Thread starter Wayne Little
- Start date
Ad: This forum contains affiliate links to products on Amazon and eBay. More information in Terms and rules
More options
Who Replied?Vic Balshaw
Major General
Thanks Corey, now I see, don't they give you the shits leaving marks like that, especially on the outside.
So next question Wayne………...I note you have little bits of spruce cut up, do you use that in some way to plug the ejection marks and if so, in the immortal words of a particular Aussie politician 'please explain.'


So next question Wayne………...I note you have little bits of spruce cut up, do you use that in some way to plug the ejection marks and if so, in the immortal words of a particular Aussie politician 'please explain.'


- Thread starter
- #163
Thanks Corey, now I see, don't they give you the shits leaving marks like that, especially on the outside.
So next question Wayne………...I note you have little bits of spruce cut up, do you use that in some way to plug the ejection marks and if so, in the immortal words of a particular Aussie politician 'please explain.'


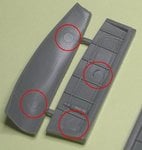
No Vic I don't use the sprues, although that's not a bad idea....
Each piece as shown has 4 of the little [email protected] sand them down with a small strip of sandpaper wrapped around the end of a piece of sprue and if they are a bit too deep some Tamiya filler or a drop of superglue...then sanding again....friggin pain in the @ss man!
Attachments
Vic Balshaw
Major General
Damn, thought you would have some magic formula to take the pain out cleaning up ejection marks. Oh well, will just have to keep filling and filing.


A4K
Brigadier General
Great work so far Wayne!
Crimea_River
Marshal
...I sand them down with a small strip of sandpaper wrapped around the end of a piece of sprue and if they are a bit too deep some Tamiya filler or a drop of superglue...then sanding again....friggin pain in the @ss man!
Especially when they obliterate details like the raised rivets and hydraulic lines like in this case.
109ROAMING
2nd Lieutenant
Nice stuff Wayne
- Thread starter
- #168
Especially when they obliterate details like the raised rivets and hydraulic lines like in this case.
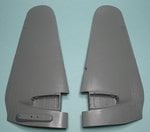
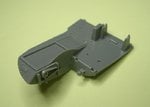
The detail in the bays is pretty much intact...the raised detail on the doors.....well, took the lot off, at the end of the day, nobody's gonna take any notice of what may have been there....
ellis995
Staff Sergeant
Hi Wayne found this, while i was just brosing the net, out of bordem

A4K
Brigadier General
Nice find Keith! Somehow something irks me bout the scheme...is it accurate for the role portrayed?
ellis995
Staff Sergeant
messed up  here is the site where the pic is located
modelingmadness.com/.../axis/luft/bioll111.htm
modelingmadness.com/.../axis/luft/bioll111.htm
Last edited:
- Thread starter
- #172
Thanks Keith!
Evan, the colours mentioned for this type of overspray pattern are RLM 02 'Grey' or RLM 76 'Lt. Blue-Grey'
From available photo's of late war He111's it looks like RLM 76 to me......
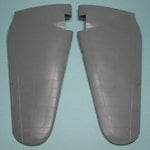
got the wings together and in the sanding phase....
Evan, the colours mentioned for this type of overspray pattern are RLM 02 'Grey' or RLM 76 'Lt. Blue-Grey'
From available photo's of late war He111's it looks like RLM 76 to me......
got the wings together and in the sanding phase....
Attachments
A4K
Brigadier General
Looking good Wayne!
What do you reckon of the scheme Keith found? Looks like the wave pattern camouflage similar to that used on Fw 200s and other ocean-going aircraft...unusual to see it applied on the upper surfaces though.
What do you reckon of the scheme Keith found? Looks like the wave pattern camouflage similar to that used on Fw 200s and other ocean-going aircraft...unusual to see it applied on the upper surfaces though.
Night Fighter Nut
Master Sergeant
When I was working on my Widow, I lost a few raised details also but I figured out how to put them back with tape and elmers glue. I just masked the area I wanted a line and put a line of glue down. Once the glue was set, I pulled up the tape the the detail was restored. Works ok with rivets to but apply with a needle tip so the dot isn't too big. As always, experiment first but if it doesn't work right, a cotton Q-tip and water will remove it. 
A4K
Brigadier General
Great idea mate!
Airframes
Benevolens Magister
I've missed out on this for awhile Wayne, but cracking job so far. It looks fairly hefty, and I'm trying to visualise the bulk of the beast in 1/32nd scale.....!
Lucky13
Forum Mascot
Try 4xOH MY!!! 
- Thread starter
- #178
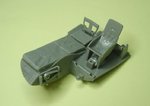
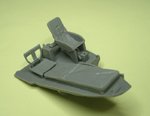
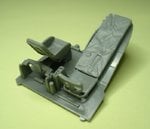
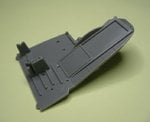
Update....been working on the second engine and started the cockpit work.....
...damn pics....having trouble loading...have to be tomorrow now...
...damn pics....having trouble loading...have to be tomorrow now...
- Thread starter
- #179
Heinz
Captain
Top stuff Wayne 8)
Users who are viewing this thread
Total: 1 (members: 0, guests: 1)

