No problem...Beiber-ite!
Navigation
Install the app
How to install the app on iOS
Follow along with the video below to see how to install our site as a web app on your home screen.
Note: This feature may not be available in some browsers.
More options
You are using an out of date browser. It may not display this or other websites correctly.
You should upgrade or use an alternative browser.
You should upgrade or use an alternative browser.
Airfix 1:72 scale He 177
Ad: This forum contains affiliate links to products on Amazon and eBay. More information in Terms and rules
More options
Who Replied?vikingBerserker
Lieutenant General
Man, I can't Beileb you just said that..........
- Thread starter
- #63
Bustedwing
Tech Sergeant
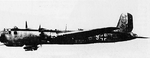
Ever feel like your in a round room looking for a corner to pee in ?? As you can imagine the decals for this kit are papyrus quality. I was toying with the idea of printing my own but it seemed to be way more bother than just cutting stencils and spraying them on. The kit lettering is "K9-NL" fair enough. After searching the web it shows up with the "9" being orange...yellow...red...white, depending on the kit . Wanting to know what was the most accurate I did a bit more digging. It turns out that that lettering is bunk, in fact the only picture of a 177 with that lettering is actually a photo of a British captured 177 painted with invasion stripes and RAF roundels that has been doctored or photo shopped as we would now call it. According to what I can find out the decal sheet is acurad albeit unusable with the Balkenkreuz being narrow without flanks in all 6 places. This leaves me with coming up for lettering that fits with the camo pattern. Any thoughts on this ? Here's a pic of the topside completed as per the instructions and how I intepreted it.

SANCER
Senior Master Sergeant
Regardless of the situation of the decals (I wish you solve it in the best way), let me say you've done a good job of painting and the progress so far is very nice. 

Felicidades y saludos Bustedwing
SANCER
Felicidades y saludos Bustedwing
SANCER
- Thread starter
- #66
Bustedwing
Tech Sergeant
If you look at that image the plane is not quite in a 3/4 view yet the cross and letters appear as a straight on view along with the white being far to "white" for a grainy B&W picture.
I agree with Sancer! Way to go!
- Thread starter
- #68
Bustedwing
Tech Sergeant
Close? looks like N9-NL?I would say the 9 was white but Wayne,Terry or Wojtek know more about B/W pic colors
- Thread starter
- #69
Bustedwing
Tech Sergeant
Update. exhaust tubes in the kit are goofey as all hell so I made some new ones from styrene and also scribed out the back of the landing gear covers. The more I get into this kit the more I discover how inaccurate it is. In all fairness it's still not a bad kit for the age it was released and lets face it. 1968 you just did'nt Google stuff to check it's acuracy !!!


On that note a very Merry Christmas to everyone, be safe be well and kick ass in 2015 !
On that note a very Merry Christmas to everyone, be safe be well and kick ass in 2015 !
Lucky13
Forum Mascot
Sorry 'bout that. I will clear out my mail box and let you know when to resend. I wouldn't post it in the open so to speak, there are weirdos on this forum.
That's weirdo profiling and I recent that!

Nice work!
Damn! Love your exhaust stains! How did you do it?
A4K
Brigadier General
Great work mate!
And you're right: we take information for granted, but so many things were unavailable even 20 years ago that are just a click away now.
And you're right: we take information for granted, but so many things were unavailable even 20 years ago that are just a click away now.
Airframes
Benevolens Magister
Very nice work indeed.
I, too, agree about the information supply - 20, and certainly 30 years ago, we were lucky if we could find one, probably expensive book, that had a cockpit photo we wanted. It would probably be the wrong 'Mark' for the type being modelled, but it would do!
Now, some modellers demand the exact type of rivet, and its spacing, and will hunt-out the info. I admit, even in the last two years, I've accumulated more books, photos and internet info, in that period alone, than I had done in the entire previous 30+ years !
Crimea_River
Marshal
That code looks bogus to me, as does the swastika size and placement. The code N9 did exist in the Luftwaffe and was assigned to Flugbereitschaft Norwegen (Air Service Norway). So far I've only found record of Ju52's He111's and a Fi156 in this unit but would have to dig deeper. The other thing not right is that the 9 is highlighted in the photo whereas, normally, the aircraft letter would be the one highlighted. In this case it should have been the N following the Balkenkreuz.
And I agree that the perspective for the lettering looks wrong.
And I agree that the perspective for the lettering looks wrong.
- Thread starter
- #75
Bustedwing
Tech Sergeant
Well I generally try to be as accurate as possible I don't have a problem with winging it as it were. I'm trying to find an accurate code for the lettering. No decal sets available from anywhere that I can find.
The xhaust stains were air brushed. First a slightly lightened rust, then black and then a shot of white. I used Testors modelmaster paints.
The xhaust stains were air brushed. First a slightly lightened rust, then black and then a shot of white. I used Testors modelmaster paints.
Crimea_River
Marshal
Suggest you do an image search on Google to see what works for you. The He177 carried many camo schemes so you'll need to narrow it down to the one you have unless you want to repaint.
- Thread starter
- #77
Bustedwing
Tech Sergeant
Internet searched to death ! Think I will go with making my own stencils. On that note a very Merry Christmas to you all. Build is on the back burner for a bit. Cheers
Graham !!
Graham !!
A4K
Brigadier General
As an eBay Associate we earn from qualifying purchases.
Good work so far!
- Thread starter
- #80
Bustedwing
Tech Sergeant
So here it goes. After farting about with printing decals it never occured to me that a printer can't print white and I should have bought the clear decal paper instead of the white stuff. Epic fail on this note, hours wasting resizing stuff I did with MS paint only to find out I have the wrong decal paper. It did'nt print very good and the decal film is too thick...and white.Forging ahead I decided to just make stencils and spray the markings on. I photo copied the decal sheet and cut out the lettering. Then I painted the backside of them with contact cement. When it was dry and just a bit tacky I applied them to the model and sprayed them. Pretty happy with how it turned out. Probably not %100 accurate but it looks right.....well according to the Airfix instructions of 1968.


The next task at hand is to try and improve the appearance of the props, the ones in the kit are just plain goofy looking !
The next task at hand is to try and improve the appearance of the props, the ones in the kit are just plain goofy looking !
Users who are viewing this thread
Total: 1 (members: 0, guests: 1)