Crimea_River
Marshal
Good work Wayne.
Follow along with the video below to see how to install our site as a web app on your home screen.
Note: This feature may not be available in some browsers.
Ad: This forum contains affiliate links to products on Amazon and eBay. More information in Terms and rules
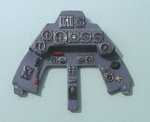
Nice IP Wayne.
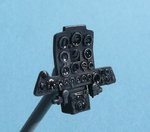
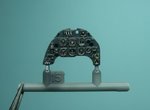
Do you do a light buff when you paint the c-pit side panels for highlights?
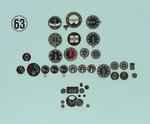
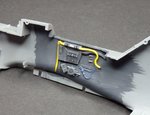
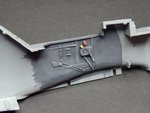
Very nice, Wayne. help me better understand what you mean by cutting out the instruments. I am very curious about that idea for a couple of 1/32 kits I have in the stack.