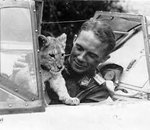
**** DONE: 1/48 Bf 109E-4 Von Werra - Defense of Britain/Atlantic.

Ad: This forum contains affiliate links to products on Amazon and eBay. More information in Terms and rules

Nice work on the guns, and the flash suppressor looks fine to me.
Regarding the spinner back plate, on closer inspection, if that is another colour, and not just dust and dirt from the hop field (or paint abrasion from impact), then I think it's more likely to be overspray from the upper-surface camouflage, especially if this particular aircraft was originally in the earlier RLM 70/71 upper colours. If that's the case, then it probably is RLM 02, the demarcation between that and the RLM 70 matching the line of the upper surface colours.
 
Very nice work John. As for masking the exhaust, I did a P 40 a while back and had the same issue because the exhausts were the fishtail type. I ended up painting the area of the fuselage slides around the exhaust hole first then installed the exhaust and masked it as best as I could, that way any area that I had over-masked was all ready painted
 

Attachments

  • image.jpg
    image.jpg
    55.2 KB · Views: 105
Last edited:
Thanks for the tip Glenn! I did that on my Hobby Boss Dora and it worked reasonably well. I'm going to try and just mask the exhausts and if it doesn't work, I'll just re-shoot them.

A little more work this morning. Here are the wheel wells and landing gear painted and weathered. Looks like I need to touch up the gear legs at the base. The brake lines are straight plastic pieces supplied by Eduard. I added the black loops on the end.
IMG_9311_zps1ktaegqj.jpg


The wheels have been painted and weathered too. Each wheel is three pieces... the tire, the front wheel and rear wheel plate.
IMG_9313_zps9eofc8o7.jpg


The black quadrants have been painted onto the spinner nose and the prop assembly is glued together.
IMG_9315_zpsjprxdays.jpg


Moving onto the fuselage... With nothing glued on, I dry-fit the engine into the two fuselage halves and laid the engine cowl and gun breech cowl to see how things fit. With the engine in place, the engine cowl was not sitting down all the way. Looking at the top edge of the engine block, I decided to shave off the most likely obstructions.
IMG_9317_zps5vfabsxw.jpg

IMG_9318_zpsnyzk3s3j.jpg


That seemed to do the trick. This is a fix that I have not read about in other builds online but based on how the inside of the engine cowling is molded with the gun troughs, I don't see how you could get the cowling to fit without doing this.
IMG_9319_zpsi1jovkw1.jpg


Being satisfied with fit, I glued the fuselage halve together, fusing the cockpit assembly in place at the same time with Tamiya Extra Thin cement. The gun breech bulkhead is not yet glued in and can be removed from the top opening.
IMG_9320_zpsuoct0un9.jpg


A view into the cockpit area with the IP, and gun breech cowling in place.
IMG_9322_zpspqyudmbi.jpg


And finally, the wing gun was redone. The conical barrel shroud was glued on using plastic cement and not CA glue to let me adjust the positioning. Not perfect but at least the conical shroud is centered.
IMG_9323_zpsxmepyapu.jpg
 
Last edited:
And yes, I noticed the broken exhaust stack as a result of inserting and removing the engine assembly! It's been fixed of course!
 
Thanks guys! The fishing trip was a success and now my freezer is stocked with fish. I'm a little sore after 2 straight days of offshore fishing but I'm hoping to jump back on the Emil shortly.

IMG_9342.jpg

IMG_9372-3.jpg
 
Sushi at John's place!

That happens tonight actually! Any of you in the San Diego area are more than welcome to join us!

Got a little bit more work done on the Emil these past couple of days that I can report on. The underwing radiators have photoetched grills that have been glued on and painted.
IMG_9406_zpsscpjsn70.jpg


The wing guns are supposed to be installed at this point but I'm leary of having those barrels sticking out during the remainder of the construction so I elected to cut off the bases of the guns and glue them in as backstops so that I can install the guns after all of the painting.
IMG_9408_zpstwkqakjw.jpg


The exit edge of the radiators are thinned down a bit...
IMG_9407_zpsncp3uc88.jpg


And the wings are glued together. I'll set that aside to let dry.
IMG_9409_zpswgvjb6gb.jpg


Now I'm going to cobble together the front end cowling pieces. This is a multi-panel assembly that I've been pre-fitting as much as I can to make sure that everything will fit correctly and with the smallest of gaps. The fit of the cowling will affect how the canopy pieces sit so I have to pre-fit these as well.
IMG_9410_zpstpkhzato.jpg


I feel comfortable enough to start fusing individual pieces into place using Tamiya Extra Thin cement. I don't know how I lived without this stuff in the past! I started on the starboard square panel and then the starboard side of the big engine cowling. Using finger pressure, I try to make sure all of the edges are square. I let that dry a bit but not completely because I want to be able to adjust these pieces ever so slightly, if necessary.
IMG_9411_zpsd0u2w0w1.jpg


Jumping over to the port side, I use Tamiya Extra Thin to secure the port square panel and port side of the engine cowling. The supercharger inlet on the square panel has already been glued and sanded in place prior to this step. Finger pressure is used to hold the pieces in place in the correct place until the cement has done its thing. It usually only takes a few minutes for the cement to form a good bond.
IMG_9412_zpszqukcrn0.jpg


Now the gun breech cowling is attached to the top of the fuselage. Again, I take it one side at a time, making sure the port edge of the cowling is sitting correctly.
IMG_9413_zpsgjn7gcdw.jpg


Repeat for the starboard side...
IMG_9414_zpsbx1ljhfw.jpg


That turned our rather nicely! I don't see any obvious spots where putty is necessary... just minor cleanup is required. I've been extra careful with that delicate Revi 12 gun sight in place. I want to get the front windscreen over it as soon as possible.
IMG_9415_zpscnjthwtd.jpg


Dry-fitting the canopy pieces to make sure it all fits. I see that the rear clear piece is sitting up a bit so I'll have to keep an eye on that to make sure that it sits properly.
IMG_9417_zpsfkm8cegb.jpg


That's it for now! Time to cut up some fish!
 
Nice work on the fiddly stuff John. I'm using Ambroid Proweld right now, but I prefer Tamiya, though both have their uses. I still use Testors tube glue to join cockpit parts together.


Geo
 

Users who are viewing this thread

Back