Airframes
Benevolens Magister
I agree about the lack of mottling, as mentioned. Now that I've looked again at the 'scrapyard' photos, I also agree that the darker tones are general 'wear and tear' dirt deposits.
Follow along with the video below to see how to install our site as a web app on your home screen.
Note: This feature may not be available in some browsers.
Ad: This forum contains affiliate links to products on Amazon and eBay. More information in Terms and rules
That's a real beaut John !
I didn't know about the fogging with Tamiya cement (which I've only recently started using), so that's good info.
Due to lack of articulation in my hands, I now tend to fit clear parts without cement - just in case of slips and cement damage !
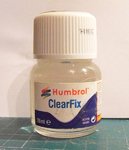
Instead, I use either PVA, or Humbrol Clear Fix, which allows time to position the part(s) without risk, and sets very well. Also, if you do need to remove a clear part for whatever reason, it can be done without damage, and then just peel off any residue, and start again.
You should put a P-47 next to them!Thank you Steph! Here are my two GB builds together. It's interesting to note the comparative sizes of these two planes. I never realized how small the Bf was and was surprised to find out that the Spitfire is the bigger airplane.