dneid
Staff Sergeant
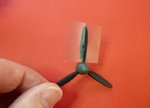
Damned nice work, Peter. Hope you get her in on time, but, lets not mess her up at this point. That would be a heartbreaker indeed.
Follow along with the video below to see how to install our site as a web app on your home screen.
Note: This feature may not be available in some browsers.
Ad: This forum contains affiliate links to products on Amazon and eBay. More information in Terms and rules
Looks great Peter. Hope you get it in on Sunday but certainly don't ruin a great job by rushing it!
Damned nice work, Peter. Hope you get her in on time, but, lets not mess her up at this point. That would be a heartbreaker indeed.