- Thread starter
- #161
Crimea_River
Marshal
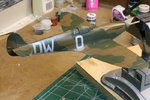
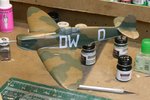
Thanks everyone.
Glenn, yes, I plan to use Future. Might consider brushing it on like you did but spray worked fine in the past.
Glenn, yes, I plan to use Future. Might consider brushing it on like you did but spray worked fine in the past.