- Thread starter
- #41
N4521U
Plastic Pirate
Thanks guys. I plold along.
Looking back at the F4U-1D start to finish buyild of Totalise, I am using his as a "model", play on wirds. Bad eh!
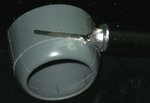
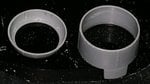
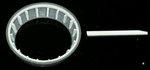
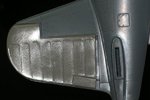
I noticed what he had done to the front cowling. The 18 little gussets at the front roll. Being as how I think I have spent enough of my hard earned cash on this plane already, I did choose to do some more scratch stuff. The Vector aftermarket cowl kit is about $25 UA but it a beauty!
So I used a PE saw blade, dragged it around the outside and gradually cut thru at the seam. Sanded both surfaces to smooth them. I used some swuare stick about .75mm and glued the around the inside to make the flage. Another PVC stick was trimmed at a slope on one side and cut off at 4mm long. Then glued the 18 of them inside the front cowl. A little more crude than the Vector stuff, but then ... So I've got all that I'm gonna do to the cowls done.
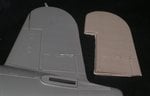
Been working on the gun bay, the ailerons, wings and flaps. I sailor on.
Looking back at the F4U-1D start to finish buyild of Totalise, I am using his as a "model", play on wirds. Bad eh!
I noticed what he had done to the front cowling. The 18 little gussets at the front roll. Being as how I think I have spent enough of my hard earned cash on this plane already, I did choose to do some more scratch stuff. The Vector aftermarket cowl kit is about $25 UA but it a beauty!
So I used a PE saw blade, dragged it around the outside and gradually cut thru at the seam. Sanded both surfaces to smooth them. I used some swuare stick about .75mm and glued the around the inside to make the flage. Another PVC stick was trimmed at a slope on one side and cut off at 4mm long. Then glued the 18 of them inside the front cowl. A little more crude than the Vector stuff, but then ... So I've got all that I'm gonna do to the cowls done.
Been working on the gun bay, the ailerons, wings and flaps. I sailor on.