**** DONE: Fw190A-5 USAAF 325FG - Captured / Aircraft in Foreign Service GB

Ad: This forum contains affiliate links to products on Amazon and eBay. More information in Terms and rules

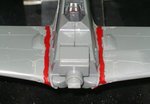
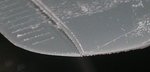
Not sure which looks better the model or the jig.......................just kidding mate
b0204.gif


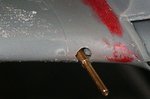
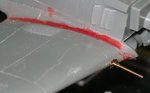
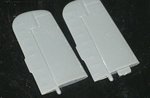
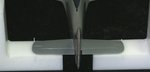
It's coming along just great.
 
Just call me Spiffy Bill!

Been slacking last couple of days. Sorry.
Will start on the seams today.
 
Thanks Y'all..........

Got a bit to show. I get to this stage and get a little skiddish about the nest step. So I been cleaning things up.
The seams at the wings, had to enlarge the gun hole on the wings so I can install After painting. Made the little flashing plate to cover up the big hole, see previous post! Didn't like the big fat ailerons, so I thinned them out and cleaned up the hole for the tail wheel.

Next the tail feathers.

So there!
 

Attachments

  • 12a filled wing seams.jpg
    12a filled wing seams.jpg
    72.2 KB · Views: 81
  • 12b gun holes.jpg
    12b gun holes.jpg
    72.9 KB · Views: 93
  • 12c seams gun flashing.jpg
    12c seams gun flashing.jpg
    68.5 KB · Views: 83
  • 12d fat ailerons.jpg
    12d fat ailerons.jpg
    71.7 KB · Views: 80
  • 12e thinned.jpg
    12e thinned.jpg
    67 KB · Views: 81
  • 12f tail wheel hole.jpg
    12f tail wheel hole.jpg
    67 KB · Views: 79
Nope, I punched it from leftover PE stuff. Fashioned it after the picture from the previous post. Sure solves a heap of fit problems. I didn't want to have to mask the pesky guns for painting. Same with the tail wheel, is why I cut part of the mounting socket out, so I could get it in After the fusey is glued together. Just hate masking.
 
You guys are too kind...........

I been doing some little stuff, and not so little.

I cut the tabs off the tail feathers. It's so difficult to get both surfaces Flat with the tab in place. So........... cut the bl00dy thing off and get a flat file on it so the surfaces mate flat. The next shot is the elevators jigged up flat and true on my 18mm thick plastic angle blocks, (I cut them at work). Put a piece of PVC rod under the tips, cuz they're tapered, and would point Down if they were flat on the blocks. I'll have to let them dry in this position cuz without the tabs, it's just two flat surfaces together.

I made the port and starboard clearance lights, out of tooth brush handles. Filed bits to 0.6mm rounds. I'll glue them in place after painting, I said I don't like masking. Still trying to figure out how I can fit the engine cowl on in one piece over the engine. Mainly because it's orange, the fuselage is blue. I hate masking!
 

Attachments

  • 13a tabs off.jpg
    13a tabs off.jpg
    70.5 KB · Views: 71
  • 13b tail jig.jpg
    13b tail jig.jpg
    62.5 KB · Views: 75
  • 13c strbrd light.jpg
    13c strbrd light.jpg
    68.3 KB · Views: 79
  • 13d port light.jpg
    13d port light.jpg
    71.4 KB · Views: 67

Users who are viewing this thread

Back