Crimea_River
Marshal
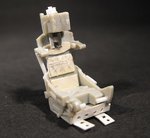
Continues to impress.
Follow along with the video below to see how to install our site as a web app on your home screen.
Note: This feature may not be available in some browsers.
Ad: This forum contains affiliate links to products on Amazon and eBay. More information in Terms and rules
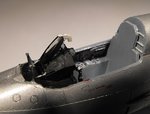
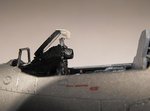
This has to be made, and fitted between the screen and the 'scope, then transparent side screens added to each side of the main screen. Could be a bit fiddly.....