- Thread starter
- #21
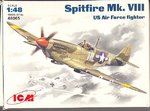
Airframes
Benevolens Magister
Thanks Max, nothing like getting the information from the original source!
I'm always dubious about photo captions and profile interpretations, unless there is definite proof. I even noticed in one of the copy pages you sent me, from the RAF Museum, that a caption to one pic stated a code letter was 'D', when it was 'P', and it looked like the caption might be wrong about the serial number too!
I'm thinking that some text / captions might be dictated, and then mis-heard by the typist, as it seems rather common to have such errors, and transposed numbers etc.