Good stuff Terry......and us young blokes need to stick together...

Navigation
Install the app
How to install the app on iOS
Follow along with the video below to see how to install our site as a web app on your home screen.
Note: This feature may not be available in some browsers.
More options
You are using an out of date browser. It may not display this or other websites correctly.
You should upgrade or use an alternative browser.
You should upgrade or use an alternative browser.
**** DONE: Spitfire MkVIII, 136 Squadron RAF, Burma, 1944, Commonwealth GB.
- Thread starter Airframes
- Start date
Ad: This forum contains affiliate links to products on Amazon and eBay. More information in Terms and rules
More options
Who Replied?Night Fighter Nut
Master Sergeant
Great start there Terry! Its always and education watching you guys work. 
- Thread starter
- #43
Airframes
Benevolens Magister
Thanks very much chaps. I hope to get most of the cockpit done tonight. Pics later - if possible.
- Thread starter
- #44
Airframes
Benevolens Magister
The first stage of the cockpit has been completed, with the areas where parts will be fitted masked, and some small details added from lead wire, copper wire, stretched sprue and plastic card. The seat has also been finished, but still awaits the rest of the harness, which will be made and fitted once the main cockpit assembly has been fitted into the starboard fuselage half, contrary to what is shown in the instructions.
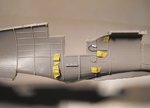
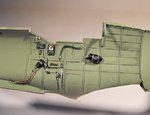
PIC 1. The port cockpit wall, with only the flexible 'pea' lamp and power lead fitted. The masking tape covers the areas for the main oxygen cylinders, electrical panel, throttle quadrant and, at the top, the area where the VHF radio remote control will be fitted, once made. The entrance hatch has also been removed, with the small 'prong' at the front top of the opening being the locking latch bracket, which is actually part of the moulding.
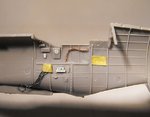
PIC 2. Starboard wall, showing the gun sight spare bulb holder and bulbs, the undercart pipework, IFF destruct panel, and oxygen tube. The masking here covers the locating pin for the undercart selector, and to the rear, behind where the seat frame and bulkhead fit, the mounting point for the pilot's oxygen bottle, which has been made from shaped sprue and plastic rod. The white areas are gloss enamel paint, where the top coat of black will be scratched to reveal lettering etc later.
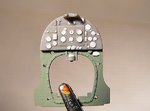
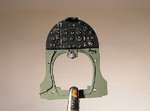
PIC 3. the first stage of preparing the instrument panel. All areas where white lettering, instrument needles etc are needed have been gloss enamelled. The bottom half of the frame will be masked, and the panel sprayed in matt black acrylic which, when dry, will receive the 'scratch treatment', and the other relevant colours.
The cockpit area is now being sprayed, and I should have the pics of the finished details sometime tomorrow.
Thanks once again for your complimentary comments and interest.
Attachments
N4521U
Plastic Pirate
The little "pea" light is cool. I wondered how that could be done. Do you mind if I do something similar to my Vb/c?
I made an oxygen hose from wire wrapped in thread, super glued it down and had to sand off the fuzz. Still doesn't look too daggy.
The cockpit casting looks so similar to my Tamiya Vb, could they be the same mold??? Now I understand how you do your instrument panels. Makes too much sense.
I made an oxygen hose from wire wrapped in thread, super glued it down and had to sand off the fuzz. Still doesn't look too daggy.
The cockpit casting looks so similar to my Tamiya Vb, could they be the same mold??? Now I understand how you do your instrument panels. Makes too much sense.
Crimea_River
Marshal
Looking good Terry. One thing I did was remove the box on the stbd side between the bulb holder and the signal switch box. I hadn't seen it in any references. Do you know its function?
Bill, I think that, while ICM prodcued their own molds, I suspect that they copied the parts to be replicated from the Tamiya kit because the resemblances, including errors, is uncanny. If they used Tamiya's molds, the fit would be way better than it currently is.
Bill, I think that, while ICM prodcued their own molds, I suspect that they copied the parts to be replicated from the Tamiya kit because the resemblances, including errors, is uncanny. If they used Tamiya's molds, the fit would be way better than it currently is.
Last edited:
- Thread starter
- #47
Airframes
Benevolens Magister
No problem about the light Bill, it ain't a secret black art! As for the ICM mouldings, there's a possibility that some info has been shared with Tamiya, although the separate parts are different. But the ICM P51B, for example, is almost a direct copy, with the main parts fitting each other, although there are better, separate cockpit and other parts.
Andy, I'm not sure about that box. I was going to cut it off, but then I saw it on one example of either a late MkIX or MkXVI, so left it. The part which I'm unsure about is the remote contactor unit, as you know, moulded as part of the fuselage. I haven't seen it on late MkIXs or, AFAIK, the MNkVIII. But, it's staying put!
Just thought - I've got the Pilot's Notes, so I'll have a look to see what the box is, if it's there.
Vic Balshaw
Major General
Advancing nicely Terry.
imalko
Chief Master Sergeant
Looking good Terry. Great work.
- Thread starter
- #50
Airframes
Benevolens Magister
Thanks Vic and Igor.
Andy, that box isn't shown in the photos in the pilot's notes, although the remote contactor is! Still don't know what it is though, although there are other signals - related fittings in the same area on the MkIX, and I suspect the MkVIII too, so it doesn't look out of place.
Anyway, the cockpit area is almost complete, and just needs a bit of tidying, and then the seat and harness fitted, along with the rudder pedals and instrument panel. Some of the added items are fairly basic, if not crude, but once the fuselage is joined, not much can be seen in great detail, so it seems pointless spending time and effort 'going to town' in this scale, when an impression of equipment and fittings will work just as well.
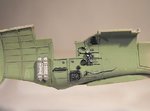
PIC 1. Shows the port side, with the scratch-built items being the VHF radio remote control, at top right, the 'flexible' lamp below it, and, below and left of the trim wheel, the rudder trim tab adjuster, made from a piece of plastic rod. The electrical services panel provided in the kit is shown located immediately below the throttle quadrant in the kit instructions, but all references I have seen show this 'box' further back, hence the positioning of this item below the rudder trim wheel; the 'cable' running forward from the box is a length of lead wire, painted in silver grey. Note that the main oxygen tanks need retouching, having got a bit 'battered' due to handling!
PIC 2. There's a bit of lighting reflection on this shot, causing some of the detail to shine a bit, but this is how the starboard wall looks after painting. The pilot's oxygen bottle started out as a reasonable shape, being sanded from a length of sprue, but it fractured whilst drilling the hole for the plastic rod 'valve' !
Fortunately, it still looks like a cylinder when viewed from above, the only way it will be seen, through the distortion of the open canopy and rear glazing, once the fuselage is joined. The plumbing from the undercart selector is again lead wire, painted a copper shade, and is loose at the ends, ready for folding around the instrument panel bulkhead frame once fitted. The selector lever had to be cut away and re-positioned, as it was moulded in the 'Up' position !
PIC 3. The 'scratch treatment' on the instruments was partly successful, although again lighting reflection off the dials, glazed with 'Klear' (Future) makes the effect difficult to see clearly in this shot. The plastic used in ICM kits is very soft, so some of the underlying white gloss enamel paint lifted when carefully scratching through the acrylic matt black. But again, once in situ, the angles for possible viewing obscure some of the detail, so I think the panel will be more than adequate.
Thanks again for your interest, and I'll post another update as soon as possible. I've got to get some art work finished for a Christmas card design for a friend by the end of this week, and then print the cards, so that's got priority at the moment. Bah Humbug!
Attachments
Crimea_River
Marshal
Looks the biz Terry!
BTW, a quick Google of "remote contactor" reveals that it was a clockwork transmitter that broadcast a signal for 14 seconds of every minute as part of an IFF system identfying friendly aircraft to ground controllers.
BTW, a quick Google of "remote contactor" reveals that it was a clockwork transmitter that broadcast a signal for 14 seconds of every minute as part of an IFF system identfying friendly aircraft to ground controllers.
Last edited:
Night Fighter Nut
Master Sergeant
Looking great Terry. 
- Thread starter
- #53
Airframes
Benevolens Magister
Thanks Andy and Bill.
Andy, I knew what the remote was for, it was the other box thingy I can't identify, but I think it might be a case for spare fuses - maybe? Can't find the bl**dy pic I saw it in now, but the shape and the 'X' stamping on it were the same.
Andy, I knew what the remote was for, it was the other box thingy I can't identify, but I think it might be a case for spare fuses - maybe? Can't find the bl**dy pic I saw it in now, but the shape and the 'X' stamping on it were the same.
Vic Balshaw
Major General
Nicely done Terry, as usual, inspirational.
- Thread starter
- #56
Airframes
Benevolens Magister
Thanks very much Max and Vic. I should get some progress done over the weekend, with the cockpit finished and the fuselage hopefully joined, then on to the wings.
- Thread starter
- #58
Airframes
Benevolens Magister
Thanks very much Jason.
I woke up at 03.00 hrs, couldn't get back to sleep, so got the cockpit finished and the fuselage up to the instrument panel joined.
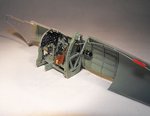
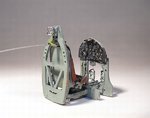
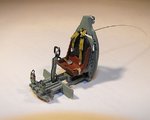
PIC 1. Shows the main cockpit assembly, with the rest of the seat harness fitted, the Bowden cable from the tail strap of the shoulder harness attached, and the 'can of beans' voltage regulator and the control column in place. The latter has had the electro-pneumatic gun firing hose added to the front, using lead wire suitably painted.
PIC 2. The cockpit assembly with the instrument panel in place. The kit rudder pedals had the rounded tops removed, and these were replaced with strips of foil, painted to represent the leather or webbing toe straps, needed for high 'G' manouvres.
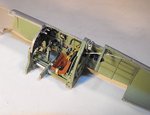
PICS 3 and 4. The cockpit assembly in place in the starboard half of the fuselage. The 'Bowden' cable has been cemented at the rear, in roughly the place where the real item would attach to the pully and anchor. Strips of plastic have also been cemented in place, to aid in alignment when the fuselage halves are joined.
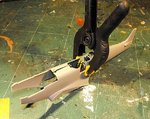
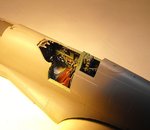
PIC 5. The rear section of fuselage has been cemented, and clamped around the rear cockpit frame to fuselage joint. The front section will be dealt with later, using the same method as Andy used on his ICM MkIX.
PIC 6 A general view into the completed cockpit. The gun sight will be added near the end of construction, as will the top brace, under the rear cockpit glazing, this being made from plastic strip.
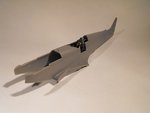
PIC 7. What the model looks like so far.
So, next job is the wings, although I might attempt to add the curve of the lower fuselage to the bottom of the cockpit, if the plastic card will fit without fouling the inner surface of the wing.
Thanks once again for your kind comments and interest, and I'll post some more pics over the weekend.
Attachments
-
 Bob Cross build 059.jpg93.5 KB · Views: 175
 -
 Bob Cross build 056.jpg48.3 KB · Views: 179
 -
 Bob Cross build 053.jpg41.6 KB · Views: 153
 -
 Bob Cross build 046.jpg42.2 KB · Views: 170
 -
 Bob Cross build 041.jpg39.2 KB · Views: 171
 -
 Bob Cross build 064.jpg42.5 KB · Views: 158
 -
 Bob Cross build 060.jpg26.6 KB · Views: 179
Vic Balshaw
Major General
That is beautiful Terry
Users who are viewing this thread
Total: 1 (members: 0, guests: 1)

