Super detailing Guillow's P-51D Mustang

Ad: This forum contains affiliate links to products on Amazon and eBay. More information in Terms and rules

Ref. Big John Landers: got to know him when I was aces secretary. He screened some of his color combat film, and the strafing was REAL impressive. Well recall one scene chasing a vehicle down a narrow road. John's rounds made the 90 degree left turn and overtook the car/truck. When I asked how he did that he said, "Rudder, son. Lots of rudder." But he had to be precisely cross-controlling to keep the ball centered. Those who flew with him said he taxied at half throttle and flew at full throttle...
 
OMG! Talk about missing the Forest for the Trees.....

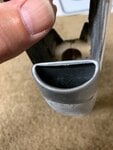
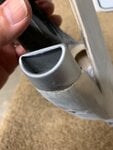
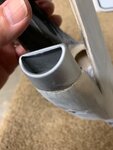
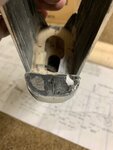
I was so absorbed in meshing the plastic radiator scoop to the model, I completely overlooked the actual shape of the inlet itself! Wow! Now I'm in a dilemma. Should I proceed to continue incorporating the plastic scoop, (somehow) alter the shape of the plastic scoop to make it more elongated, or do away with the plastic scoop and the wood structure and totally rework the belly scoop area? This is one for the books, gentlemen. I totally agree with everyone.
 
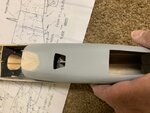
As you can see, I've adapted the whole underside of the fuselage to accept the plastic scoop as it is shaped now. I tried squeezing the plastic inlet (like I did with the canopy windshield) in the hopes that it would pinch itself to a more elongated shape. To some degree, it did just that, but at the expense of fitting to the rear support of the fuselage belly.

Wished I had seen this coming earlier gentlemen. I'm going to turn this one over in my mind for a couple of days and see if there are any alternatives to reworking the whole underside.

I sincerely thank: Spl Ed, Nuumann and everyone for this input.

To Mr. Barrett,

I'd love to hear more stories about John Landers. I would like to relate them to my daughter to whom this model will be given.
 

Attachments

  • P-51 belly scoop -model # 44.jpg
    P-51 belly scoop -model # 44.jpg
    271.2 KB · Views: 49
  • P-51 belly scoop -model # 45.jpg
    P-51 belly scoop -model # 45.jpg
    314 KB · Views: 47
Reproducing that scoop shape won't be easy. The only thing I can think of is to make the proper shape out of wood, insert the plastic part and then try heating it with a hot hair dryer so that it melts over the wood. That is fraught with risk though.
 
BTW.. some of two-part Milliput Standard Yellow Grey Epoxy Putty ( or any similar two part putty ) at the red marked area. Then same of sanding for getting the correct shape and voila.

P-51 belly scoop -model 45.jpg


milliput-standard-yellow-grey.jpg


putty.JPG
 
Reproducing that scoop shape won't be easy. The only thing I can think of is to make the proper shape out of wood, insert the plastic part and then try heating it with a hot hair dryer so that it melts over the wood. That is fraught with risk though.

I agree that melting the plastic over a wooden form is definitely fraught with risks. I'm visualizing that if I were to pursue this course, the end result would be a semi-flat underside fuselage leading up to a rounded belly forming the beginnings of the belly scoop, then drastically tapering to an elongated inlet.

Outside of altering the entire forward end of the fuselage underside, not sure if all this is feasible. I'll try out Wurger's ideas & some of my own on some scrap wood & see if it's "doable." What I'm seeing what should've been done in the first place, is to have the flattened fuselage underside extend to the inlet of the belly scoop.

What I actually did, was to allow the rounded former to stay "as is" & I simply followed the planking up to that rounded shape.

Better still, I should have altered the shape of the former that I painted black to a more elongated shape leading up to the inlet. Then everything would be more consistent. Oh boy!
 
See if you can gently heat the scoop and using different dowel sizes, stretch the opening to the proper shape. Guillows will sell you parts, for repairs, and it is cheaper than buying a complete kit. Order an extra couple of scoops for practice. You can always use the plastic scoop for it's dimensions and reproduce the proper shape in balsa. We have seen your work and we know you can do it.
 
Spl Ed,

Thank you for those wonderful words of: suggestions, encouragement & a vote of confidence. I'll definitely take you up on those ideas. The application of heat along with the use of dowels to stretch the opening to more of an elongated shape really has a ring of logic.

Based upon that, my guess would be to create a duplicate former of the belly scoop to which I can slip the plastic inlet over. That way, I can retain the original shape needed while heat-treating the inlet portion with dowels. This duplicate former would be made out of hardwood to reduce any susceptibilities to heat.

I'm thinking as I write this. Stopping short of having a volunteer to help hold the wood-plastic inlet piece combo, I could also fabricate a long wooden stick to be glued to the backside of the (duplicate) wood former. The plastic inlet would then be securely placed over the wood former/stick. Then I could place the whole assembly in a vise. The vise would serve as an extra pair of hands holding the assembly in place while I first apply heat (which means my hands are safely away), then after the plastic has been softened, I can then use both of my hands with dowels placed inside the "mouth" of the inlet & gently pull apart.

I'll probably have to take incremental steps in heating the plastic as I have no idea about it's melting threshold & potential flammability.

Hmmmm, I could probably (still thinking as I write this) practice on some scrap plastic that is left over from cutting the inlet free.

I'll also first, make a wood version of the whole inlet to use as a template in case the heat treatment doesn't pan out. Great ideas!

It's really great to have people "know" each other from a half-world away from viewing their previous works & just from the contexts of conversations being exchanged over a period of time.

Thank you!

I'll be visiting my daughter this weekend as she's having a short surgical procedure & I want to be there for support. She's also whom I'll be handing over the Mustang (Yikes!). So I'll be trying out the suggestions next week. However, should you (we) brainstorm more ideas, I'll be using my new iPhone to keep in contact.
 
It should be possible to heat-form a new scoop inlet, in the same way as moulding a canopy.
However, the existing plastic part could also be modified, by cutting out a section, re-filling this with plastic card (or perhaps balsa sheet, although plastic would be better), and then creating the curves and lip with Milliput.
Using Wojtek's adapted photo to illustrate, the yellow lines show the approximate area where the cuts should be made, The black line indicates the forward edge of the new plastic card insert.
Once the new insert has fully set, it can then be blended in, using Milliput, to create the required shape / profile, with final sanding and polishing creating a seamless fit.


P-51 belly scoop -model 45.jpg
 
Good suggestions. I don't have the means to create a completely molded inlet. However, I was considering a couple variations of your ideas. The first, would be to stretch out the inlet itself with the previously discussed dowels -although the one disadvantage is that the lower lip is already recessed back making the stretching of the whole thing a potentially two-step affair with both spreading & then pulling the lower lip forward.

Obviously there's more risk involved with plastic being "asked" to stretch in different directions.

The idea of having a piece of plastic inserted into the section outlined as suggested really has merit & worth consideration. Very practical & within both my capabilities & my limited tools of a small apartment.

Hey wait a minute. Your ideas just fired off my imagination! How about this?

Let me bounce this off of you guys. What if I create a template out of relatively thick balsa sheet. This template would look like it was pulled out of a lip to the inlet that is of correct size & elongated shape. It would be exactly the same size & elongated shape of the inlet needed to fit the model.

From this balsa template I wrap around at least two strips of plastic. Each laminated together. The laminations will help hold the plastic to the shape of the template. Let's say this strip is about an inch wide to account for any cutting & recessed lower lip. When the glue dries the strips would be removed from the template. The plastic strips then ends up looking just like the lip to the inlet. I then cut away the "old" lip & replace it with the "newly created" lip. Or simply cut away portions of the lip as outlined in your suggestions & replace the lower lip.

Does what I just wrote make sense?
 
Why not? It's worth a try. If it works, you have developed a new technique, if it doesn't, you have lost only time and learned what won't wok.
 
That might work, and as mentioned, if it doesn't, then nothing lost.
However, if you're going to go to the trouble of making a template, you might as well try moulding a new scoop.

Make a pattern (of the front of the scoop, about the same overall size as the kit part) out of 'solid' balsa, and include a 'handle' with which to grip it, seal the grain with the varnish / talc mix and, when set, give it a couple of coats of gloss varnish, in order to have a smooth, glass-like finish.
Make this pattern very slightly smaller than the required finished part, to allow for the thickness of the plastic to be used for the moulded part.
Using the pattern as an outline guide, draw the shape onto a sheet of fairly thick balsa, and cut out this shape to make a female mould. This will need to be made so that the front end of the scoop pattern can be pushed through the hole easily, to form the basic shape of the 'chin' of the scoop.
Now firmly fasten a sheet of plastic card onto the balsa sheet former, and gently heat this under a cooker grill, or over a hob, until the plastic becomes soft and slightly floppy. Move the balsa sheet in a circular motion whilst heating, keeping it around four to six inches from the heat source.
Then quickly push the balsa block pattern through the plastic over the female mould, in one, smooth action, which will form and set rapidly, and then withdraw the scoop pattern.
Remove the moulded plastic from the balsa sheet, and trim to the required shape, taking care when cutting to create the open 'mouth' of the scoop intake.
You should now have the basic shape of the front of the scoop, which can be trimmed to fit the fuselage, and the required curves of the lip can be created with Milliput and blended-in.
It will probably take two or three attempts to get the required part, but you may be lucky first time. I've been using this technique for nearly fifty years, and I guess practice helps, but I normally get it right within one to three attempts.
The pics below show the moulds, carved from balsa, and the clear sheet used to mould a 1/32nd scale Mosquito canopy, which is roughly the same size as your scoop in 1/24th scale.
However, if you are unable to make one successfully, then it might be an idea to try the suggestion I made earlier.


Mossie 32 scale 042.jpg
Mossie 32 scale 043.jpg
Mossie 32 scale 045.jpg
Mossie 32 scale 046.jpg
Mossie 32 scale 047.jpg
Mossie 32 scale 049.jpg
 
Alrighty gentlemen,

I've been both busy on the model with all of the suggestions and ideas taken into account for the belly scoop and busy with Life in general that has taken me away from the Mustang project. It'll probably be a bit of both for awhile.

In the meantime, I've done an awful lot of thinking, experimenting, research, and tinkering around with the model, plastic scoop, and more. I've come to several conclusions, a variety of experiments and ended up with a compromise of a bit of everything. As suggested by our distinguished fellow members, it was pointed out that my original belly scoop was more rounded than the belly scoop on the full sized aircraft. A feature to which I simply overlooked (slapping my wrist here). Ah well, that's what this forum is about in the first place, eh?

I'll start posting soon of my trials and results, but I wanted to let everyone know that I've taken all suggestions into serious consideration. Firstly, I believe I mentioned in the past that I live in a very small apartment and thus, my access to a variety of tools and space is somewhat limited. In the same vain, I also do not have any access to an outdoor grill of the sorts. Thus, I had some boundaries that stood in the way of the suggestion I use a heat source for melting plastic sheeting and pulling down over a mold. With such a small kitchen and very limited space, taking a chance of melting a sheet of plastic over en electric stove or oven was, in my humble opinion, too risky.

I've melted plastic before (both intentional and by accident) and I'm aware that plastic has some rather unique properties. One of such properties is that plastic can go from just getting soft from the heat source to quickly becoming a burning mess in seconds. It was this in mind that I decided to forego the plastic sheet/pulled over a mold.

However all is not lost and I've actually managed to use a hair dryer instead. So, the suspense builds....
 
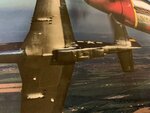
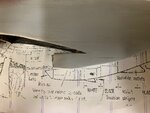
To begin, as seen from the photos of the real aircraft banking away from the camera plane, the model, and the comparison of the model with the scale drawing, it can easily be seen that the belly scoop is actually flat from the tail wheel all the way to the inlet of the belly air scoop itself. The pictures also show that the underside of the model is far too rounded to simply sand away and make it flat without compromising the structure. This was demonstrated in my previous posts where I sanded too far and into the structure which resulted in me having to add Spackling Compound to help seal up the exposed framework.

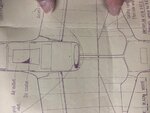
The second photo shows how far apart the two subjects are when comparing the scale drawing with the model. The model reveals it is too rounded and "thick" compared to the drawing which shows the belly outline as being somewhat slim in profile.

Without having to resort to the extreme of building an entirely new model, I decided a compromise of a little bit of everything will work.
 

Attachments

  • P-51 belly scoopA.jpg
    P-51 belly scoopA.jpg
    53 KB · Views: 44
  • P-51 belly scoop -model # 45.jpg
    P-51 belly scoop -model # 45.jpg
    314 KB · Views: 37
  • P-51 belly scoop -model # 68.jpg
    P-51 belly scoop -model # 68.jpg
    235.5 KB · Views: 36
First thing, I peeled off the black paper backing so have access to the model belly scoop area. As can be seen in this picture, there really isn't much margin of "play" for me to simply sand away the underside without touching the framework. Still, I decided at least some sanding is better than nothing at all. So I sanded as much as reasonably possible and the second picture shows this.

I also compared the underside of the model fuselage with the underside of the scale drawing and they really represent the extremes of flatness and roundness. I knew right here that there really isn't too much "wiggle room" for me to actually go completely flat without invasive surgery
 

Attachments

  • P-51 belly scoop -model # 76.jpg
    P-51 belly scoop -model # 76.jpg
    340 KB · Views: 38
  • P-51 belly scoop -model # 85.jpg
    P-51 belly scoop -model # 85.jpg
    290.1 KB · Views: 41
  • P-51 belly scoop -model # 86.jpg
    P-51 belly scoop -model # 86.jpg
    355 KB · Views: 37
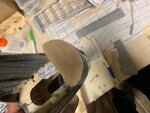
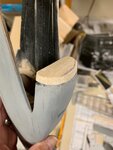
Still, (there's that word again) I decided some sort of carving of balsa block into a close approximation of the flat belly scoop would be worth an effort. My main focal point would be the inlet itself. I used the rounded former of the belly from the fuselage as my starting reference point. From here, I used a 1/4" thick balsa sheet cut to both shape and size of the former.
 

Attachments

  • P-51 belly scoop -model # 49.jpg
    P-51 belly scoop -model # 49.jpg
    276.7 KB · Views: 38
  • P-51 belly scoop -model # 50.jpg
    P-51 belly scoop -model # 50.jpg
    320.7 KB · Views: 43

Users who are viewing this thread

Back