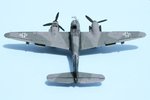
Ugh. I'm not looking forward to this build I'm doing. (Airbrushing camo)

Ad: This forum contains affiliate links to products on Amazon and eBay. More information in Terms and rules

[SC] Arachnicus;905598 said:
Do you have a bit more detailed instructions?

Detailed instruction?
Before you have the wings attached, take one wing and the 3 or 4 view section of the instructions to a copy machine. Reduce or enlarge so the wing fits the copied image. Then copy all of the views as they should all be the same in scale. Make several to waste.

Then cut the patterns out with scissors. Now use some of the flexible glue tac, make little thin snakes of it and attach to the underside of the paper about 1/4" in from the edge and attach to the plane in it's place. If you want it to look older, use a thicker snake to get the paper further off the plane.

You will have to fake in the joining pieces from wing to top of engine cowling and sides to the top of the fuselage. Don't get too bloody frustrated with this joining of shapes, it's just paper! When you got it like you want it, spray your brains out.

Give it a go, once you've tried it you'll get to understand what you need to do to get where you want it to be.

Good luck mate.
 
Somehow I think the point is being missed.

Not at all. If you want an even softening of an edge using a raised mask you must spray consistently at the same angle to the mask edge. If you don't you will get a variation in the edge.

Spitfires were sprayed in the factory using masks. That is why,from the factory,the demarcations are quite hard. The limits of overspray were regulated. I don't have the figures to hand on my computer but at 1/48 scale they are effectively a hard edge. That is why the method of applying paper masks works so well on British aircraft. Look how hard the demarcation is on this Hurricane.

hurri9-1.gif


A machine that had had its camouflage altered or repaired at a maintenance unit might not be so well defined but then it didn't have to pass the Air Ministry inspectors in the factory,just some stroppy Warrant Officer's appraisal.

German camouflage was applied differently at the factory and much more frequently altered at unit level. Only some very early fighter schemes had hard demarcations. A Bf 109 in the early RLM 70/71 upper colour might have a hard demarcation. When the RLM 70 was changed to RLM 02 this almost invariably became a softer demarcation. Later they left the factory with soft or even diffuse demarcations.

As far as the mottle goes it was initially applied in a bewildering variety of ways at unit level. Later it became a factory "standard" and it is often possible to identify from which factory an aircraft came by the style of the mottling. It was still often altered or "improved" by units post production. For example a highly thinned overspray of RLM 02 was popular with at least a couple of units operating the FW 190. They considered this to tone down the mottle and RLM 76 on the flanks of their aircraft.

I'm just explaining how the originals looked. A good reference is indispensible as there are no hard and fast rules,particularly for the Luftwaffe. How someone chooses to paint there model is entirely up to them.

Cheers
Steve
 
Last edited:
Very good points Steve. The overall appearance of the actual finish is often overlooked by modellers too. For example, Luftwaffe aircraft, generally speaking, were not dead matt in finish, but had a sheen which could be described as less than 'satin', but more than matt. Likewise, by the BoB and after, Spitfire finishes were not dead matt, but had a very slight sheen - more than matt, but less than semi-matt, and a lot less than Luftwaffe aircraft. Then of course there are the different types of 'black' used on RAF bombers as the war progressed ........
 
I've posted this before, but spraying on paper has it's own problems. Any restuarant will give you the styrofoam "left-over" boxes which come in all sorts of sizes, have inside and outside contours and they are plastic. Try doing your cammo scheme on a few of these until you get what you want
 
And good tips they were too Bill.

Yes they were. I didn't mean to belittle that at all.
It's just that aircraft finishes is a huge and interesting topic and there is no one way that will enable the modeller to represent all the variations. I've been airbrushing camouflage for many years and am continually trying to improve and develop my techniques to get the result I'm after,as I'm sure we all are.
In the end it's an artistic as much as a technical endeavour and as long as the modeller is happy with the result,that is all that matters. I'm always happy to try and show the variety of ways in which the originals were finished but would never attempt to tell anyone how to paint their model.
Cheers
Steve
 
Just a little something to add here regarding Practice - I too initially practiced on card/paper, but found that when I moved to plastic, things werent quite the same. The paper/card was a bit absorbant, which hid things like too thin a mixture or slight runs... I ended up using a piece of sheet tin, which I sprayed onto - it is far more representative of the type of surface you're spraying onto and after a while can be easily cleaned with Acetone/Thinners/Steel Wool...

Luftwaffe camo's are arguably the hardest, due to the bewildering variety of techniques you can find on a single a/c. For example (in the case of my love affair, Fw 190D), major subcomponents were often partly (or wholly) painted before assembly, so you have different widths of feather, different densities of paint, different mottles, etc. Then the factory would over paint (in part or whole) some of these things (often with a different feather width and style of mottle again). Units would apply thin, wide 'tones' over patterns, older markings would be oversprayed with soft edges, hard edges or even by brush in different colours and thene of course there was the bare metal sections AND depot/unit level maintence, which would do everything a little different again; as well as applying RLM02 or Red Oxide primer to places!

Its a lot of fun :)
 
For a practice surface old milk "bottles" which are obviously plastic these days work very well. You can even prime them with your favourite primer to replicate the surface that you will be spraying on to when you finally attack your model.

Much better than paper or card for the reasons the fellows above have already given.

Cheers
Steve
 
Yep, which is why I mentioned spraying on to painted plastic, to find the differences in mix ratios, flow rates, and how the paint reacts as it contacts the surface.
The reason for practicing first on paper or card, with kid's water colours, is to become accustomed to the workings and 'feel' of the 'brush, and to practice and become familiar with the way to best hold the 'brush and control it. The materials are inexpensive and less 'messy', so if needed, lots of practice can be had without the expense of 'real' paint, and without the risk of spoiling a model.
I also keep an old 'hack' model for trying out various paint mixes and techniques, using this to see what the result/technique is like when applied to an actual model.
 
Yeah the old hack model is never far from my Airbrush Either (and 18+ year Old F-16N); especially when I am spraying Clear Coats - I always make a pass over the falcon to make sure consistency and pressure is OK...
 
Cheaper yet: water with ordinary food coloring added. Water colors can contain poorly ground solids not a good thing for an airbrush.
 
Nothing to be nervous about. Although a relatively delicate, precision instrument, an airbrush is a tool, just like any other tool, and can be used with ease. OK, we've all harped on about practice, but this is logical - there are some people who think buying and using an airbrush will make them better modellers/artists/nail painters whatever, and that their models/paintings/nails will therefore be wonderful overnight. Well of course, that's not going to happen, and an airbrush is not an essential tool, more a convenience and, to an extent, a luxury.
What we have all been offering is some advice to allow you (or any other newcomer to airbrushing) to commence work on a model with at least a little confidence, brought about by practice and familiarity with the tool, rather than gross disappointment and frustration, after attempting to use the tool, straight out of the box, on a model.
Think in terms of only ever having used a hand drill and sand paper, then being given a variable speed power drill and a power sander, and told to make a wooden cabinet - without first finding out how the power tools work.
The airbrush is a similar thing - find out how it works, why it works, where it works and how best it works - in differing situations and requirements - the you'll have the confidence, and basic ability, to use it 'for real' when you come to tackle your first model paint finish with it.
The rest, like anything else, comes with practice and experience.
So - get stuck in !!
 
I'm almost at the point of putting CAmo on. I still have making, the light blue painting, then I will be ready for the camo on the wings and the motts on the sides. The specific paint job I am doing the camo on the wings and stabilizers seems pretty hard to see the difference between the two. it is two shades of gray, ( Model Master RLM 74 and RLM 75).
 
I was afraid of just that!!!!!

Too much information to digest.

Forget the details of what you have read. With all that has been written, just sit down, look at what you've got, what you want to have happen and just START planning.

You're not doing a heart transplant. When I was in the sign business, we referred to signs as "just a bird perch", put them up today and the birds just sit and sh!t on'em. Makes everything less stressful, puts it into perspective.

Grab a piece of paper and sketch in the order of what you think is right. As soon as you have done one, "the penny will drop" and you will catch on. When I was teaching adult education, Calligraphy, my mantra was "I hear and I forget, I see and I remember, I do and I understand". So don't let all this verbiage scare you off, just do it mate, you'll be okay.
 
[SC] Arachnicus;907325 said:
I'm almost at the point of putting CAmo on. I still have making, the light blue painting, then I will be ready for the camo on the wings and the motts on the sides. The specific paint job I am doing the camo on the wings and stabilizers seems pretty hard to see the difference between the two. it is two shades of gray, ( Model Master RLM 74 and RLM 75).

Those are a standard RLM camouflage combination and the lack of contrast between the two surprises many people.

I would suggest,on a model at least,lightening one or both of the colours. Certainly lighten the lighter colour (RLM 75) by adding a drop of two of white to your paint cup.

I'm in the school that thinks it is absolutely pointless to attempt to accurately replicate a colour from the 1940s and apply it to a scale model. Painting a model is an artistic enterprise,starting with a decent representation of the original colour is a good point of departure,but all sorts of factors come into play when trying to bring a small plastic model to life. Not least the infamous "scale effect".

I assure you that others will disagree,but that's all part of the fun :)

Cheers
Steve
 
If you look at the pic I posted of the 109 someone else did, the camo on the wings looks pretty simple and does not really have too many rounded bends or anything. I THINK I may be able to free hand it with some practice.
 
That's the spirit. By the way, the Model Master 74 and 75 look close in the bottle but, once on the model, have a suitable contrast. My Me 410 below used MM straight out of the bottle:
 

Attachments

  • 120527 6 oclock.jpg
    120527 6 oclock.jpg
    46.3 KB · Views: 63

Users who are viewing this thread

Back