1/32nd Scale 'Revegawa' Spitfire MkXIVc

Ad: This forum contains affiliate links to products on Amazon and eBay. More information in Terms and rules

Bloody brilliant Terry! That cockpit looks the business all closed up 8)

Scary cutting going on in this build though!! I'd never have the balls to attempt something like that. :notworthy:
 
Thanks Keith. It's not the cutting that's the scary part, it's putting the f****ng thing back together again, in the right order and shape!!
 
Got a lot more work done, but it doesn't seem as if there's that much to show for it!
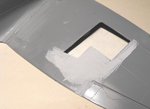
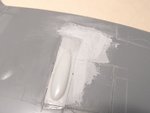
Most of the time has been spent filling and blending the fin extension, using Milliput epoxy putty, and doing the same to the other areas, on the tops and bottoms of the wing, where the Mk.V cannon bulges have been removed, and also around the opened gun bay on the starboard wing. Some other small filling jobs have been commenced, as has some re-scribing. Work has also started on the radiator baths, which were much deeper on the Mk.XIV, compared to previous Marks.
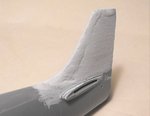
PIC 1. The fin extension has been filled and blended, and the first stage of sanding completed. A rough coat of grey enamel has been applied, which is intended to show up any rough areas, depressions or other blemishes. As you can see, there are still some areas that will need careful, and gentle attention. The grey primer is applied roughly, as it helps as a guide when lightly sanding, using fine grit wet and dry paper, the second sanding being done 'wet', in order to achieve a smooth finish without going too deep in the angled or curved areas. The primer also affords a degree of protection to those areas which don't require sanding, in this case, the rest of the fin!
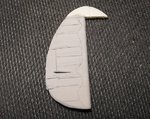
PIC 2. The rudder has been treated in the same way, with the filled area around the trim tab and its actuator, and the tail lamp housing, having been gently sanded. A further very light rub down will be completed, and then a further,thin coat of light grey primer applied, in order to blend-in the ribbing etc. ready for painting.
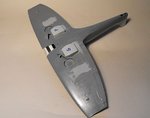
PICS 3 and 4. The areas around the gun hatches and blister on both wings have received the same treatment. Happily, there is very little in the way of blemishes or sink marks, and the those that are present can be filled with a varnish and talc mix, then gently sanded to match the surrounding areas. The lines for the ammunition hatch cover have been scribed on the port wing, and will be 'dressed' and finished later.
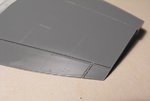
PIC 5. The ailerons on the Mk.XIV were moved inboard from the joint with the wingtop, to improve overall control and roll rate, and the line for the outboard edge of these has been engraved. The pic shows the starboard wing, with the first exploratory cut in the wrong place! This will be filled and sanded later - no major drama here! (I hope!!)
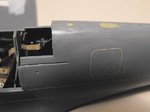
PIC 6. The port side radio hatch engraving has been filled, and the mounting plate for the radio mast, and the aperture for the anti-collison light, on the fuselage spine, have been removed and filled. The radio hatch on the Mk.XIV was on the starboard side, and a whip antenna was mounted further to the rear, near the re-positioned hatch. This antenna will be added towards the end of the build, after painting etc. A small hole has also been sunk, just below the rear canopy glazing area, to represent the oxygen tank filling valve.
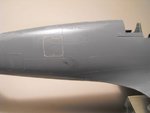
PIC 7. The outline for the new radio hatch has been scribed, and a small hole drilled for the whip antenna, just off centre to starboard, on the fuselage spine. The hatch has yet to be cleaned up and polished, to eliminate scratch marks.
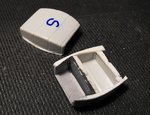
PIC 8. The two radiator baths from the Mk.22 kit have been 'deepened' slightly, by the addition of thin strips of plastic card, contoured around the upper edges, and also across the radiator front and rear matrix panels. These will also serve as the curved fillets, where the baths blended onto the underside of the wing. The Revell radiators are slightly short in overall length, but to be honest, this will not be noticed once in place, and a ruler would be required anyway, if some poncy 'rivet counter' wished to nit-pick on the scale size! I could have increased the overall length, by some 2mm,(64mm on the full-size aircraft) but to do that would have required quite a lot of work, and it would have been easier, and quicker, to mould new items!
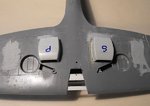
PIC 9. The radiator baths have been cemented in place. They were marked to indicate which one went on which wing, as I had contoured the plastic card to allow for the wing dihedral. Once they have fully set, they will be carefully blended to the wing.
PIC 10. A general view of the underside, showing the radiators in place, and the cannon blister areas filled, sanded and primed, as described above. The underside wing root joint, and the fuselage joint line, have also been attended to. The whole lot has yet to be cleaned, polished, and re-scribed where required.
Once all the sanding and polishing has been satisfactorily finished, the the first trial fitting of the engine and nose sections can be done, the most crtical part of the whole build. Get this wrong, and the whole conversion is $*@ed !!
Thanks again for you interest and kind comments.
Terry.
 

Attachments

  • Spit XIV Build 161.jpg
    Spit XIV Build 161.jpg
    20.9 KB · Views: 100
  • Spit XIV Build 149.jpg
    Spit XIV Build 149.jpg
    94.8 KB · Views: 103
  • Spit XIV Build 153.jpg
    Spit XIV Build 153.jpg
    25.6 KB · Views: 103
  • Spit XIV Build 156.jpg
    Spit XIV Build 156.jpg
    23.2 KB · Views: 100
  • Spit XIV Build 154.jpg
    Spit XIV Build 154.jpg
    20.2 KB · Views: 97
  • Spit XIV Build 163.jpg
    Spit XIV Build 163.jpg
    23.5 KB · Views: 106
  • Spit XIV Build 151.jpg
    Spit XIV Build 151.jpg
    26.8 KB · Views: 100
  • Spit XIV Build 143.jpg
    Spit XIV Build 143.jpg
    56.3 KB · Views: 106
  • Spit XIV Build 165.jpg
    Spit XIV Build 165.jpg
    32 KB · Views: 100
  • Spit XIV Build 164.jpg
    Spit XIV Build 164.jpg
    26.9 KB · Views: 103
Thanks Evan and Jan. I often mark things port and starboard, especially 'handed' control surfaces, but I try not to mark my shoes L and R !!
 

Users who are viewing this thread

Back