1/48 Finnish Brewster dio "Unofficial GB"

Ad: This forum contains affiliate links to products on Amazon and eBay. More information in Terms and rules

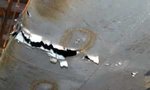
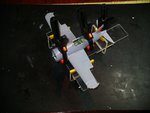
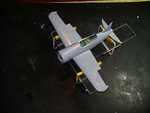
Control surfaces are "covered" in shredded" fabric. Terry I cant thank you enough for the paper tip. It worked a treat. Don;t know how long it would have taken me to figure that one out. So now I get to start assembling the fuselage around the cockpit and doing some gap filling.

I sailor on.

I remember that Terry suggested the material that you get with decals to use as the fabric but did you have to do anything special to prep it? Or was it cut to the shape, glue and paint?
 
That's the way I've normally done it Dirk. Just attach with small spots of poly cement, wiping off any excess. Once set, paint it and it goes taught. Depressions and tears can then be made easily.
 
I did it a little different. Tracing the surface shape on the paper. Then marked out the pieces I want "left on". Tore it with my fingers into the desired shapes. Layed these pieces Under the control surface and dabbed on PVC glue where it would be attached to the framing, then placed the paper on the glue, pressed it down and wiped the excess glue off. The paper is a little more shredded looking. I've only done this to the top surface, as the bottoms will be out of sight in the "water" of the diorama. Hope this helps answer your question.

I still don't have a very clear picture of the top surfaces of the wings to see what damage was done to the skin. I can just see the port side tip at the top the see the skin pushed in a bit, as I have replicated on the model. I keep looking.
 
Well now, I have found some more pictures, of the wings. Seems they were relatively intact and unharmed, 'cept for a bullet hole inunder the leading edge of the port wing. I will be putting that in. I will be having Friday off, more work to be done on the important stuff in life.
 

Attachments

  • 15 bullet hole.jpg
    15 bullet hole.jpg
    16.6 KB · Views: 106
I have this evening stuck the "sides" together..... Fillin and sandin comes next.
Sorry for the size of the photos, my graphics program has stuffed up and can't resize, have to reload it.
 

Attachments

  • 15a clampt.JPG
    15a clampt.JPG
    147.3 KB · Views: 115
  • 15b stuck.JPG
    15b stuck.JPG
    136.8 KB · Views: 111
Thanks to you all for your comments, as well as lookin in.
Sticking the wing section in at the bottom.
Might be slowing down for a bit on this one if my aces kit shows up.
And I been a little sidetracked with a B-24.
 
He!!, I just couldn't help myself!
It was available, so I got it.
Besides it's in one of the photos.

I'm not gonna show the underside of the wing........ it's a huge hole!
 

Attachments

  • 16 gun bay.jpg
    16 gun bay.jpg
    74 KB · Views: 86
Looking really great Bill. But remember about some dirt in cockpit area and the engine depertment etc.... if the model shows the plane found in the lake. A couple of years underwater has done its part.
 

Users who are viewing this thread

Back