**** DONE: 1/12 Art Chester Racer - From WW1 to WW2 GB (1 Viewer)

Ad: This forum contains affiliate links to products on Amazon and eBay. More information in Terms and rules

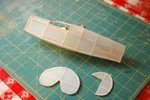
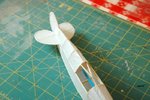
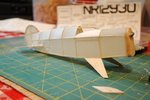
Quick work! Do you build two sides then connect them with the formers?

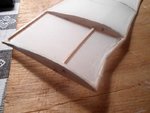
Yes, Paul. Build two of the side pieces, then attach either formers or balsa spacers, finally gluing the tail end together.
I usually find a flat spot on the side pieces, then pin them to the plans. After getting a couple of the spacers or formers
attached, un-pin and do the rest.

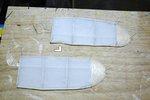
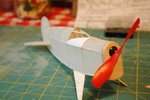
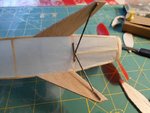
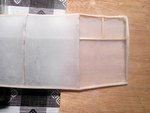
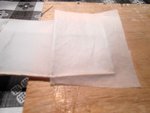
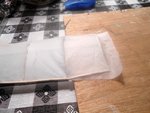
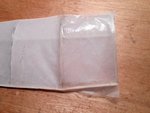
All the pieces of the A.C. Racer are covered, except the wings, spritzed with water and are drying. Pic's later.

Charles
 
Last edited:
Worked on the wingtips, today. Got them both finished and attached.

Charles
 

Attachments

  • DSC_2835.JPG
    DSC_2835.JPG
    100.1 KB · Views: 79
  • DSC_2836.JPG
    DSC_2836.JPG
    97.8 KB · Views: 66
O.K., now, what's the hammer for?

Paul.... my work board is 1/4" plywood. I hammer the pins into the work board. I have a 36" X 18" balsa work board ordered from Guillows, but (alas) it's on backorder.

woljags said:
Wow, that's fragile, Charles,good progress, mate.

Tell me about it. Did a super job of covering the wings (** Pats self on the back**), and while trimming, I broke the leading edge spar.

Charles
 

Attachments

  • DSC_2843.JPG
    DSC_2843.JPG
    115.1 KB · Views: 65
Ah, the folly of patting one's self on the back, the world often comes up and smites one. Well, there is no problem with one's friends patting said back, consider it done!
 
Have not repaired the broken leading edge wing spar, yet. Trying to decide the best way to do it. Been working on the fuselage tail ass'y. Got them mated, and started working on the landing gear. Got them on too. Had I given this some thought, I'd have done the wire support piece differently. Oh well, I follow plans.

edit: My missus bought me a Nikon Coolpix S4300 ! The last pic down was taken this morning, showing the cross-wire support
for the landing gear. Looks like it will take good close-ups !!

Charles
 

Attachments

  • DSC_2837.JPG
    DSC_2837.JPG
    79.3 KB · Views: 66
  • DSC_2838.JPG
    DSC_2838.JPG
    82.3 KB · Views: 69
  • DSC_2840.JPG
    DSC_2840.JPG
    81.2 KB · Views: 67
  • DSC_2841.JPG
    DSC_2841.JPG
    68.9 KB · Views: 75
  • DSC_2842.JPG
    DSC_2842.JPG
    61 KB · Views: 72
  • DSCN0003.JPG
    DSCN0003.JPG
    81.5 KB · Views: 64
Last edited:
Nothing to report, Guys. Had an epidural (spinal) shot this morning, so I am sort of laying low for a day or so. Gotta fix that busted wing before I do anything else. Cheers...

edit: Decided to repair the broken wing, and give you a blow by blow how I did it, with the new camera. BTW, all pic's were taken w/o a flash !

#1... The broken wing
#2... Cut out the tissue wedged glued a piece of 1/16 balsa
#3... Cut a piece of tissue the correct size attached the trailing edge, w/clear dope. Afterthought: should have repaired
it from the bottom. Reason: bottom is flat !
#4... Attached the rest of the tissue.

#5.. This is where things went to hell. Spilled half a bottle of clear dope and most of it went on the wing. Had no choice
but to spread it out. Don't know how this will affect the spritzing or the shrinkage.

Charles
 

Attachments

  • DSCN0012.JPG
    DSCN0012.JPG
    76.9 KB · Views: 65
  • DSCN0013.JPG
    DSCN0013.JPG
    89.5 KB · Views: 69
  • DSCN0014.JPG
    DSCN0014.JPG
    55.3 KB · Views: 62
  • DSCN0015.JPG
    DSCN0015.JPG
    97.6 KB · Views: 65
  • DSCN0017.JPG
    DSCN0017.JPG
    86.6 KB · Views: 63
Last edited:
Looking like you got it sorted out Pal. Well done. However I'm still thinking that using of a such thin balsa slat for the leading edge is a mistake. I would use thin strip of pine or spruce wood.
 

Users who are viewing this thread

Back