That's looking good Terry!
Navigation
Install the app
How to install the app on iOS
Follow along with the video below to see how to install our site as a web app on your home screen.
Note: This feature may not be available in some browsers.
More options
You are using an out of date browser. It may not display this or other websites correctly.
You should upgrade or use an alternative browser.
You should upgrade or use an alternative browser.
**** DONE: 1/48 Hawker Sea Fury FBII, 807 NAS, 1951 - Carrier Aircraft GB
- Thread starter Airframes
- Start date
Ad: This forum contains affiliate links to products on Amazon and eBay. More information in Terms and rules
More options
Who Replied?meatloaf109
1st Lieutenant
Great work!
Crimea_River
Marshal
That's looking very sharp Terry.
- Thread starter
- #104
Airframes
Benevolens Magister
Thanks very much chaps, it's very much appreciated.
I'm hoping to get the finishing clear coat on tonight, then plan the sequence for the next stages, if I'm not too stiff. Bl**dy weather is back to how it's been 90% of this year - wet and cool, with changing pressure - and I ache like an aching thing on an aching day, in an aching place!
Got to figure out which course of action is going to be the best of a bad bunch when it comes to the wing fold. I can either attach the PE wing fold set, and then attach the wings, which could cause handling problems when it comes to attaching the landing gear and doors etc, or I can attach the landing gear and stuff, which will cause handling problems when it comes to attaching the wings!
I think I'll probably opt for the latter course of action, and hope the gear legs don't get in the way when working on the wings.
Ah, the joys of modelling ......
ccheese
Member In Perpetuity
That's looking very sharp, Terry.
I'll drink to that !!!
Charles
Vic Balshaw
Major General
You done good buddy.
very nice Terry
Look forward to the next stage Terry!
Crimea_River
Marshal
Me too.
- Thread starter
- #112
Airframes
Benevolens Magister
Thanks very much chaps. Got the semi-matt clear coat on, and a few little bits done, including the armoured head rest, and a scratch-built gun sight and mounting bracket, and about to start cutting the vac-form canopy from its moulding sheet. I hope to have some pics posted later tonight.
- Thread starter
- #113
Airframes
Benevolens Magister
Still got to do a bit of a clean-up, but here's how the model looks so far.
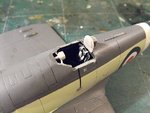
PIC 1. The head armour is in place, omitting the support bracket, as it didn't match the original, and was far too big. Also shown here is the gun sight support bracket,, and the sight under construction, made from plastic rod, and the aforementioned head rest bracket, remodelled!
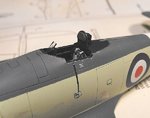
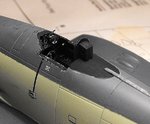
PICS 2 and 3. The head rest and the rear decking painted, and the gun sight painted and reflector glass in place
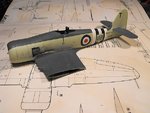
PIC 4. The semi-matt clear coat is on, and the bare metal exhaust panels are painted, with the first stage of exhaust staining added. The stains have yet to be blended in, and further, lighter staining added.
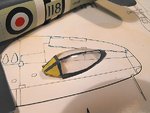
PIC 5. The vac-formed canopy has been removed from the backing sheet, trimmed and sanded, and is seen here in the process of having the frames painted. The inner faces of the frames were painted matt black, and then the exterior frames were also given a coat of black, to cover any 'thin' patches on the inside, before painting the grey.
Thanks again for your continued interest, and I hope to post some more sometime on Sunday.
Attachments
T Bolt
Colonel
Looking fantastic Terry
Vic Balshaw
Major General
Coming on a treat Terry and your Sky looks better than mine in photo.
pretty damn good!
ccheese
Member In Perpetuity
meatloaf109
1st Lieutenant
Me too!
Crimea_River
Marshal
Looks great Terry.
- Thread starter
- #120
Airframes
Benevolens Magister
Thanks very much chaps, good to know it meets approval. Not got any more done today, it's been one of those days where I can't seem to wake up properly, and I'm stiff in hands and shoulders to boot. Maybe more tomorrow.
Users who are viewing this thread
Total: 1 (members: 0, guests: 1)

