DONE: 1/72 Scale Wildcat Scratch (Wood/Metal) Group Build

Ad: This forum contains affiliate links to products on Amazon and eBay. More information in Terms and rules

Was bl**dy quick wasn't it? Mind you, I sent some stuff to Darryl a couple of weeks back, in Oz, and he got it about 4 days after I posted it, and that included a weekend! You must have a very efficient P.O. in Oz I think, unlike my local service, where they've just upgraded from ponies to steam-driven trucks!!
 
Was bl**dy quick wasn't it? Mind you, I sent some stuff to Darryl a couple of weeks back, in Oz, and he got it about 4 days after I posted it, and that included a weekend! You must have a very efficient P.O. in Oz I think, unlike my local service, where they've just upgraded from ponies to steam-driven trucks!!

I was rather surprised at the speed I can tell ya!
 
I sent a parcel to Daniel and Evan and they arrived a day next to each other, one was to NZ and one to Hungary work that one out :lol:
 
Last edited:
As I expected, Terry's package arrived today. But I'm afraid not without "casualties". One propeller without a spinner came with two blades broken. So, I guess I can write that one off as it can not be repaired. But everything else arrived undamaged and there is two more propellers which I can use for Wildcat model. They are little larger then needed, but I believe I can manage to reshape them. Decals will fit just fine I believe. Thank you very much Terry for sending this stuff to me. I appreciate your gesture very much. (And you have wrote the name of the street correctly.)

And now off to modeling and finishing this Wildcat on time. :D

Edit: By the way Terry, those propellers you've sent, from which model are they? Those with a spinner appear to be from Lancaster model maybe (judging by their size and shape)?
 
Last edited:
Sorry to hear about the damage, but at least there are spares! Yes, the props with spinners are off my nephew's Lancaster, when he was about 12, over 20 years ago! The others are off his Matchbox Halifax. Those are the ones I thought you could trim down and re-shape. I've since found a couple more, so I'll keep hunting and send whatever else I find, possibly some wheels too! I don't use 1/72nd scale stuff normally, so you're welcome to what I have, unless I can use the stuff for smaller items in a larger scale!
 
Okay, not much work left on Wildcat and I will post final progress pictures in next couple of days with official ***Finished thread by the end of week.

But for now I have one question... I have painted the model and applied Humbrol Satin Cote (which I ordered recently) on its surface. As I understand after putting the decals on, in order to protect the decals I should apply varnish once more. My question is should I apply it just on the decals or on entire model once more? (I'm doing all work with hand brushes as I don't have an airbrush.)
 
It will be better to give the entire model another coat of the varnish, after applying the decals Igor. This will give an overall even finish, and should look great. When you've applied the decals, and they have totally set, use a soft cloth, slightly damp, and clean the area gently, to remove any traces of water or decal adhesive. This might not be immediately visible, but it will be there, and will show up though the varnish with time if not cleaned off.
 
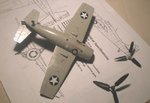
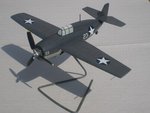
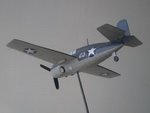
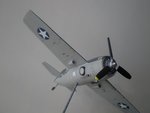
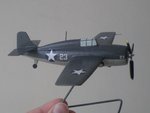
Time for final progress photos. I took these few minutes ago and couldn't help myself but decided to post them right now although the light was not the best and quality of the photos suffered accordingly. I will take official photos of finished model tomorrow at daylight, but for now I hope these will do.

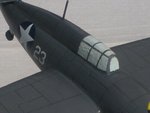
I've painted the model with blue gray (Humbrol 79) color on upper surfaces and light gray (Humbrol 129) on under surfaces. In contrast with my earlier models I've decided to paint conopy frames as well this time instead of drawing them to achieve more convincing look. Hope this was successfull.
Panel lines which I drew with pencil before painting were not seeing through the paint job, but as I was pressing pencil quite hard when drawing them after painting there were traces of panel lines left scribed on the fuselage and wings. So, I went from there almost as with normal plastic kit and lightly redraw panel lines with pencil after painting. Also with this model I applied a varnish for the first time and done some weathering (exhaust traces and stains around gun ports).
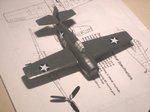
Propeller which Terry kindly sent me needed quite resizing and you can see result in one of the photos where I also put a spare unaltered propeller for comparison. Reshaped propeller isn't exactlly as a real Wildcat propeller but I hope its close enough.
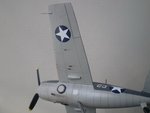
Decals were applied without any major problems. White star insignia could be little larger but all in all I'm satisfied with how they fit the model. Once again thanks to Wayne and Terry for sending decals I needed.
 

Attachments

  • 6_01.jpg
    6_01.jpg
    53.4 KB · Views: 58
  • 6_03.jpg
    6_03.jpg
    49.4 KB · Views: 55
  • 6_04.jpg
    6_04.jpg
    31.5 KB · Views: 76
  • 6_05.jpg
    6_05.jpg
    47 KB · Views: 86
Last edited:
how the hell am i supposed to compete with you Igor, i have to spend money on nice finely engineered plastic kits and you pick up a lump of wood and a pocket knife and hey presto a wildcat appears :evil:.

just kidding Igor, wonderfull workmanship :lol::lol:
 
Thanks to everyone for your kind words and for showing interest. Its very much appreciated. This kind of support, encouragement and help is still something quite new to me when it comes to modeling. And to think its coming from all over the world. Amazing. In any case its much more then I receive in "real" world from people around me and that is in many cases indifference at best...

Anyway, here are few more photos of better quality with close ups. And now I'm off to do some more photographing and selecting photos for official ***Finished model thread... :D
 

Attachments

  • 7_03.jpg
    7_03.jpg
    37.3 KB · Views: 79
  • 7_02.jpg
    7_02.jpg
    50 KB · Views: 74
  • 7_01.jpg
    7_01.jpg
    52.7 KB · Views: 77
  • 7_04.jpg
    7_04.jpg
    33.9 KB · Views: 77
  • 7_05.jpg
    7_05.jpg
    31.6 KB · Views: 74
  • 7_06.jpg
    7_06.jpg
    36.4 KB · Views: 80
Last edited:

Users who are viewing this thread

Back