**** DONE: Bf109F-1, W.Nr. 5628, Werner Molders, Stab JG51, Me/FW Group Build.

Ad: This forum contains affiliate links to products on Amazon and eBay. More information in Terms and rules

Thanks awfully chaps ! More sometime over the weekend - if I survive an informal Regimental 'Get together' on Saturday night - or more correctly, long after dawn on Sunday !!
(Sigs intercept:_ "Hello Zero, LocStat, Over." "Hello One One Alpha, I'm f****d if I know where I am !!")
 
Thanks guys. Tonight's 'do' has been postponed, due to couple of the guys being delayed at work, so I might get some more done.
 
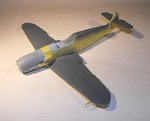
All the 'bits' are in place that need to be, and the model is masked ready for primer then the first painting stage.
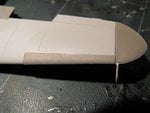
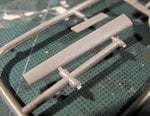
PIC 1. The leading-sedge HP slats need to have the sprue attachment points carefully removed and the area sanded, and there is also a fine moulding line across the front edge, which needs careful sanding. The slats do, however, have the end plates moulded in, so one less job to tackle.
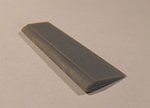
PIC 2. The slats have been tacked in place using PVA, and will be removed after painting the model. The exposed wing surface will then be painted RLM02, and the slats properly attached in the partly deployed position.
PIC 3. The separate flaps have an aerofoil leading edge, which is fine if fitted in any of the deployed positions. But if you want them in the neutral (Up) position, then this will need sanding to allow the flap to fit snugly into the wing.
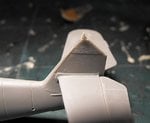
PIC 4. The moulded-in fin antenna wire post was extremely thin and fragile, and eventually went walk-about. Here, a new one has been glued in place, from a scrap of plastic card, and is being sanded to shape. It only fell off six times during this process - oh deep joy !
PIC 5. Flaps cemented in the partly deployed position, and the model masked ready for priming (in order to give an even base colour overall). Once this has dried, the RLM 65 will be sprayed on the fuselage and undersides.
Might have some more pics later, or sometime tomorrow.
Thanks again for your continued interest.
 

Attachments

  • Molders Bf109F 130.jpg
    Molders Bf109F 130.jpg
    48.8 KB · Views: 96
  • Molders Bf109F 131.jpg
    Molders Bf109F 131.jpg
    31.8 KB · Views: 94
  • Molders Bf109F 137.jpg
    Molders Bf109F 137.jpg
    39.8 KB · Views: 94
  • Molders Bf109F 129.jpg
    Molders Bf109F 129.jpg
    67 KB · Views: 98
  • Molders Bf109F 135.jpg
    Molders Bf109F 135.jpg
    34 KB · Views: 100
Thanks Andy. Got the primer on, but as it looks the same as in the last posted photo, apart from being one shade of grey overall, there's not much to see. I'll post some pics once the first colours are on.
 
Good to see your progress. I'm suffering a bout of low motivation at this point. The weather's been great and we're out in the garden more. Working out of my basement dungeon is more appealing when the weather is bad.
 
Yeah, I'm trying to get this one finished sooner, but without rushing, as I have another Bob Cross model to do, and a painting to finish!
Try taking a table outside, and work in the sunshine!
 
Oh I know the joy you had when eventually fixing that antenna wire post Terry, has the same problem with the 190 and ended up using a piece of shaped brass rod drilled into the tail fin. For a guy with a postponed date, you sure pushed on well.
 
Thanks Vic. Got the first coats of RLM65 sprayed, but I'm not too happy with the underside of the wingtip joints. They looked flush, after the sanding, in the primer coat, but the blue seems to make the ridge re-appear! I'll see what they look like after a further couple of light coats, but I doubt I can do anything about it now, without major work building-up with filler. Hopefully, once the clear coats are on, it won't be as noticeable.
 
Coming along very nicely!

Terry, a question:

Do you know the factory code for Molders F-4?

Just found an interesting pic and was curious.
 
Last edited:
Thanks chaps. Painting has stalled for now, as I'm trying to improve the look of the underside wing tip joints.
Chris, I think I've seen a pic of an F-4 purporting to be flown by Molders, but don't know of any Werke Nr or code.
 
Well, the wing tip joints will have to do. Without starting some major work, there's not a lot more I can do to reduce the step, and they won't be seen much once the model is on it's 'legs' anyway. The problem is that the tips themselves are too thin where they meet the main wing, and would need to be built up with filler, then profiled outboard to the tip.
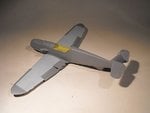
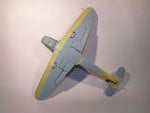
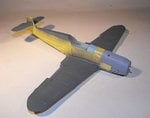
So, having done what I could along the underside joints themselves, the model was re-sprayed in RLM 65 in thsee areas, then masked as required and the RLM 02 sprayed on the upper surfaces.
PICS 1 to 3 Show how it looks so far.
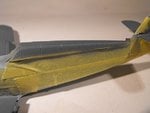
PIC 4 Shows the method of spaced masking along the fuselage sides, in order to acheive a soft edge.
Next step is to spray the RLM 71, after determining the actual pattern. This appears to be the intermediate style, as used on the '109E in the BoB, rather than the more complex splinter used on later 'F' models.
More soon, and thanks again for your interest.
 

Attachments

  • Molders Bf109F 145.jpg
    Molders Bf109F 145.jpg
    34.4 KB · Views: 117
  • Molders Bf109F 143.jpg
    Molders Bf109F 143.jpg
    40.8 KB · Views: 184
  • Molders Bf109F 141.jpg
    Molders Bf109F 141.jpg
    43.2 KB · Views: 136
  • Molders Bf109F 140.jpg
    Molders Bf109F 140.jpg
    40.5 KB · Views: 111

Users who are viewing this thread

Back