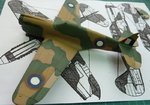
**** DONE: Curtiss P-40E-1 S/L Keith "Bluey" Truscott - Aircraft of the Aces GB.

Ad: This forum contains affiliate links to products on Amazon and eBay. More information in Terms and rules

Great stuff peter, and I agree about the foil, I use it for many things now. Thanks for the info about the masking material too - think I need to get a compass cutter some day !
 
Thanks Terry, Karl, CR, Wayne, and Andy

Pic 1
Here you can see Bluey clowning with the other pilots in front of the dispersal tent. Through the trees and closest to the tent is his ship A29-142 parked close by in case of scramble. Benefits of being a CO - you don't have to run as far!

For many years it was thought that no photo existed showing the complete codes A29-142 wore, and profiles were based perhaps on this photo showing only part of the "ID" codes.

Pic 2 3
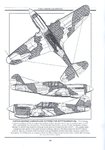
These two profiles have appeared in an IMPS newsletter and a Kagero publication. Basically correct, I will be making a couple of changes though. A29-142 was delivered in Curtiss factory lend lease colours. DuPont 71-009 "Brown" and DuPont 71-013 for the top surfaces and DuPont 71-021 for the underneath surfaces. When assembled in Australia the underneath was resprayed RAAF Sky Blue and the US markings over sprayed. A complete re-spray underneath was warranted to remove the "U.S. ARMY" in large letters, but on the top surfaces the stars were over sprayed with what appears to be RAAF Earth Brown. I've been using a reference called "P-40 Camouflage Special" by Ian K. Baker that goes through the changes that were made.

Pic 4
Here a photo courtesy of the "Aviation Heritage Museum of WA" which has a better view of 142, including the style of codes that it wore. Standing along side is the "owner".

Pic 5
Canopy and side windows successfully installed, and not without a few nervous moments. The side windows need the up most care to get them cleanly off the sprue without mishap. Job done, whew!

Pic 6
First step is to cover the canopy in interior green.

Pic 7
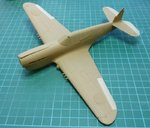
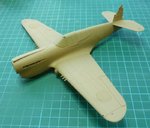
I'll start on the upper surfaces first for this one. First is the Brown.

Pic 8
I'm going to fade the paint on this one quite a lot. Somehow the fabric control surfaces always seemed to fade quicker, so I did a quick mask and added more white to the DuPont Brown. Here's how it turned out. When I fade the overall paint, it won't look so starkly different. Rudder was also done, although you can;t see it in the photo.
 

Attachments

  • Truscott with pilots and kittyhawk ID milne bay - resized.jpg
    Truscott with pilots and kittyhawk ID milne bay - resized.jpg
    87.6 KB · Views: 86
  • A29-142 ID Bluey Truscott.jpg
    A29-142 ID Bluey Truscott.jpg
    61.9 KB · Views: 91
  • A29-142.jpg
    A29-142.jpg
    63.4 KB · Views: 81
  • paint 006 resized.jpg
    paint 006 resized.jpg
    76.5 KB · Views: 82
  • paint 003 resized.jpg
    paint 003 resized.jpg
    70.8 KB · Views: 84
  • paint 004 resized.jpg
    paint 004 resized.jpg
    69.2 KB · Views: 98
  • paint 005 resized.jpg
    paint 005 resized.jpg
    74.4 KB · Views: 92
  • Truscott with kittyhawk ID milne bay - resized.jpg
    Truscott with kittyhawk ID milne bay - resized.jpg
    61.4 KB · Views: 94
Thank you

This weeks progress has been in completing the paint.

Pic 1
The masking was done using a pattern provided in the Ian K Baker P-40 Camouflage Special. I scaled the drawing to 1/48, cut out the pattern as a template and made masks using the 'frisket' masking material.

Pic 2
The masks were applied. Curtiss used masking mats to paint the camo, so hard edges.

Pic 3
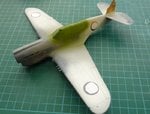
Here the painting of the Green has been done, using a special mix of MM FS34092 and FS34079 to get the right shade. Once done, I added a couple of drops of white and faded the green down a bit.

Pic 4
I also decided to fade the brown a bit and used heavily thinned Tamiya Desert Yellow for this.

Pic 5
Here's a screen cap from a colour movie of P-40's at Milne bay. It shows clearly that the US stars were obliterated using RAAF Dark Earth, and I'm going to replicate that on 142.

Pic 6
I mixed a batch of RAAF Dark Earth from several different colours to get what a I thought was pretty close. The great thing about masking the roundels, was that I can know paint over the masks as you see here.

Pic 7
Same for the Fuselage roundels and an area where the original British serial was applied. the A29-142 serial will be applied over the top.

Pic 8 9
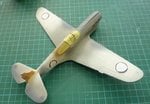
Okay, time to remove the masks and see how it all turned out. A few small touch ups are required, and a white edge showing across the top of the fuselage roundel, which is easy to fix. I'll attend to this and get cracking on the under sides next.

Cheers and thanks for looking.
 

Attachments

  • paint 013 resized.jpg
    paint 013 resized.jpg
    70.3 KB · Views: 89
  • paint 010 resized.jpg
    paint 010 resized.jpg
    68.5 KB · Views: 83
  • paint 009 resized.jpg
    paint 009 resized.jpg
    69.2 KB · Views: 80
  • paint 007 resized.jpg
    paint 007 resized.jpg
    76.7 KB · Views: 82
  • paint 021 resized.jpg
    paint 021 resized.jpg
    49.1 KB · Views: 84
  • paint 020 resized.jpg
    paint 020 resized.jpg
    75.7 KB · Views: 102
  • paint 017 resized.jpg
    paint 017 resized.jpg
    67.2 KB · Views: 89
  • paint 015 resized.jpg
    paint 015 resized.jpg
    66.7 KB · Views: 90
  • Milne Bay P-40 Z 001 resized.jpg
    Milne Bay P-40 Z 001 resized.jpg
    35.6 KB · Views: 82
  • P-40 Camoflage pattern - resized 800.jpg
    P-40 Camoflage pattern - resized 800.jpg
    171.5 KB · Views: 82

Users who are viewing this thread

Back