- Thread starter
- #181
N4521U
Plastic Pirate
Thanks for that...........
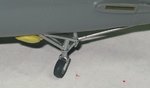
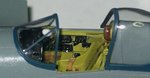
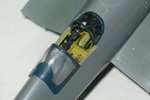
I have attached all the interior now, painted all of the control surfaces, flaps and such that will not be Attached until final assembly.
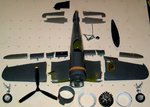
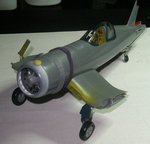
This is a photo of most of the parts before I have done most of the painting and sticking the fuselage together. It's all going together rather nicely. I am realllly happy with the Tamiya AS-8 for color match, sprayablity and consistancy and do reccomend these colors when applicable to ones build. My LHS told me "they are not easy to get", but one phone call and I found them In Stock in Melbourn! So much for LHS help eh!
So now I can put the halves together and head for home plate.
Oops, sorry for the size, I am having to post from a second laptop without Corel to resize.......
I have attached all the interior now, painted all of the control surfaces, flaps and such that will not be Attached until final assembly.
This is a photo of most of the parts before I have done most of the painting and sticking the fuselage together. It's all going together rather nicely. I am realllly happy with the Tamiya AS-8 for color match, sprayablity and consistancy and do reccomend these colors when applicable to ones build. My LHS told me "they are not easy to get", but one phone call and I found them In Stock in Melbourn! So much for LHS help eh!
So now I can put the halves together and head for home plate.
Oops, sorry for the size, I am having to post from a second laptop without Corel to resize.......