Done : Fw190D-9, "Black 12" of Leutnant Teo Nibel of 10/JG54, Gruppe Build (1 Viewer)

Ad: This forum contains affiliate links to products on Amazon and eBay. More information in Terms and rules
Already spotted something in the pics, not shown correctly on the Tamiya painting guide profile.
The swastika is closer to the rudder hinge line, but on the painting guide it's shown squarely on the fin, and the upper fuselage cammo colour line is shown much, much lower, and as a 'soft' straight line on the painting guide. The pics are worth their weight in expensive stuff already!
I just hope that the top side colours are correct in the instructions!
 
Eeeeeriiiiich!!!! :lol: Since I started on this forum I've stopped trusting the paint instructions coming with the kits..! :lol:

As for the pint, I hope that it's an Extra Cold Guinness....8) :lol:
 
Its just my flu-stained eyes. One the canopy is slid back and the other is closed - the broken glass threw me off. As for the camo, one pic is in bright sunlight and the other is not.

I'm gonna take another shot of Nyquil.
 
Sounds like you've got this bug really bad Chris, much worse than us over this side of the Pond. Hope you recover soon, but it's interesting that those of us 'over here' are up in the middle of the night, 'talking' to those 'over there'...it'll be nice to get back to a normal sleep pattern!
Jan, I rarely trust kit painting guides, which is one of the reasons I rarely do them OOB. As for the Guinness, it's an extra-sized pint, and extra, extra cold, with a very large wee dram by the side!
 
Shame that my local, directly opposite my house, has closed down! The only way you could get out, was if both Great Grand Parents came, with a written request in hand, asking for their 50+ year old Great Grandson to be excused, and could he go home now, please!
 
Well, now that I've finally decided on which aircraft I'm doing, I've made a start on the Tamiya 1/48th scale FW190D-9. It's quite a nice kit and, despite some reports of inaccuracies, I can't find anything glaringly wrong. There is a bit of a fit problem so far though, but nothing major, and hopefully it will be resolved when the time comes.
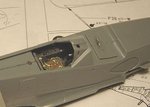
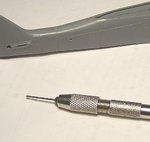
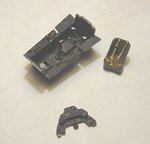
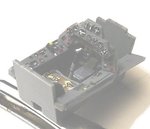
I spent about four hours on the cockpit, painting it and building it 'out of the box', with the exception of a very few small, scratch-built additions. These were a new throttle friction knob, the original of which is moulded onto the port wall of the cockpit tub, but looks too low, the throttle lever, and seat belts. The friction knob was made from a piece of plastic rod, inserted from the outside of the tub, through a hole drilled with a pin-vice. The throttle lever was made from a piece of stretched sprue, bent to shape, and glued into a small notch cut into the throttle slide-gate. It wasn't until I went to fit the cockpit that I noticed there was a throttle hand-grip moulded onto the cockpit wall! No problem though, as this was a bit on the 'chunky' side, and was quickly despatched with the aid of a scalpel. The seat belts were added from strips of paper, glued into place and then painted, with the 'buckles' and 'adjusters' being painted-in with a 5/0 brush. I was going to make these from very thin plastic card but, when I realised that most of the cockpit would't be clearly visible once the fuselage halves were joined, I decided to take the easy way out!
The instrument panel and dials were painted by hand, with Johnson's Klear (Future) for 'glass', again using the small brush, but I had to base the dials etc on a colour illustration of a FW190A panel; but again, little can be seen once in place.
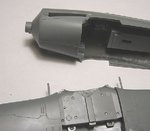
The cockpit was fitted after the fuselage halves were joined, and there was a very slight misalignment of the fuselage joint, but nothing serious. The lifting points on the rear fuselage were drilled out, again using the pin-vice.
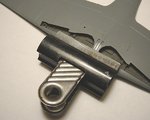
The undercart wheel-well was painted in RLM 02 and cemented in place, and the wing tops added, and here I came across another small problem. The starboard wing root, just inboard of the moulded-on cannon, displayed a prominent gap, but a couple of spots of 'Superglue' and a few minutes clamped with an old 'Bulldog' clip sorted this.
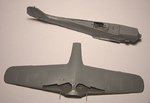
A trial fit of the wing assembly to the fuselage uncovered another problem. The leading edge of the centre section would not slot into place, standing proud of the fuselage, and there was a gap of about 3mm at the front of the port wing root also.
Out came the scalpel and wet and dry, and the problem was solved, with another trial fit showing that the wings should now fit, although a small amount of filling might be required along the port wing root joint.
The photo's show the progress so far, and I apologise for the poor quality, as my colour-balanced light source went 'phut', and I had to use a standard bulb.
I'll post some more pics when I get some more work done on the model.
 

Attachments

  • Group Build 067.jpg
    Group Build 067.jpg
    28.2 KB · Views: 100
  • Group Build 073.jpg
    Group Build 073.jpg
    23.6 KB · Views: 113
  • Group Build 078.jpg
    Group Build 078.jpg
    20.1 KB · Views: 102
  • Group Build 081.jpg
    Group Build 081.jpg
    49.6 KB · Views: 101
  • Group Build 086.jpg
    Group Build 086.jpg
    26.1 KB · Views: 104
  • Group Build 088.jpg
    Group Build 088.jpg
    31.2 KB · Views: 104
  • Group Build 098.jpg
    Group Build 098.jpg
    32.4 KB · Views: 104
  • Group Build 096.jpg
    Group Build 096.jpg
    34.1 KB · Views: 108
  • Group Build 101.jpg
    Group Build 101.jpg
    39 KB · Views: 98
  • Group Build 100.jpg
    Group Build 100.jpg
    37.8 KB · Views: 114
Great lookin work Terry.... Appreciate the progress writeups as well... The fact that u have f'ed up hands makes this that much better... Great detail on the cockpit..


Hey Dan after looking at the instrument panel he's pulling or leg bud and I believed him:lol: .Great job so far Terry I got the Tamy A8 and thinking of p/u the Aires tub today.Kevin
 

Users who are viewing this thread

Back