Navigation
Install the app
How to install the app on iOS
Follow along with the video below to see how to install our site as a web app on your home screen.
Note: This feature may not be available in some browsers.
More options
You are using an out of date browser. It may not display this or other websites correctly.
You should upgrade or use an alternative browser.
You should upgrade or use an alternative browser.
**** DONE: Revell 1/48 P-40B RAF 112 Squadron in Egypt in 1941 MTO Group Build
- Thread starter B-17engineer
- Start date
Ad: This forum contains affiliate links to products on Amazon and eBay. More information in Terms and rules
More options
Who Replied?- Thread starter
- #562
B-17engineer
Colonel
Ok, now just clarification, before I do it. Like the line to the left I did by accident, because I thought that's what you meant to fill?
I can't say you did it accidentally. However you are going well. The main problem with the kind of joins on fuselage is that we cannot be sure if when sanded down the area could be of smooth surface.Therefore you have to put the putty on the joint.
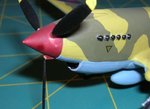
Please post a pic of the underside of the nose.
Please post a pic of the underside of the nose.
Last edited:
- Thread starter
- #564
B-17engineer
Colonel


- Thread starter
- #566
B-17engineer
Colonel
Looks really good!
- Thread starter
- #568
B-17engineer
Colonel

- Thread starter
- #570
B-17engineer
Colonel
Okay. Let me try. I feel like an idiot excuse my dumb behavior and wasting ur time .
excuse my dumb behavior and wasting ur time .- Thread starter
- #572
B-17engineer
Colonel
That would be cool 8)
I'll go try again with the sanding. Sanding take 21.
I'll go try again with the sanding. Sanding take 21.
- Thread starter
- #573
B-17engineer
Colonel
OK. Looking very good. I'm have a day off tomorrow.So I'm at home.
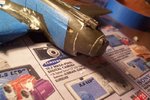
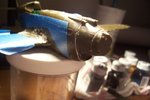
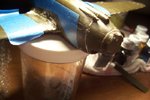
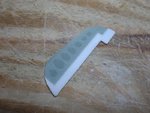
Here is an example of similar sanding.But I didn't use a putty because I applied much glue to the joint instead.
In the first pic you can see the kit part and the white additions.Also the glue can be seen.
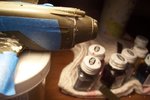
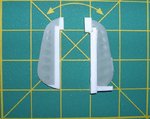
In the second pic some plastic of the addition was just sanded down but the joint and the glue can be still seen.
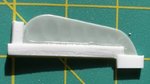
In the third pic it is almost done.Notice the joint and glue aren't seen.
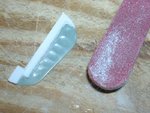
In the fourth pic you can compare both parts one is done the second is waiting for farther working.
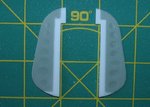
In the fifth pic all is done.These joints aren't seen at all.
You have do the same to the joint but you have remember about the fuselage curvature.
Here is an example of similar sanding.But I didn't use a putty because I applied much glue to the joint instead.
In the first pic you can see the kit part and the white additions.Also the glue can be seen.
In the second pic some plastic of the addition was just sanded down but the joint and the glue can be still seen.
In the third pic it is almost done.Notice the joint and glue aren't seen.
In the fourth pic you can compare both parts one is done the second is waiting for farther working.
In the fifth pic all is done.These joints aren't seen at all.
You have do the same to the joint but you have remember about the fuselage curvature.
Attachments
Last edited:
- Thread starter
- #575
B-17engineer
Colonel
Oh, I see. Great job.
I wonder how mine is.
I wonder how mine is.
- Thread starter
- #577
B-17engineer
Colonel
Alright let me finish that then I'm done! With that sanding part atleast.
- Thread starter
- #578
B-17engineer
Colonel
Well I did sanding and the putty just came off. What the hell...
- Thread starter
- #580
B-17engineer
Colonel
Sanding but is it suppose to be gone?
Users who are viewing this thread
Total: 1 (members: 0, guests: 1)