**** DONE: Revell P-61A 1/48 scale, Nocturnal Nemesis, Night Fighter GB.

Ad: This forum contains affiliate links to products on Amazon and eBay. More information in Terms and rules

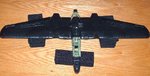
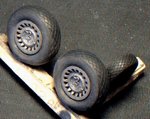
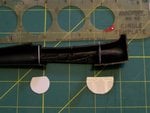
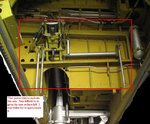
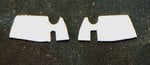
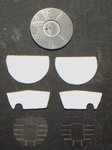
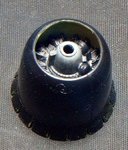
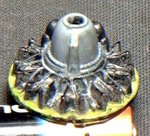
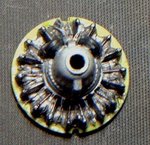
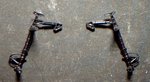
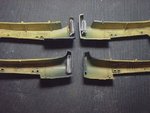
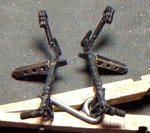
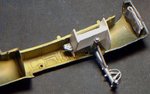
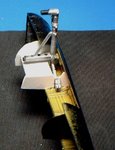
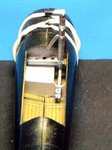
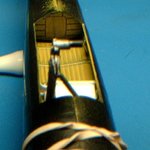
Right then. I have had a little time to do more rivet work. This time its on the wings. I also painted up the wheels. Hopefully soon I can get back to some real work on this craft. I've started working on the engines and propellers. Engines are painted but not weathered and I'm currently adding the ignition wires. More to follow soon I hope. :) BTW... Does anyone know where I can find information regarding the nacelle wheel wells? Thanks.
 

Attachments

  • wingson5.jpg
    wingson5.jpg
    97.8 KB · Views: 130
  • wingson6.jpg
    wingson6.jpg
    76.5 KB · Views: 129
Been wondering about the main gear bay as well. Photos of the P-61 under restoration seem to show a deeper more circular bay - basically just the inside of the boom which is going to be difficult to reproduce given the engineering of the kit.
Danielle Hui shows what he did as a good compromise in TMMI #129
ModelArt P61A
I've started by cutting front and rear bulkheads 3/4" for the rear and 1" for the front and will attempt to box in the front section of the bay next.
 

Attachments

  • 100_1614 (Small).jpg
    100_1614 (Small).jpg
    36.1 KB · Views: 115
Thanks all very much. So much to do and so little time. With any luck I'll get a lot accomplished this weekend. Here's to hope.

Thanks Chris for that link. That gives me some idea how to tackle it. I rechecked that restoration website and can see what that fellow was up to.

As for using oil pastels, first I painted the wheels flat black. Black undercoats help bring richness to colors applied over it. Also helps that the wheels started out black anyway. :)

Then I dry brushed the hubs with aluminum. Depending on what effect I want to achieve, ie.. dirt runway vs. paved tarmac, I will very my colors for future dry brushing. I then studied several wheels from different photos I've saved up. The sidewalls always seemed grayish in color unless the plane is in a dusty place, then they are a yellowish light grey color. The treads are the real trick. On a dirt runway, the wheels will be slightly darker on the sides as opposed to the tread which will have a light sandy grey color on the high spots and a darker sand down in the deep part of the treads. Just my observation. For tarmack its the opposite. The sidewalls will be lighter in color than the tread. This is what I did with my wheels. My oil pastels come in three colors... black, grey, and white. With a very stiff and short brissel brush, I scrubbed a little of the grey oil pastel pastel on the sides. Oil pastel gives a more realistic look to the tires. I added a little black pastel with the grey until the tone was what I was looking for. Then I dry brushed a sandy light grey over the tread and followed it up with black oil pastel. The slight shine on the tread came when I rubbed my finger over the pastel. Since its an oil pastel, not just the oils on my fingers, it shines up just a little bit without too much trouble and looks believeable. I think rubber looks better with oil pastels. Once I was done with the pastels, I carefully re-drybrushed the aluminum color to the hubs. :)
 

Attachments

  • landingbay.JPG
    landingbay.JPG
    59.9 KB · Views: 109
Last edited:
Needless to say I finally got around to working on the plane. I finished painting and wiring the two motors, there isn't much to them, and mounted them within their respective cowlings. Then I started to tackle the main landing gear. As I was thinking about what I had, I noticed that the firewall for the other, more complete, motor was just the circumfrunce I needed to create the other walls within the wheel well. So I used it as a template and cut out a couple more walls to box in around the landing gear. Looking at the landing gear, I also noticed that the piston for retraction was present. The designer must of put it there for those wanting to build this area. Below was my solution then as to how to use it. Now with the basic structure made, I can go on with the easier details like tubes and wires. :)
 

Attachments

  • nacelle5.jpg
    nacelle5.jpg
    57.9 KB · Views: 90
  • nacelle4.jpg
    nacelle4.jpg
    42 KB · Views: 87
  • nacelle3.jpg
    nacelle3.jpg
    68.1 KB · Views: 86
  • nacelle2.jpg
    nacelle2.jpg
    33.2 KB · Views: 86
  • nacelle1.jpg
    nacelle1.jpg
    41.9 KB · Views: 89
  • nacelle6.jpg
    nacelle6.jpg
    201.2 KB · Views: 87
  • nacelle7.JPG
    nacelle7.JPG
    49.8 KB · Views: 90
  • nacelle8.jpg
    nacelle8.jpg
    96.9 KB · Views: 86
  • nacelle9.jpg
    nacelle9.jpg
    85.5 KB · Views: 85
  • nacelle10.jpg
    nacelle10.jpg
    158 KB · Views: 88
  • nacelle13.jpg
    nacelle13.jpg
    60.2 KB · Views: 87
  • nacelle14.jpg
    nacelle14.jpg
    35.3 KB · Views: 87
Nicely done. I have been avoiding this area - trying to come up with some sort of plan obviously the best thing to do is just roll up your sleeves and start cutting plastic or better yet have someone show you how they just did it.
Thanks
Following/building along with you on this one

The Vector P-61 cowl-engine replacement set shows some sort of collar over the engine crank case that is the same diameter as the spinner athough I don't know how much anyone will be able to see in this area.
 
Thanks guys, it's very much appreciated. Chris, when I worked on the wheel well I needed to do a ton of dry fits to make sure not only that they all fit together but that those extra parts didn't push the halves apart. I had to do a little cutting and sanding on those extra bits to get both outer halves to sit properly. On the engine and spinner, once the propeller is on, the spinner blocks most of the view to the engine. Infact the only real part of the engine you will see is the piston and outer wires... If you're up close and looking slightly to one side you can see the rest of the engine but only just. The collar you're talking about may or may not be the right one depending on which version of engine you want to add. I've seen some pictures with and without the collar. I'm no expert but I believe I've seen the collar on the later versions of P-61's Like the late P-61 B's and certainly the P-61 C's.
 

Users who are viewing this thread

Back