Evan's photography phun

Ad: This forum contains affiliate links to products on Amazon and eBay. More information in Terms and rules

Thanks guys. Yes, Vic, I am getting more gumby-like these days. ;) The shoot yesterday was one of my toughest ever, shooting backwards, over my head while going through rolls and inverted. The results were good, but I can't post any until my customer selects which ones they will use. It will be part of a national (possibly international) ad campaign in some major aviation periodicals.

But I can post these from yesterday. This is the Pitts I was in.

EVG_3811.jpg

EVG_3816.jpg

EVG_3817.jpg
 
Last edited:
He, he, he... but for what is the fire hydrant there? A very low pass? :lol:
 
Thanks guys. The hydrants was a kill. Hydrant not seen during taxiing. Not good for the prop nor the engine, but hey, the airplane was clean. ;)

I don't remember his start altitude, but he was pretty low when he hit 81.75.
 
What a fantastic time you are having and so glad you share your shots and adventures, they are quite an inspiration Eric. Cheers my friend 8)
 
The customer likes the images, and should have a decision on which ones he wants to use in the next week or so. Once I get that, I can share some of the others. I learned a little something about metering that makes a huge difference when doing ground shot portraits in mid-day lighting. Center spot metering gave varied results with many shots having blown out highlights and overexposed backgrounds. Weighted center spot was better, but matrix metering was best if you have the sun in your subjects face. I am so used to shooting either in the studio with controlled lighting, or with stuff whizzing by at 200 MPH, I didn't think about metering at first. Thankfully, a quick image review fixed that.
 
Every year around this time, we do some home improvement projects. We do some over Thanksgiving and usually some over the Christmas break too. I took on a project that I knew would be a pain this past weekend, starting it on Saturday. I had an idea of what I thought would work before I started and ended up changing it mid-project as I knew that what I had in mind would be WAY too much work.

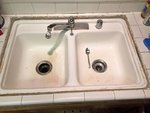
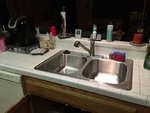
Our house was built in 1986, and the kitchen sink was original. Years of use had left it chipped and stained. The tap was a piece of crap. I had replaced the guts on it at least three times and it would drip again after about 6 months. I went out to Amazon to find a replacement faucet. The related products section had a stainless steel sink on sale ($900 down to $120). Well, that was easy. ;)

The original sink was a drop in sink, mounted to look like a bottom mount with a tile border. I thought I could mount the new sink the same way, but it was bigger than I expected. I had to strip away the old tile border, then ended up having to put some of it back to fill in the corners for the new one.

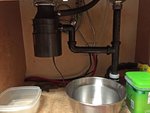
Anyway, without getting too wordy (I know, already there), here are some pics, before and after. I ended up doing way more than I expected work wise, but it was so worth it.
 

Attachments

  • IMG_3002.jpg
    IMG_3002.jpg
    69.3 KB · Views: 52
  • IMG_3004.jpg
    IMG_3004.jpg
    59.7 KB · Views: 46
  • IMG_3013.jpg
    IMG_3013.jpg
    63.9 KB · Views: 51
  • IMG_3014.jpg
    IMG_3014.jpg
    62.2 KB · Views: 46

Users who are viewing this thread

Back