New project: Revell P-40B

Ad: This forum contains affiliate links to products on Amazon and eBay. More information in Terms and rules

machine shop tom

Senior Airman
503
222
Apr 13, 2007
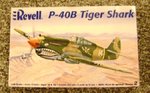
After much gnashing of teeth, flipping of coins, and other such ways of deciding what to do next (having 40+ kits to decide from is no help at all.........), I have decided to go nostalgic and build this old venerable standard. I first built one when I was age 10 years or so, then I built one a few years ago. The first one disappeared in the mist of time, the second one disappeared under my then 5 year-old daughter's foot.

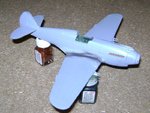
So here I am building my third Flying Tiger. As I recall, the fitment on this piece will be really challenging. However, I will use this as a practice or test dummy for honing my meager modeling skills.

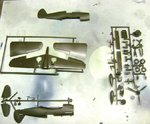
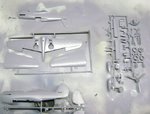
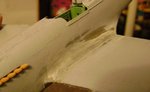
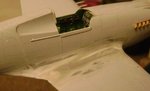
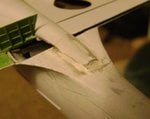
So here it is, before and after priming:
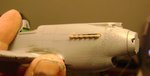
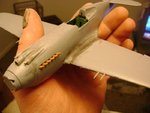
 

Attachments

  • Tiger cover.jpg
    Tiger cover.jpg
    65 KB · Views: 257
  • Tiger parts.jpg
    Tiger parts.jpg
    63.8 KB · Views: 236
  • Tiger parts primed.jpg
    Tiger parts primed.jpg
    44.5 KB · Views: 246
Actually, Tom, despite its age, the Revell P-40B is outwardly the most accurate -B still extant among the quarter scale offerings. Only the Trumpeter kit is its closest rival. Will watch this thread with great interest....
 
B-17 Engineer spent a lot of time with the kit.It was his first one ( whatever it means :lol: ) ........but someone else was assembling the kit with a success as mamo serves.
 
Looking good Tom. I seem to remember building the same kit about 25 years ago, can't recall any major issues.
 
B-17 Engineer spent a lot of time with the kit.It was his first one ( whatever it means :lol: ) ........but someone else was assembling the kit with a success as mamo serves.

So did you!!! :lol:

I think Muller was making it but we can't find him :(
 
I finally got some time to work on the 'Hawk....

There was a terrible mismatch between the wing tops and the fuselage. I used super glue and tape to bring the wings up to get the dihedral close and to close most of the gap. I then used a two-part epoxy to finish blending the wings to the fuselage. There was also a lot of sanding and shaping at the joint of the cowl and nose, as well as the machine gun and carburetor inlet scoop interface.

I also replaced the exhaust stubs from the kit with some extras from my Airacobra kit. Looks like I have some seams to remove from those.........
 

Attachments

  • P-40 4.jpg
    P-40 4.jpg
    95.4 KB · Views: 186
  • P-40 3.jpg
    P-40 3.jpg
    91 KB · Views: 176
  • P-40 2.jpg
    P-40 2.jpg
    42.5 KB · Views: 199
  • P-40 1.JPG
    P-40 1.JPG
    55.7 KB · Views: 202
I think Harry can be interested in the wing-fuselage transition.He got enormous experience in a such work.;)

Looking nice indeed.Keep working on.:D

BTW What happened to the finger-nail? I I hope you haven't tried to correct the model with a hammer. :lol:
 
Not a lot of progress, but I did learn something useful. I've been trying different types of filler without a lot of happiness. I finally tried a two-part epoxy that I use at work a lot. Its a Permatex product called Cold Weld. It sets up in about 15 minutes, but doesn't harden completely for several hours. Before it hardens, it can be cut or shaped with a sharp knife, and after it's hard, it can be sanded or filed. When applying it, I use a water-wetted finger to blend it in. One can use a wet rag or finger to remove excess material before it sets up.

The only real downfall to the stuff is that it really stinks while curing, very similar to a skunk smell.

Here are some pics of my first attempt at sanding it after applying it and letting it cure. I think I'll continue to use it and will try to refine the process.
 

Attachments

  • Untitled.jpg
    Untitled.jpg
    39 KB · Views: 195
  • Untitled 2.jpg
    Untitled 2.jpg
    31 KB · Views: 199
  • Untitled 3.jpg
    Untitled 3.jpg
    28 KB · Views: 181
  • Untitled 4.jpg
    Untitled 4.jpg
    35.8 KB · Views: 183

Users who are viewing this thread

Back