Post Your Models!

Ad: This forum contains affiliate links to products on Amazon and eBay. More information in Terms and rules

this kit looks kinda old judging from the condition of the box when i got it, one of the blades on a propeller were missing so i had to scratchbuild (A newbie scratchbuilding?) a blade using scrap plastic
I'd also have to let it sit there for a while and let my airbrushing skills, most especially mottling, get better (I want a realistic camo)
and i need to do some research on maritime camo, and making RLM paints with tamiya acrylics, got no access to other brands

what iknow is, I'm not following the box's painting instructions entirely
***edit: oh and if i don't find any info, I'll do a hypothetical scheme of my own
 
Meanwhile, there are a few things you can do to prepare painting: I don't know if the plastic's white or if you applied a coat of primer, but that could be a good idea.
Paint the canopy frames with the color they should be seen from INSIDE.
Then you can paint all parts that are supposed to be made of metal with acrylic silver paint (Tamiya X11 is what I use), and gently smooth the paint when dry with a piece of cloth.
you can paint possible fabric covered areas tan and do the same treatment.
That way the model will be ready to receive its camo and any further scratching on camo paint for weathering will show the underneath metal or tan color.
 
Hi 'luma' the Ju290 was painted in RLM72 Green and RLM73 Green on the upper surfaces and RLM65 Light Blue on the lower surfaces. you can actually mask off this kit for a hard edge pattern... if you wish of course! and then blend in a mottle pattern along the sides. You can also go the freehand approach but this will depend on your skill with an airbrush.
I use Tamiya paints also but have not done a Maritime Camo before, I will check some references for you, as I said earlier i have a Bv222 that will require the same colours... be back to you soon.
 
Hi Looma... mottling is best done with an airbrush and plenty of practice, differing ratio's of paint and thinner will give different results and then theres air pressure.....There are many ways and patterns of mottle... you just have to practice, practice, practice..!
However if you don't yet have an air brush the job is a little bit more difficult to achieve. If I had to go back to mottling without an air brush I would probably use a dry brush method.
That is to take a brush dip it into you paint and then wipe off most of it by dabbing it on a tissue and then dabbing it on the model ONLY AFTER a suitable amount of practicing on some paper. You can dab it twist it etc. to get a subtle application, lightly at first you can then apply a bit more pressure to darken or thicken the mottle, but you must take care in how much paint you keep on the brush. Only dip the end of the brush to reduce the amount of paint and wastage.
I hope I am explaining this right, do you understand what I am getting at?
 
Hi Looma, good to know you have an airbrush...
Ok you have the first 2 items... an airbrush and a practice model.

In practicing your mottling first off try different ratio's of paint and thinner.
3 to 1, 2 to 1, 1 to 1 even go more thinner to paint 1 to 2, 1 to 3 etc.
You will find that Tamiya paints are not all the same when it comes to thinning and applying.
Also try different air pressures, low medium and high.

In this way you can get a wider range of trial applications and get a feel for how the different combinations will work.
It will also come down to your trigger finger and how carefully you work it for paint and air flow combination and the distance from the model that you work.

What type of airbrush do you have? Mine is an Aztec 430, dual action that is I can press the trigger down for air and then back for paint, so i can adjust the amount of air and paint depending on pressure and action of my finger on the trigger.

Over to you...
 
the cheapest and only airbrush with compressor i was able to find, a tamiya basic spray-works, yeah it's single action and u can't adjust air pressure, but it's a beginners airbrush and most people here really know it and can even detail and mottle a 1/72 Bf-109 with it... and it literally is a trigger/gun type
 
Loomaluftwaffe, let's use a soft masking. It's simple to make an use:
1. Take a piece of paper (cardboard will be better), cut/drill a hole (or holes) on the middle (size about 2-5 mm for 1/72) with required mottling shapes.
2. Hold this pierced paper about 5mm above your model and paint thougth the holes using an airbrush (keep a distance about 10 centimeters between airbrush and paper).
3. Remove the paper - you can see a path (pathes) with shape as cutted on paper (a little larger) with soft edges.
You can apply a single or groups pathes, it depend on number of cutted holes. Belive me, it works! I use this method for mottling my Bf 109Z (you can find it in this thread).
I suggest practice it first on cheaper models of course.
 
Hi Looma, not a problem, even with a basic airbrush you can achieve good results.
Net_sailor has provided a great yet simple method, get your mixes and pressures right and practice.

Now, paints for that 290, still working on a top side mix for those 72/73 greens, when you look at paint chips they are very close to the same, yet some photo's which claim 72/73 show a reasonable tonal difference in B/W pics while colour shots show 2 quite different shades of green! Anyway will keep studying and mixing, you're not in a major hurry are you?
 
Don't worry Looma.Even if you have to go to a school, you can always find some of free time for modeling. There shouldn't be any problem to make a model gradually. :)
 
models.JPG


models III.JPG


models IV.JPG


models V.JPG


models VI.JPG
Here is a selection of photos, it was hard to find one that showed the best view, anyway....:)

Cheers
Andrew


edit: These photos don't do the lighting justice! A good mate of mine installed some very effective lights in the ceiling of the cabinet, unfortunately the digi cam does not pick the light effect up.
 
First off, let me to take my hat off in front of your models! Seems like a long and very colorful journey since you got your first model. Very pieces there! 8)

As you slightly mentioned, we cannot see the details. Maybe if you turn your flash off, turn the lighst on and put your camera on a tripod (so it won't shake), you might be abkle to get some decent pictures.
 
Hi !!!

Yakflyer - very nice collection.I like it.:D
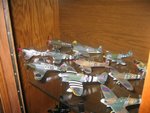
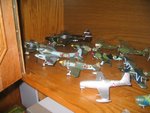
Could you tell us what producers are mostly they of? As far as the pics are concerned Pisis is right,I agree with him completely.Besides,I think you should put them in order to show the models in a better way.There two my pics of a part of my collection.Propably, I should also clean them up. :lol:
 

Attachments

  • Img_0036.jpg
    Img_0036.jpg
    59.9 KB · Views: 149
  • Img_0038.jpg
    Img_0038.jpg
    56.5 KB · Views: 150

Users who are viewing this thread

Back