Revell B-29 Superfortress 1/48 (1 Viewer)

Ad: This forum contains affiliate links to products on Amazon and eBay. More information in Terms and rules

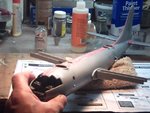
Great start Boats. I have this in the to-do pile(decals for Lucky 'Leven), just need to find the yardage to display it when it's done.

Geo

Ahoy Geo
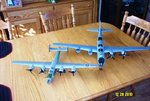
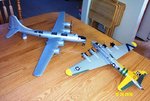
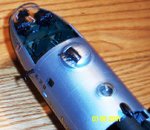
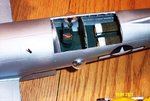
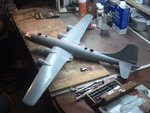
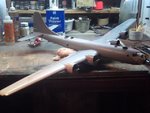
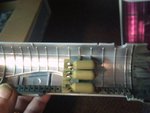
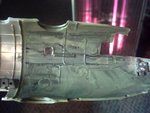
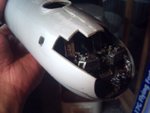
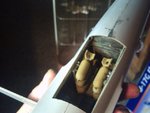
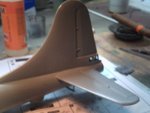
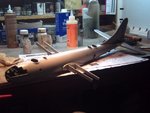
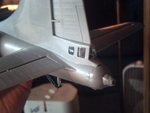
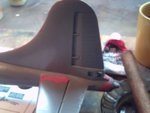
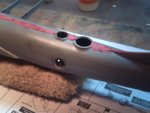
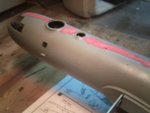
Thank you for your reply yes sir I am getting off in a good start I am actualy enjoying this build getting all of the sub assemblies completed before wet sanding and priming of the primer paint. thanks my man.

Boats
 
Awesome!! Great start Boats!


Ahoy Lucky
Thanks this is truely a very relaxi9ng build for me the dern thing builds itself.. It is a shame all of the work i put into the intereir wont be seen, Buit you Fellas and me know its all there. Thanks my man get your B-29 started.

Boats
 
Ahoy
Here is the build update for now more coming your way, for now i have constructed the bombs the kit gives you 12 1000 lb bombs they come in two sections.. once they were assembled I wet sanded the joints into smooth primed with gray primer paint and painted same with olive drab.Next I installed the boms to the bomb racks useing hot stuff backed up with 5 minute epoxie.. A word of suggestion there are two locateing holes on each bomb more less indentation points where the bombs are glued to the bomb racks useing a pin vise or your No.11 exacto blade open up these holes so you will get a better installation or no matter how much cenet you use eventually they will fall of the model when handeled or bumped. So by opening up these holw will save you one hell of headache in the future.Next I assembled the two wing spars by sandwhiching the false gas tank in the center of the spars.. the spar is covered with ejector pins marks all in male perportion sticking out they have to be sanded off before the spars go through the wing roots. I never seen this 35 years ago when this kit was first released the molds need to be redone but still a great kit..


Another Bonus in the kit is four extra propellers before Monogram gave you four, but the give you four more extra props the first four are curtiss wright props that were originally came with the kit the extra four are Hamilton standard props so Fellas save the four other props they will come in use , so store them in your parts scrap box by saving all of the extra partys on all kits is a god sent for other modeling projects that come to mind. once the wing spars were glued into position its time to close up the fuselage the fuselage halfs were glued together use Mercury Adhesive M300M Great stuff comes in a huge 8oz. bottle for $24.00 you get at leased 2 to 5 years of usage on plastic kits. Dries fast too after the fuselage halfs were glued together i let it set for 4 hours next i checked for what seams need to be filed down before i laydown filler putty.. useing a file I filed down all of the seams until smooth makeing certain that no detail has been lost, Usein bondo glazeing putty as my favorite filler I filled in the seams before I done3 that I assembled the horizonal stabilizers in place. now the fuselage structure is drying over night next I wi8ll attend to the wing sub assemblies and then so on. Here are the updates for the night.

Boats :happy1:
 

Attachments

  • PICT0001.JPG
    PICT0001.JPG
    59.4 KB · Views: 147
  • PICT0002.JPG
    PICT0002.JPG
    46.6 KB · Views: 147
  • PICT0003.JPG
    PICT0003.JPG
    45.8 KB · Views: 144
  • PICT0004.JPG
    PICT0004.JPG
    56 KB · Views: 144
  • PICT0005.JPG
    PICT0005.JPG
    39.3 KB · Views: 145
  • PICT0006.JPG
    PICT0006.JPG
    48.8 KB · Views: 144
  • PICT0007.JPG
    PICT0007.JPG
    48.5 KB · Views: 143
  • PICT0008.JPG
    PICT0008.JPG
    58 KB · Views: 142
  • PICT0009.JPG
    PICT0009.JPG
    41.8 KB · Views: 140
  • PICT0010.JPG
    PICT0010.JPG
    31.7 KB · Views: 141
  • PICT0011.JPG
    PICT0011.JPG
    37.6 KB · Views: 141
  • PICT0012.JPG
    PICT0012.JPG
    34.5 KB · Views: 139
  • PICT0013.JPG
    PICT0013.JPG
    35.2 KB · Views: 146
  • PICT0014.JPG
    PICT0014.JPG
    51.4 KB · Views: 145
  • PICT0015.JPG
    PICT0015.JPG
    38.2 KB · Views: 141
  • PICT0016.JPG
    PICT0016.JPG
    36.8 KB · Views: 139
  • PICT0017.JPG
    PICT0017.JPG
    40.9 KB · Views: 138
  • PICT0018.JPG
    PICT0018.JPG
    34.3 KB · Views: 140
  • PICT0019.JPG
    PICT0019.JPG
    57.7 KB · Views: 138
  • PICT0020.JPG
    PICT0020.JPG
    64.2 KB · Views: 137
  • PICT0021.JPG
    PICT0021.JPG
    44.4 KB · Views: 136
Great work Boats :thumbright: I built this kit back when it came out and your pictures are bring back memories. I can still recall hating to close up the fuselage and hiding all that detail.
 
There is some great detail in that kit that's for sure. Too bad it's so damn huge. I'm inspired to pull out my 1/72 but I don't have any place to put that one either. I can't wait to see more of this build
 
Boats, built this kit about two years ago. Probably too late now but at the time I had discussions about all that interior detailing just to bury it, ever to be seen again, when the fuselage halves come together. As you can see I cut the tops off 4 sections with a razor saw. the setions can be replaced or left off for display.
And it is big compared to other 4-engine bombers: my 1/48 B-17 and B-24.
Lastly it is the good old "Humpin honey". Just for the heck of it, I also made "fat man" and "little Boy"
 

Attachments

  • DCP_1456.JPG
    DCP_1456.JPG
    60.1 KB · Views: 147
  • DCP_1460.JPG
    DCP_1460.JPG
    47 KB · Views: 148
  • DCP_1463.JPG
    DCP_1463.JPG
    67.9 KB · Views: 145
  • DCP_1468.JPG
    DCP_1468.JPG
    64.8 KB · Views: 146
  • DCP_1476.JPG
    DCP_1476.JPG
    37.8 KB · Views: 151
  • DCP_1481.JPG
    DCP_1481.JPG
    54.6 KB · Views: 148
  • DCP_1482.JPG
    DCP_1482.JPG
    58.3 KB · Views: 145
Boats, built this kit about two years ago. Probably too late now but at the time I had discussions about all that interior detailing just to bury it, ever to be seen again, when the fuselage halves come together. As you can see I cut the tops off 4 sections with a razor saw. the setions can be replaced or left off for display.
And it is big compared to other 4-engine bombers: my 1/48 B-17 and B-24.
Lastly it is the good old "Humpin honey". Just for the heck of it, I also made "fat man" and "little Boy"

Ahoy Mikewint
A Hardy well done on the magnificient three, I wished I would have done that by removeing the top sections to reveal all of the hard work that went into the interier of this wonderfull kit.. To Late for me the damage has been done, The fuselage halfs had been cemented together and filled in with putyy I am wet sanding the stuff off now. tomorrow I will give her a primer coat. Hardy Well done good job.

Boats
 
Ahoy
thank fellas for all of your wonderfull replies, Back at the Build I had to do another honey do list for my Mrs.. now back to the build, useing wet sand paper I sanded off all of the filler and re filled some gaps without the aid of primer paint usering natural lighting i can see blemishs and gaps so i re filled same with bondo glazeing putty.. Let dry and re sand same all imperfections are smooth no gaps or blemishes.. Before I attached the wings to the fuselage i8 sanded them down and refilled a few areas that needed refilling with putty. useing 5 minute epoxie I attached the wings to the fuselage and let dry the wing is strong and it wont go nowhere.. results a very strong installation as of now going back to fill in the wing roots with putty and repeat wet sanding and filling untillo imperfections are completely gone.. If the good lord is willing and the rivers dont rise I will apply the gray primer coat tomorrow and return to the sub assemblies of the engine nacelles and so on. by Monday next week i will apply the finish color useing Areo Gloss dope silverair Aluminum it works better then alcaids or spray inplate, Here is my massive B-29 as she sits drawfing my work bench.

boats:D:D:D:D
 

Attachments

  • PICT0001.JPG
    PICT0001.JPG
    62.1 KB · Views: 123
  • PICT0002.JPG
    PICT0002.JPG
    50.6 KB · Views: 199
  • PICT0003.JPG
    PICT0003.JPG
    54.3 KB · Views: 113

Users who are viewing this thread

Back