Crimea_River
Marshal
Looking good!
Follow along with the video below to see how to install our site as a web app on your home screen.
Note: This feature may not be available in some browsers.
Ad: This forum contains affiliate links to products on Amazon and eBay. More information in Terms and rules
Overall, that's a reasonable assessment, but there appears to be some confusion, by the author, over colour names and periods introduced or used. For example, there are notes on some of the photos naming Sky Blue, or Sky Grey when the colour was Medium Sea Grey, and so on. Her also appears to have the post 1942 colours confused in some pictures with 1940 and early 1941 colours.
Given the amount of data and information elsewhere, I would tend to ignore this publication.
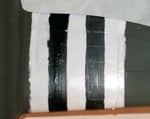
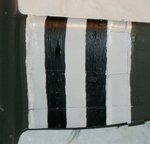
I decided on hand painting the stripes instead of decals. Terry, I couldn't find a 1/48 cat to paint with but I used a cheap flat brush. What's the concensus, stick with these or spend $6 for decals...there's still time for delivery!
")