1/48 P-47D, Lt Frank Oiler 84th FS, 78th FG Group Build

Ad: This forum contains affiliate links to products on Amazon and eBay. More information in Terms and rules

on;y my 2nd model and purely an accident. I painted the floor the wrong color at first so I took about 5:1 dirty thinner to paint with the right color and dabbed it across the top unitl it pooled, when it evaporated it looked like that. I did a wash with burnt umber watercolors but didn't use enough water so the pigmet caked up like mud. Then I dry-brushed testors aluminum (square bottle) and it looked scratched. it was a series of mistakes that turned out OK.
 
As memo serves the invasion strips for fighters were wide on 18" each one. So divide 18/48 and you will find out that.
 
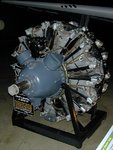
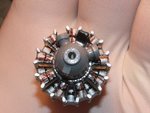
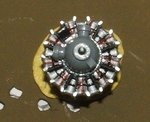
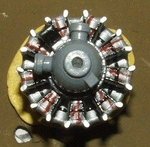
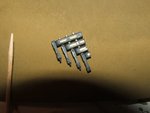
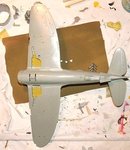
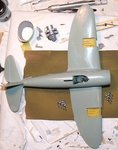
It's been a busy few days. Found a pic of the engine. I debated on making the cooling lines out of solder and thin copper wire but I didn't have what I wanted (skills-wise that is, I had the materials) so I opted to paint them on. The results are, well...:oops: but that's OK after a black wash and brown wash AND inside the cowl, I think I'll be in great shape. Fuselage and wings are glued up and seams were filled using Mr Surfacer 500, sanded, and smoothed with leveling thinner. Ready to start working on paint tomorrow.


Special thanks to Wayne Little and his KILLER step by steps in the modeling section. They've been invaluable. Also found 2 books on maodeling the P-47, one by Bert Kinzy and the other by Brett Green.
 

Attachments

  • 450px-Pratt_%2526_Whitney_R-2800_Engine_1.jpg
    450px-Pratt_%2526_Whitney_R-2800_Engine_1.jpg
    57.1 KB · Views: 128
  • P 47 002.JPG
    P 47 002.JPG
    57.9 KB · Views: 142
  • P 47 006.JPG
    P 47 006.JPG
    35 KB · Views: 144
  • P 47 009.JPG
    P 47 009.JPG
    33.4 KB · Views: 152
  • P 47 016.JPG
    P 47 016.JPG
    40.1 KB · Views: 139
  • P 47 017.JPG
    P 47 017.JPG
    46.3 KB · Views: 141
  • P 47 019.JPG
    P 47 019.JPG
    48.8 KB · Views: 144
Thanks, I'm very please with how this kits coming together. I'm going to keep it simple this time but I think I'll have to build another very soon.
 
Nice work so far, and the engine should look fine when in place. BTW, the copper 'lines' are the ignition harness, and the black tubes the push rods; the engine was air-cooled.
One point if it's not too late - the ammunition feed chutes to the guns should be dull bare metal.
 
I appreciate the encouragement, guys.

Great info, Terry, nothings glued in yet so I can make that change.Do you happen to know if they were aluminum or steel? I'm guessing mix some aluminum and grey testors, equal amounts, should get me what I'm looking for, no?
 
Eric looking good so far but do let me know if you have issues with the front cowl and engine assembly.I am currently working on three builds of 47's and the front cowl is just not quite as tight as I would suspect from Tamy.I sanded here and there with only marginal success.Cheers Kevin
 
Eric, far as I know the chutes were alloy, or maybe 'tin plate'. A spot of matt white mixed with silver should give the right look. When dry, give them a light dusting by dry brush with a very small, thin, touch of gold. This gives the worn look often seen on these parts.
 

Users who are viewing this thread

Back